Autoplay CTA
Play complete onboarding screenshots automatically
Ordered sequence from Step 01 to Step 35 with a larger preview area for clearer viewing.
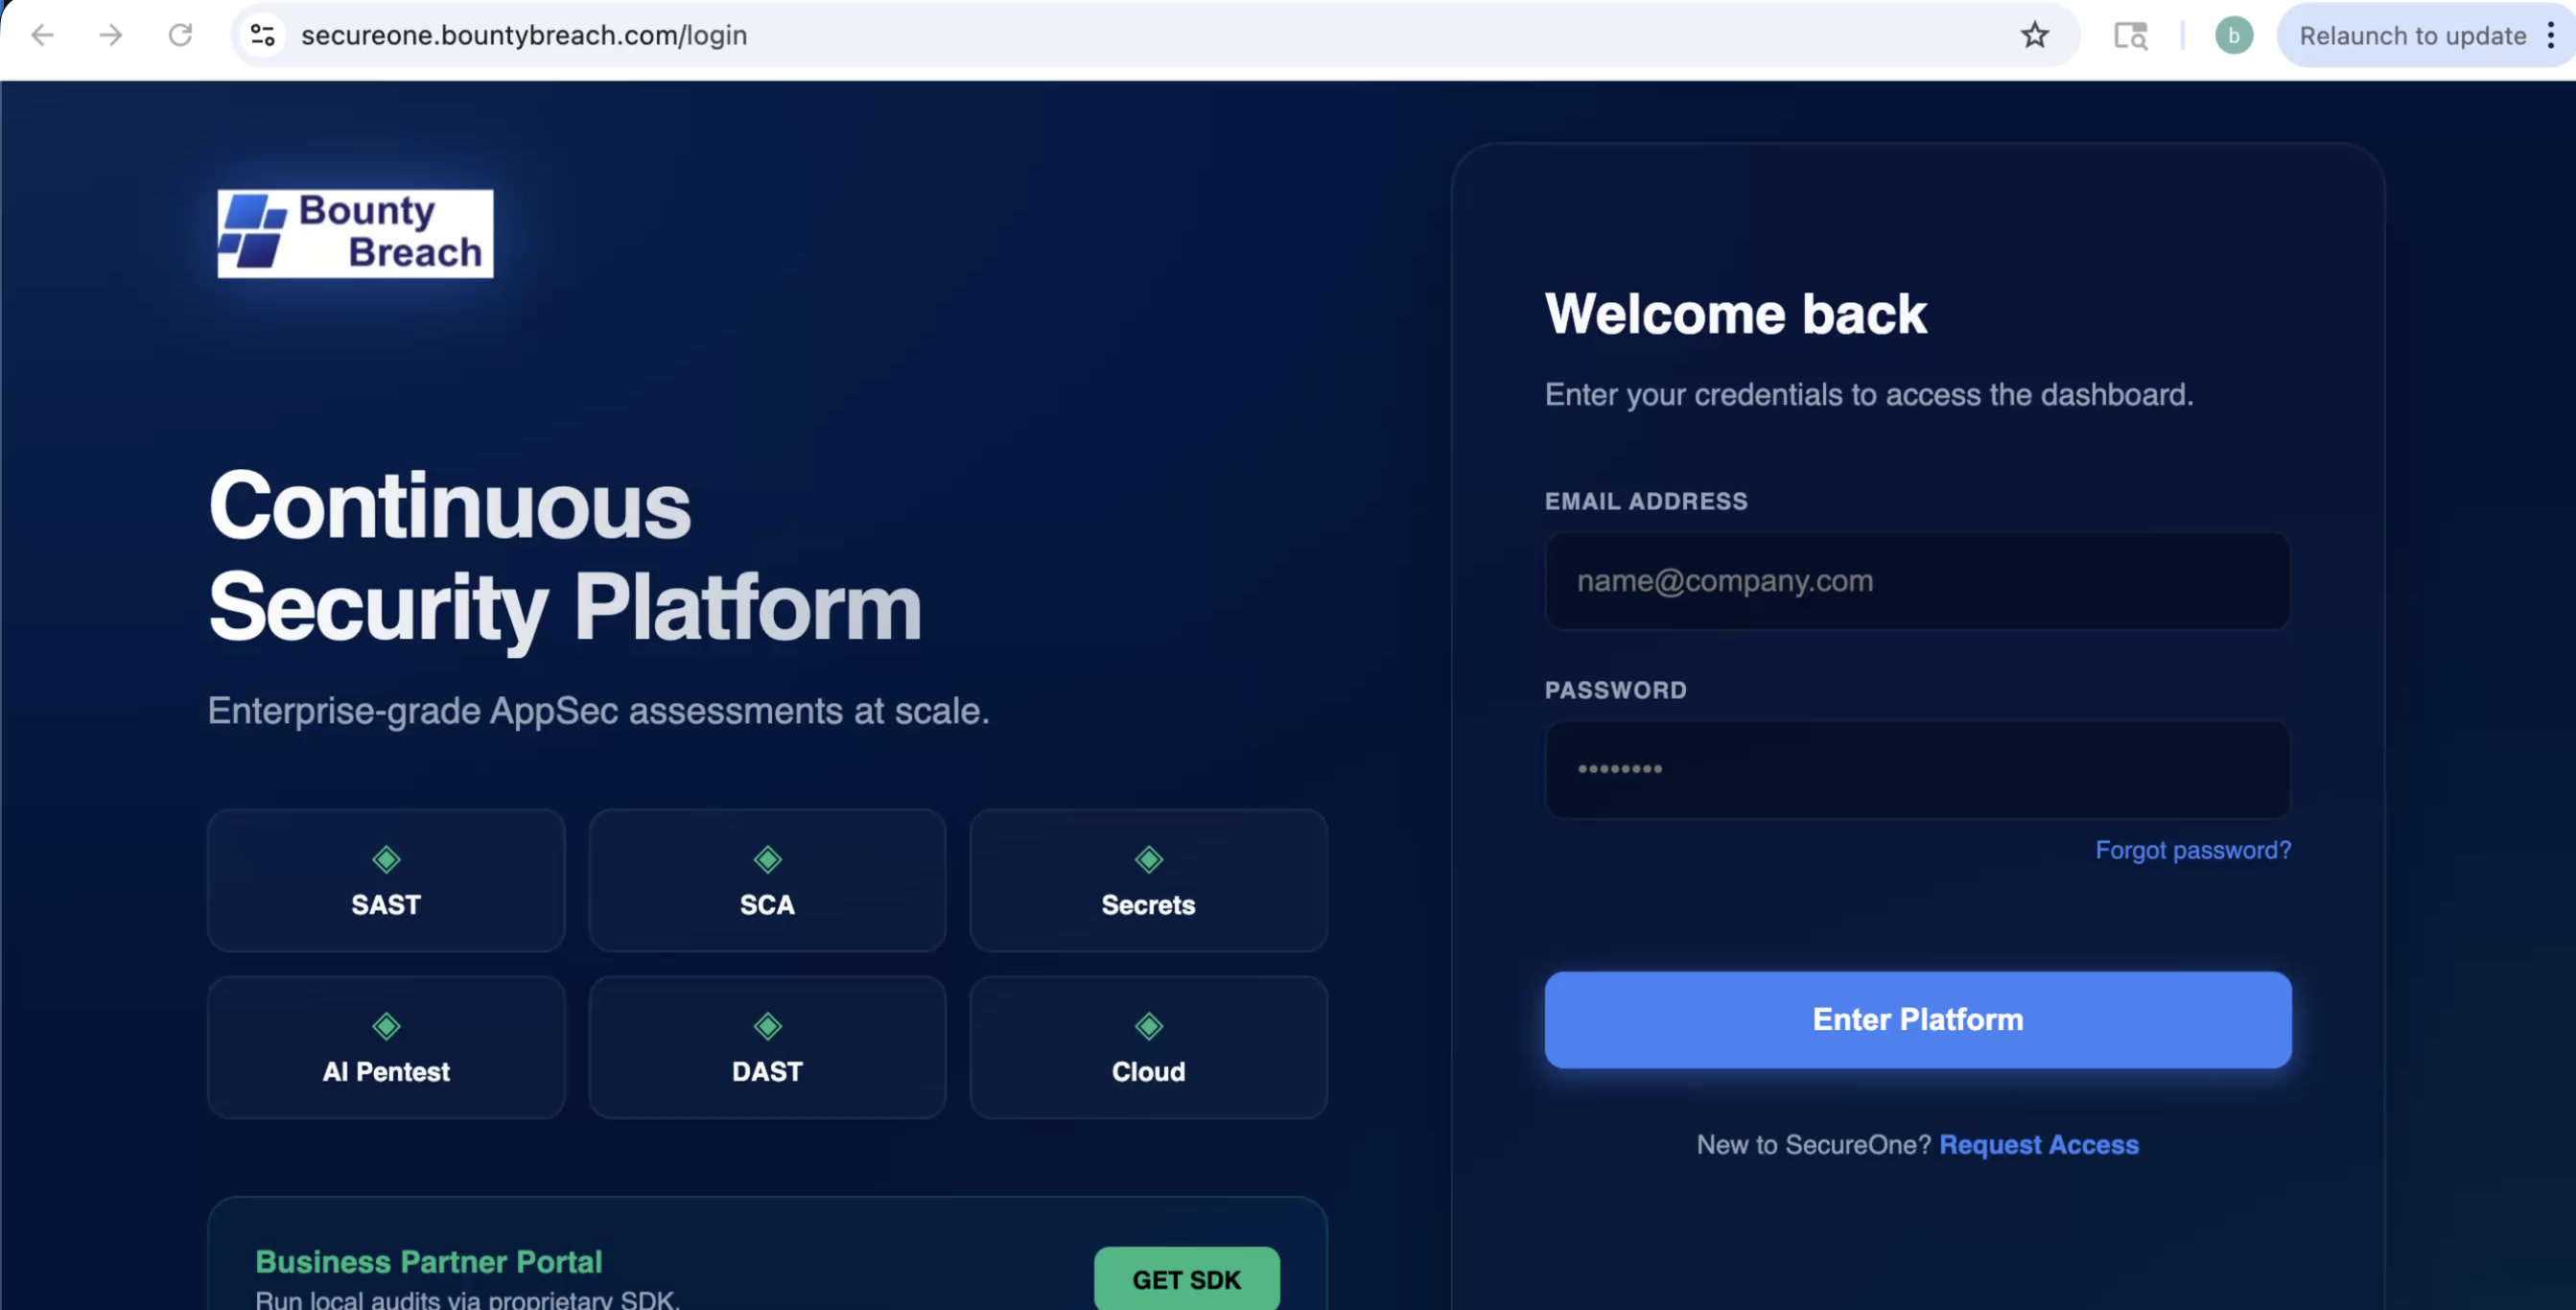
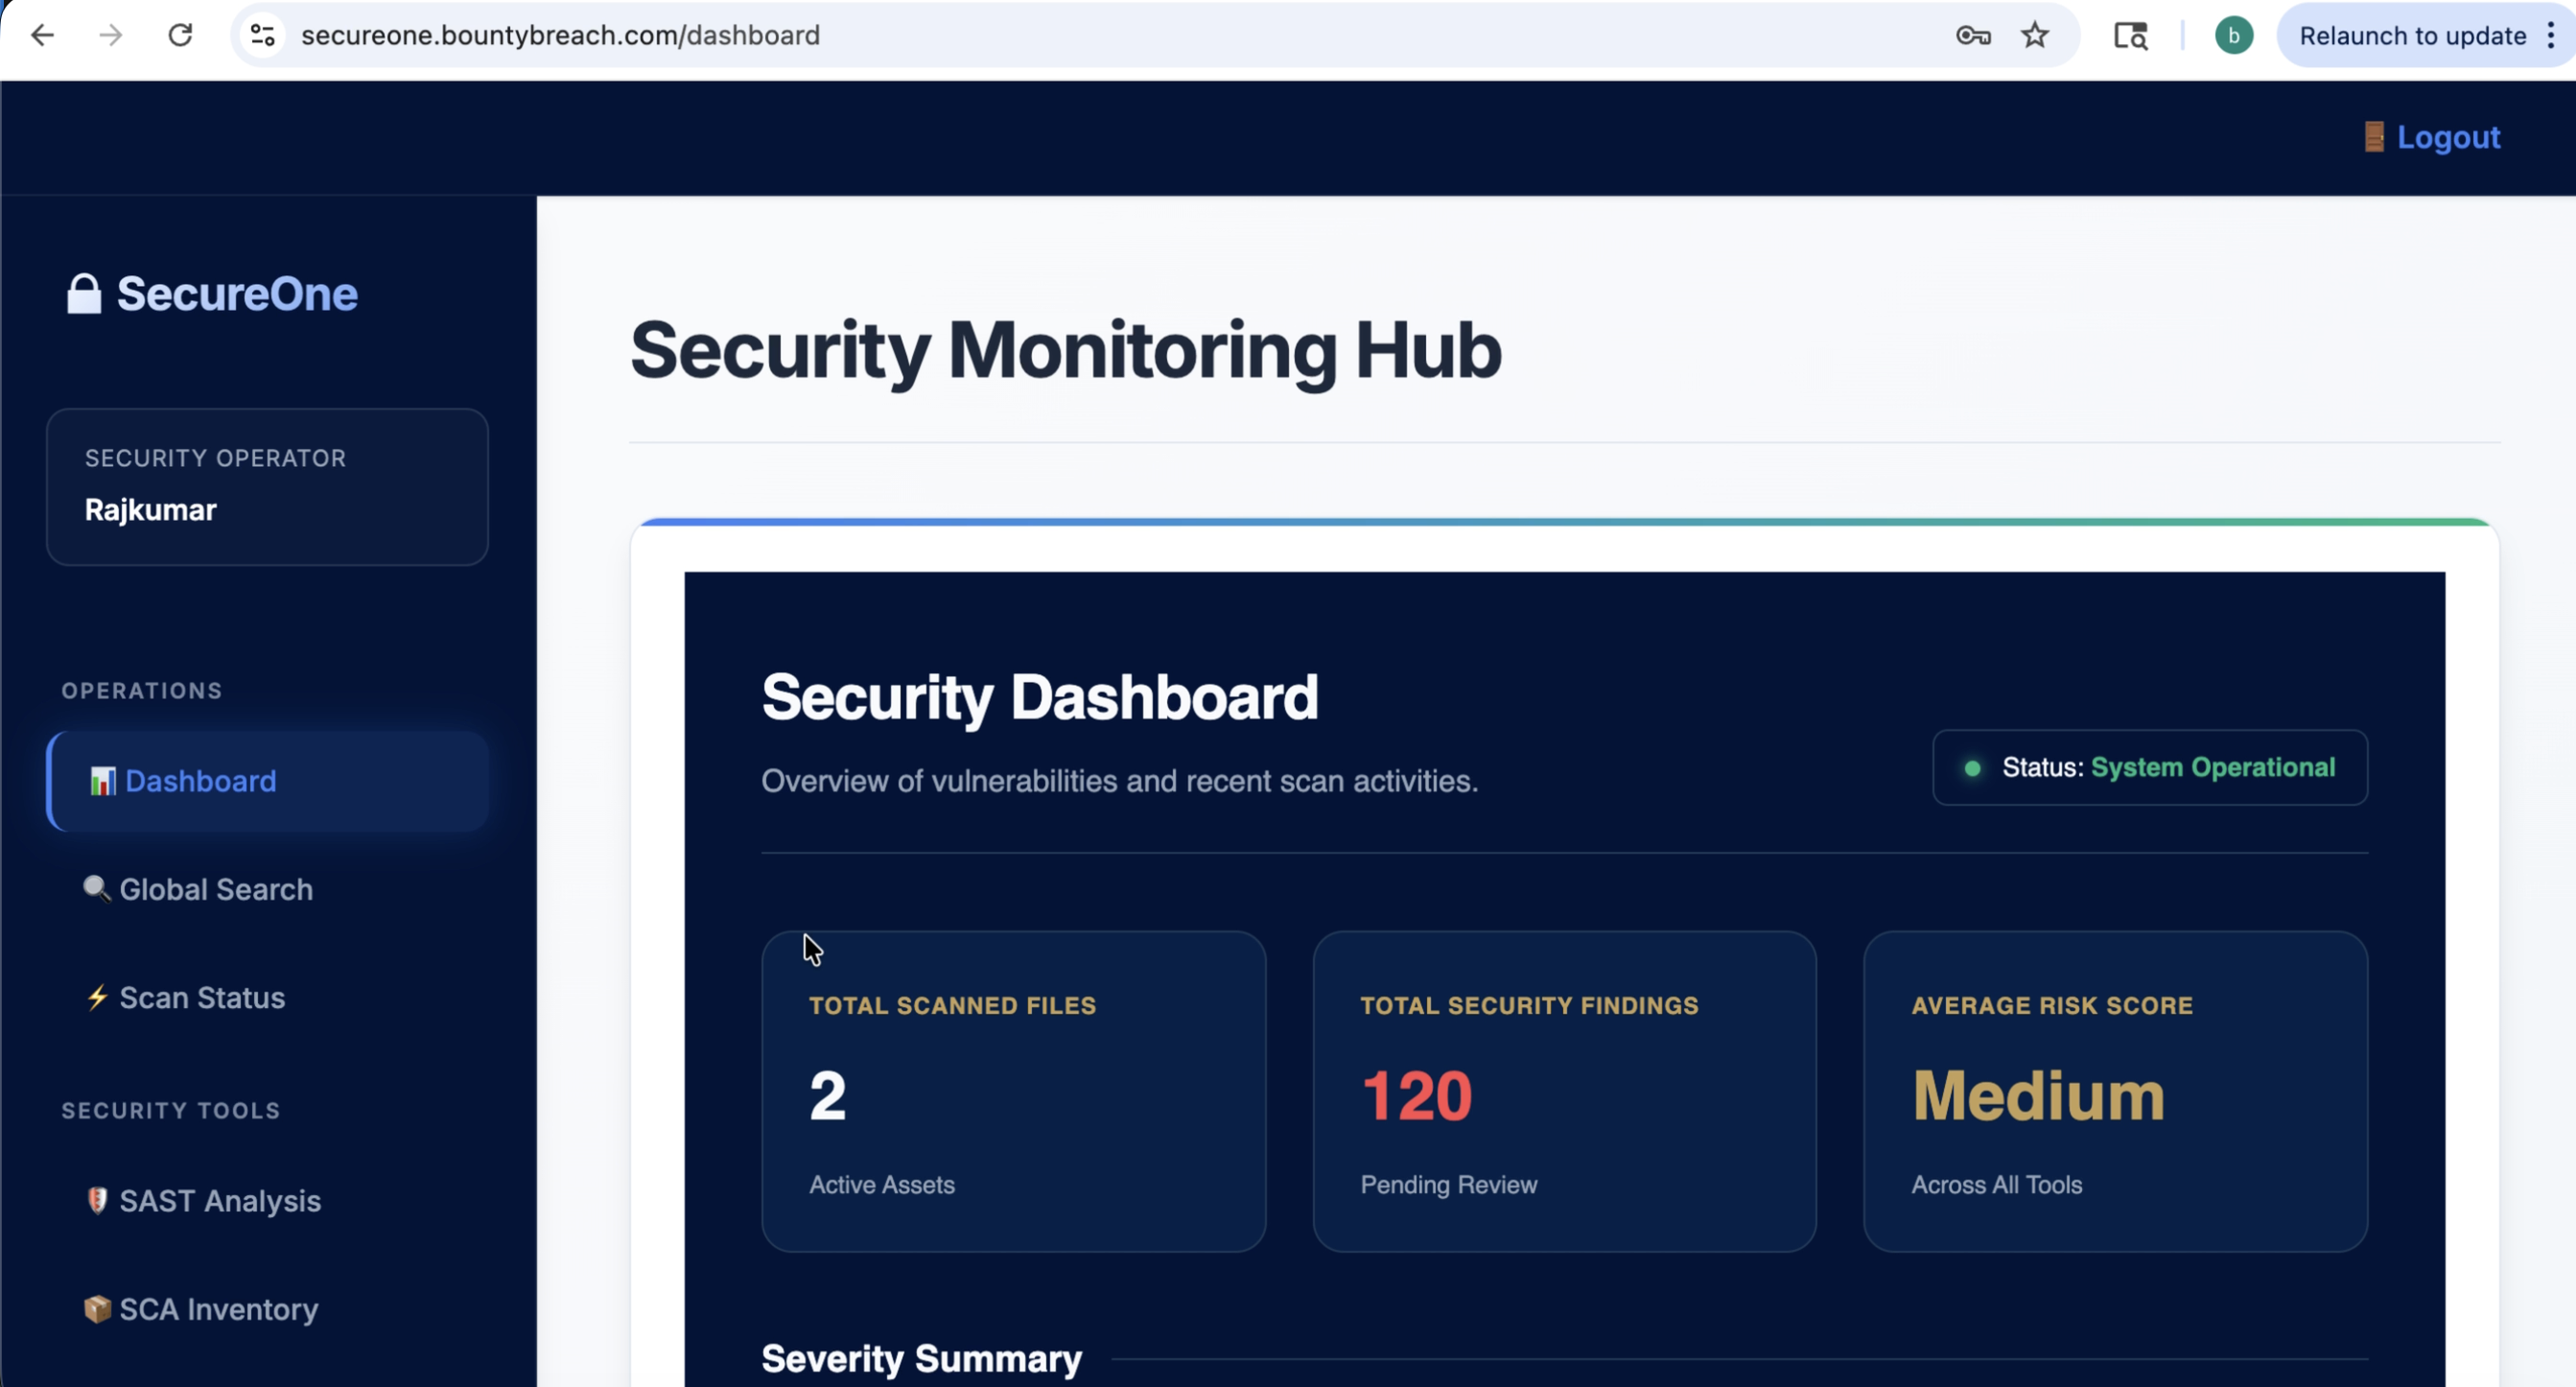
User Guide
Set up your first SecureOne scan in guided steps
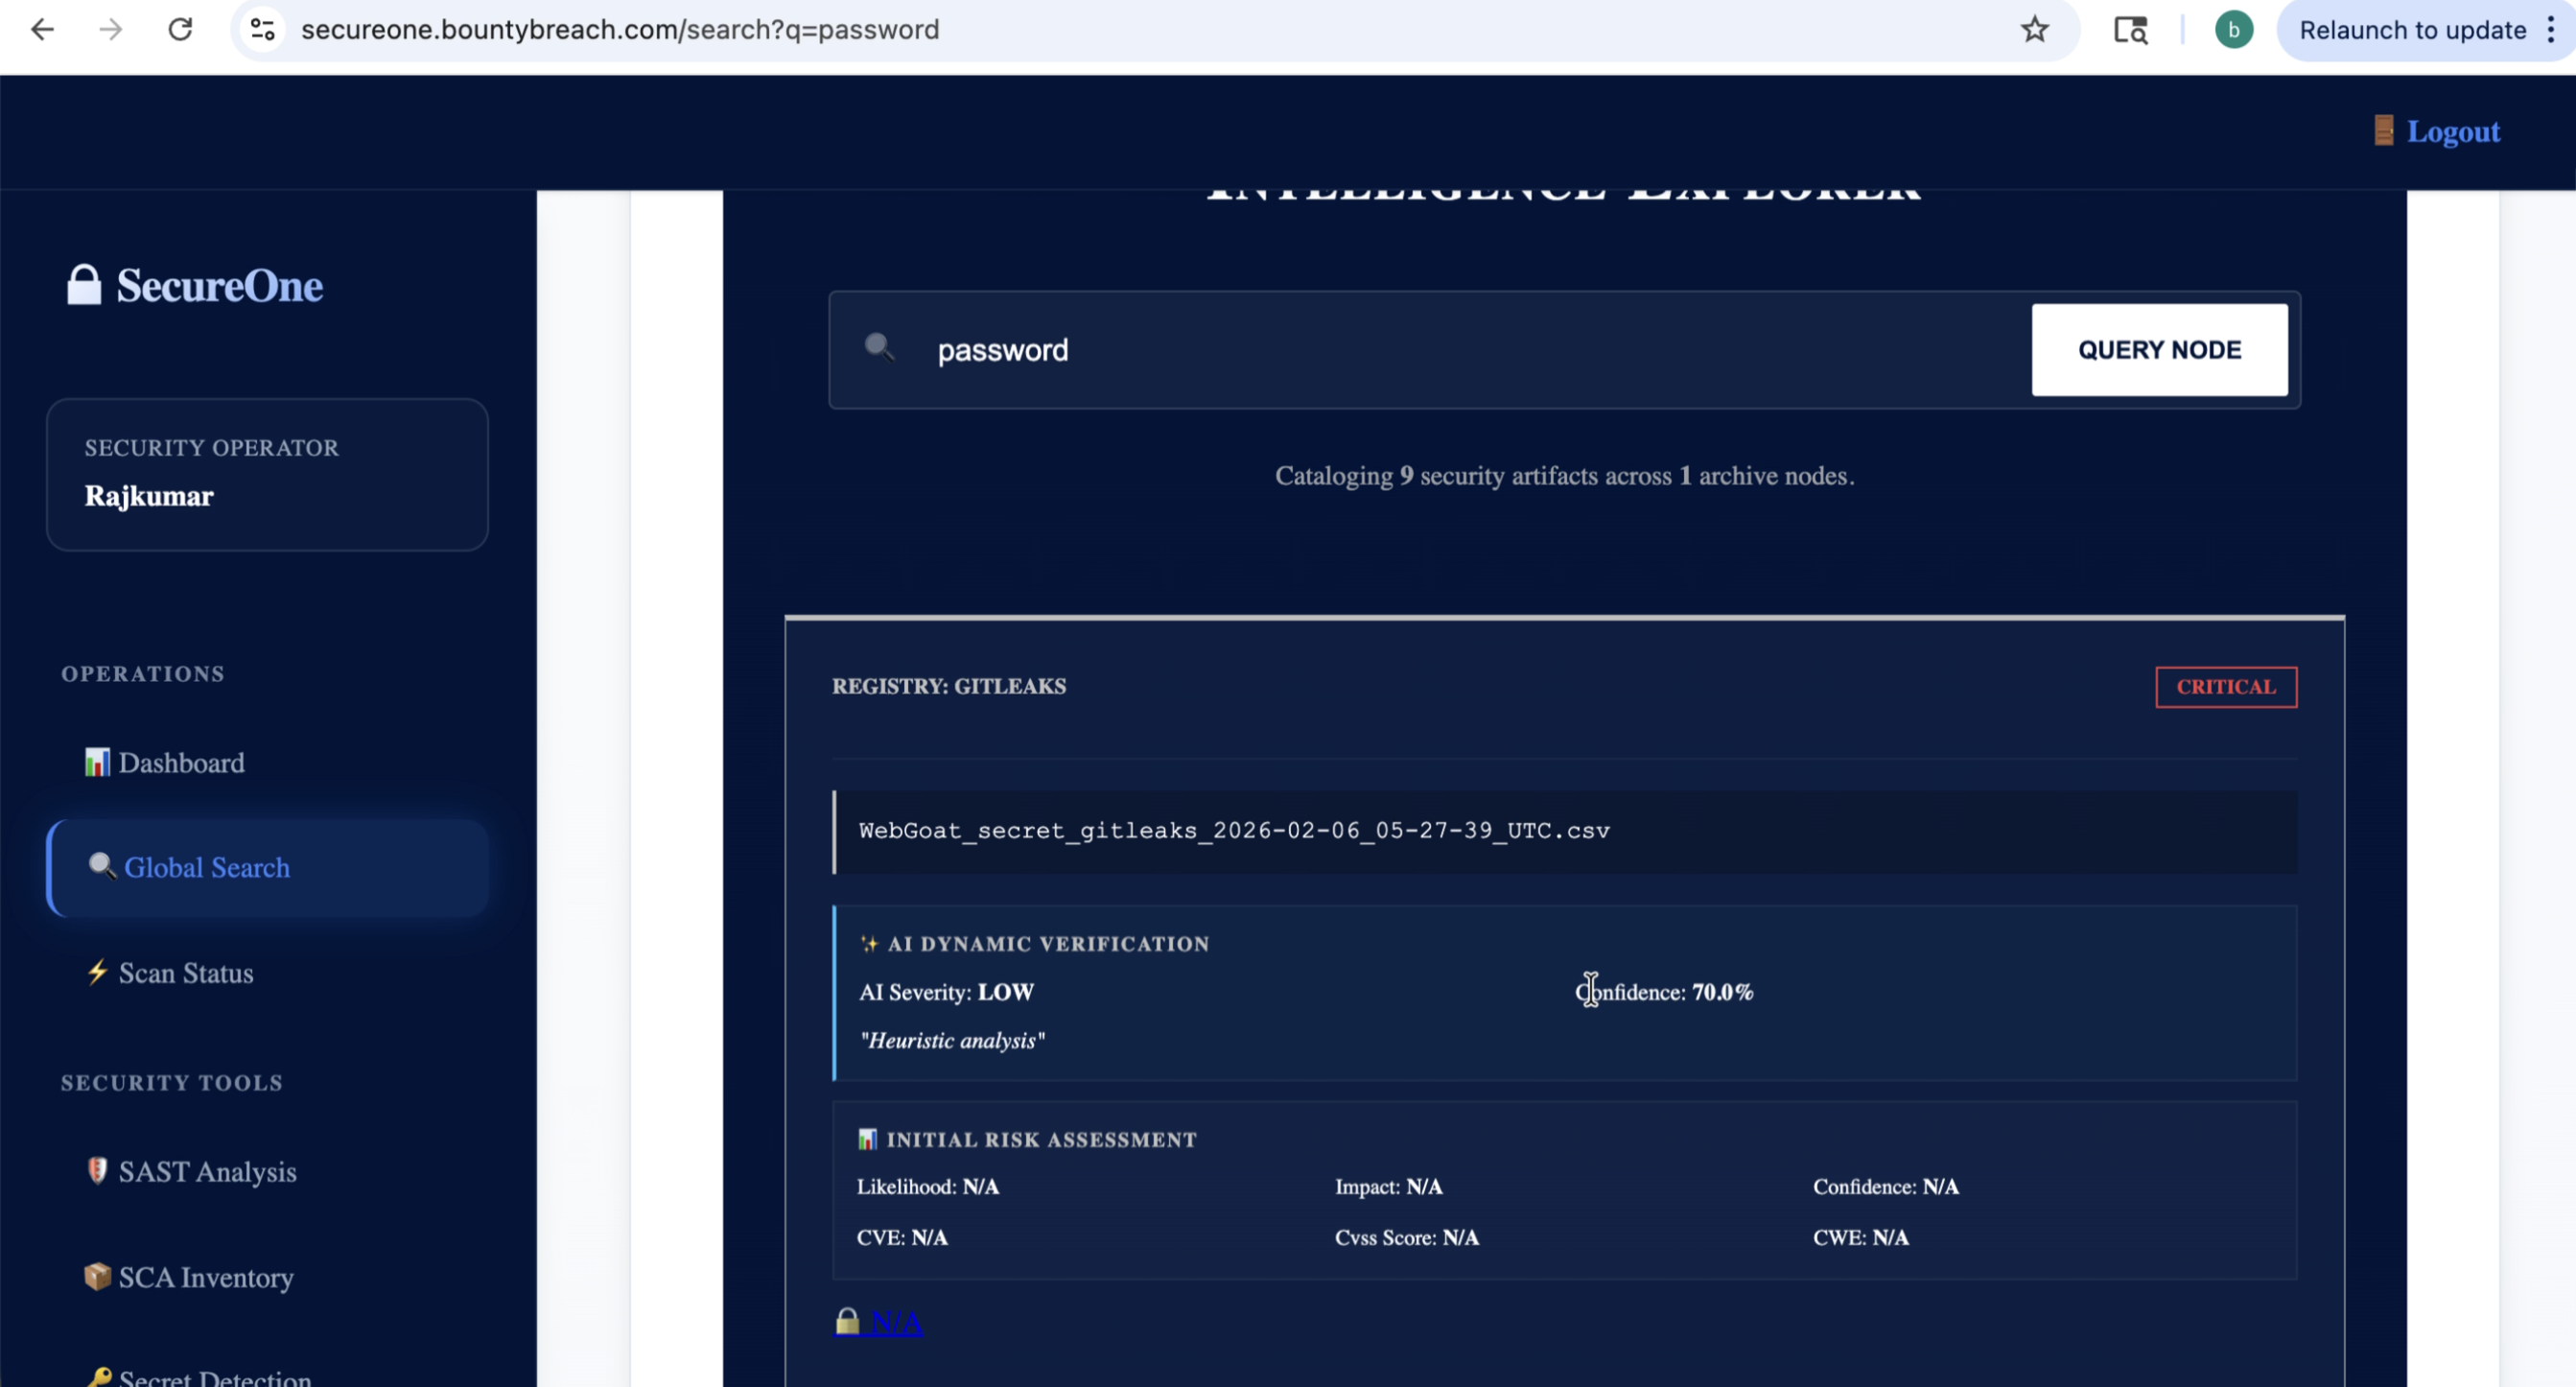
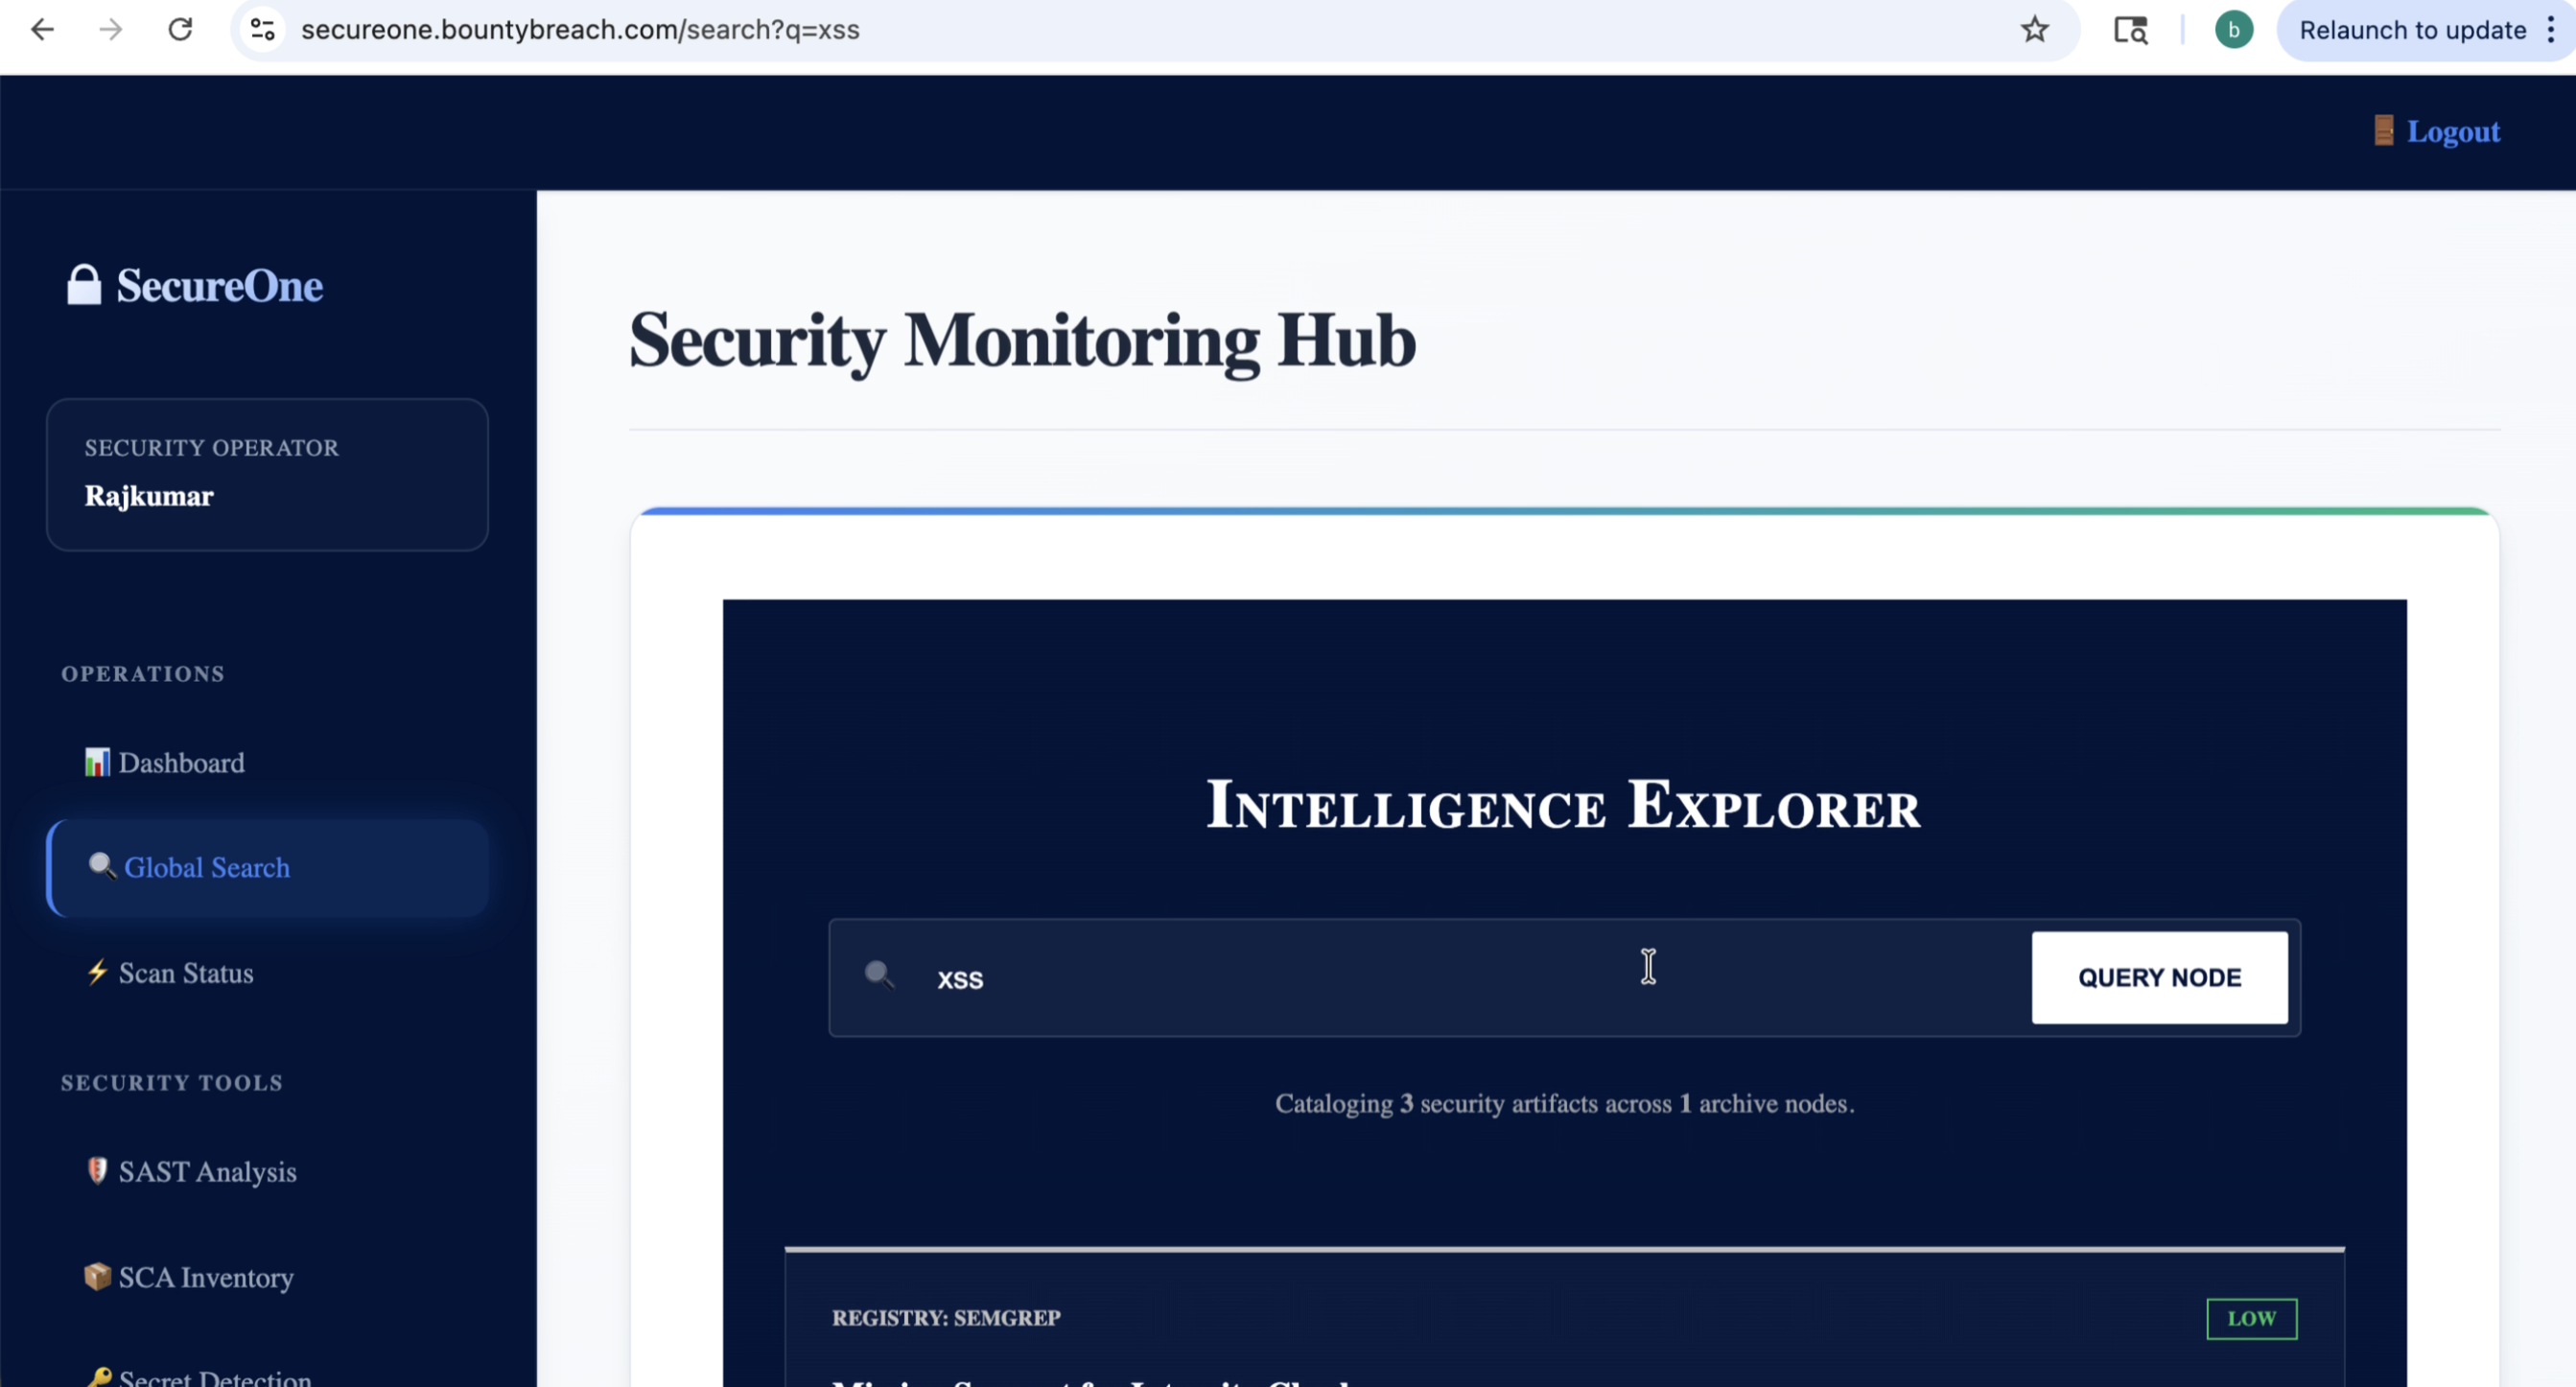
Follow this click-through guide from left navigation to complete setup, execute your first scan,
and understand how to review and act on findings.
Use this page as a practical onboarding checklist for first-time setup, first scan, and initial triage.
 Step 01 screenshot
 Step 02 screenshot
 Step 03 screenshot
2) Prerequisites
- SecureOne panel is running and you can sign in as admin.
- At least one repository or CI/CD pipeline is available to scan.
- Scan agent host has Docker installed (if using agent-based scans).
- Tokens/credentials for Git provider and agent registration are ready.
 Step 04 screenshot
 Step 05 screenshot
 Step 06 screenshot
3) Create Workspace
- Sign in to SecureOne and open the dashboard.
- Create (or select) your organization/workspace.
- Set environment details (project name, deployment mode).
- Confirm workspace appears in your left navigation/project switcher.
 Step 07 screenshot
 Step 08 screenshot
 Step 09 screenshot
 Step 10 screenshot
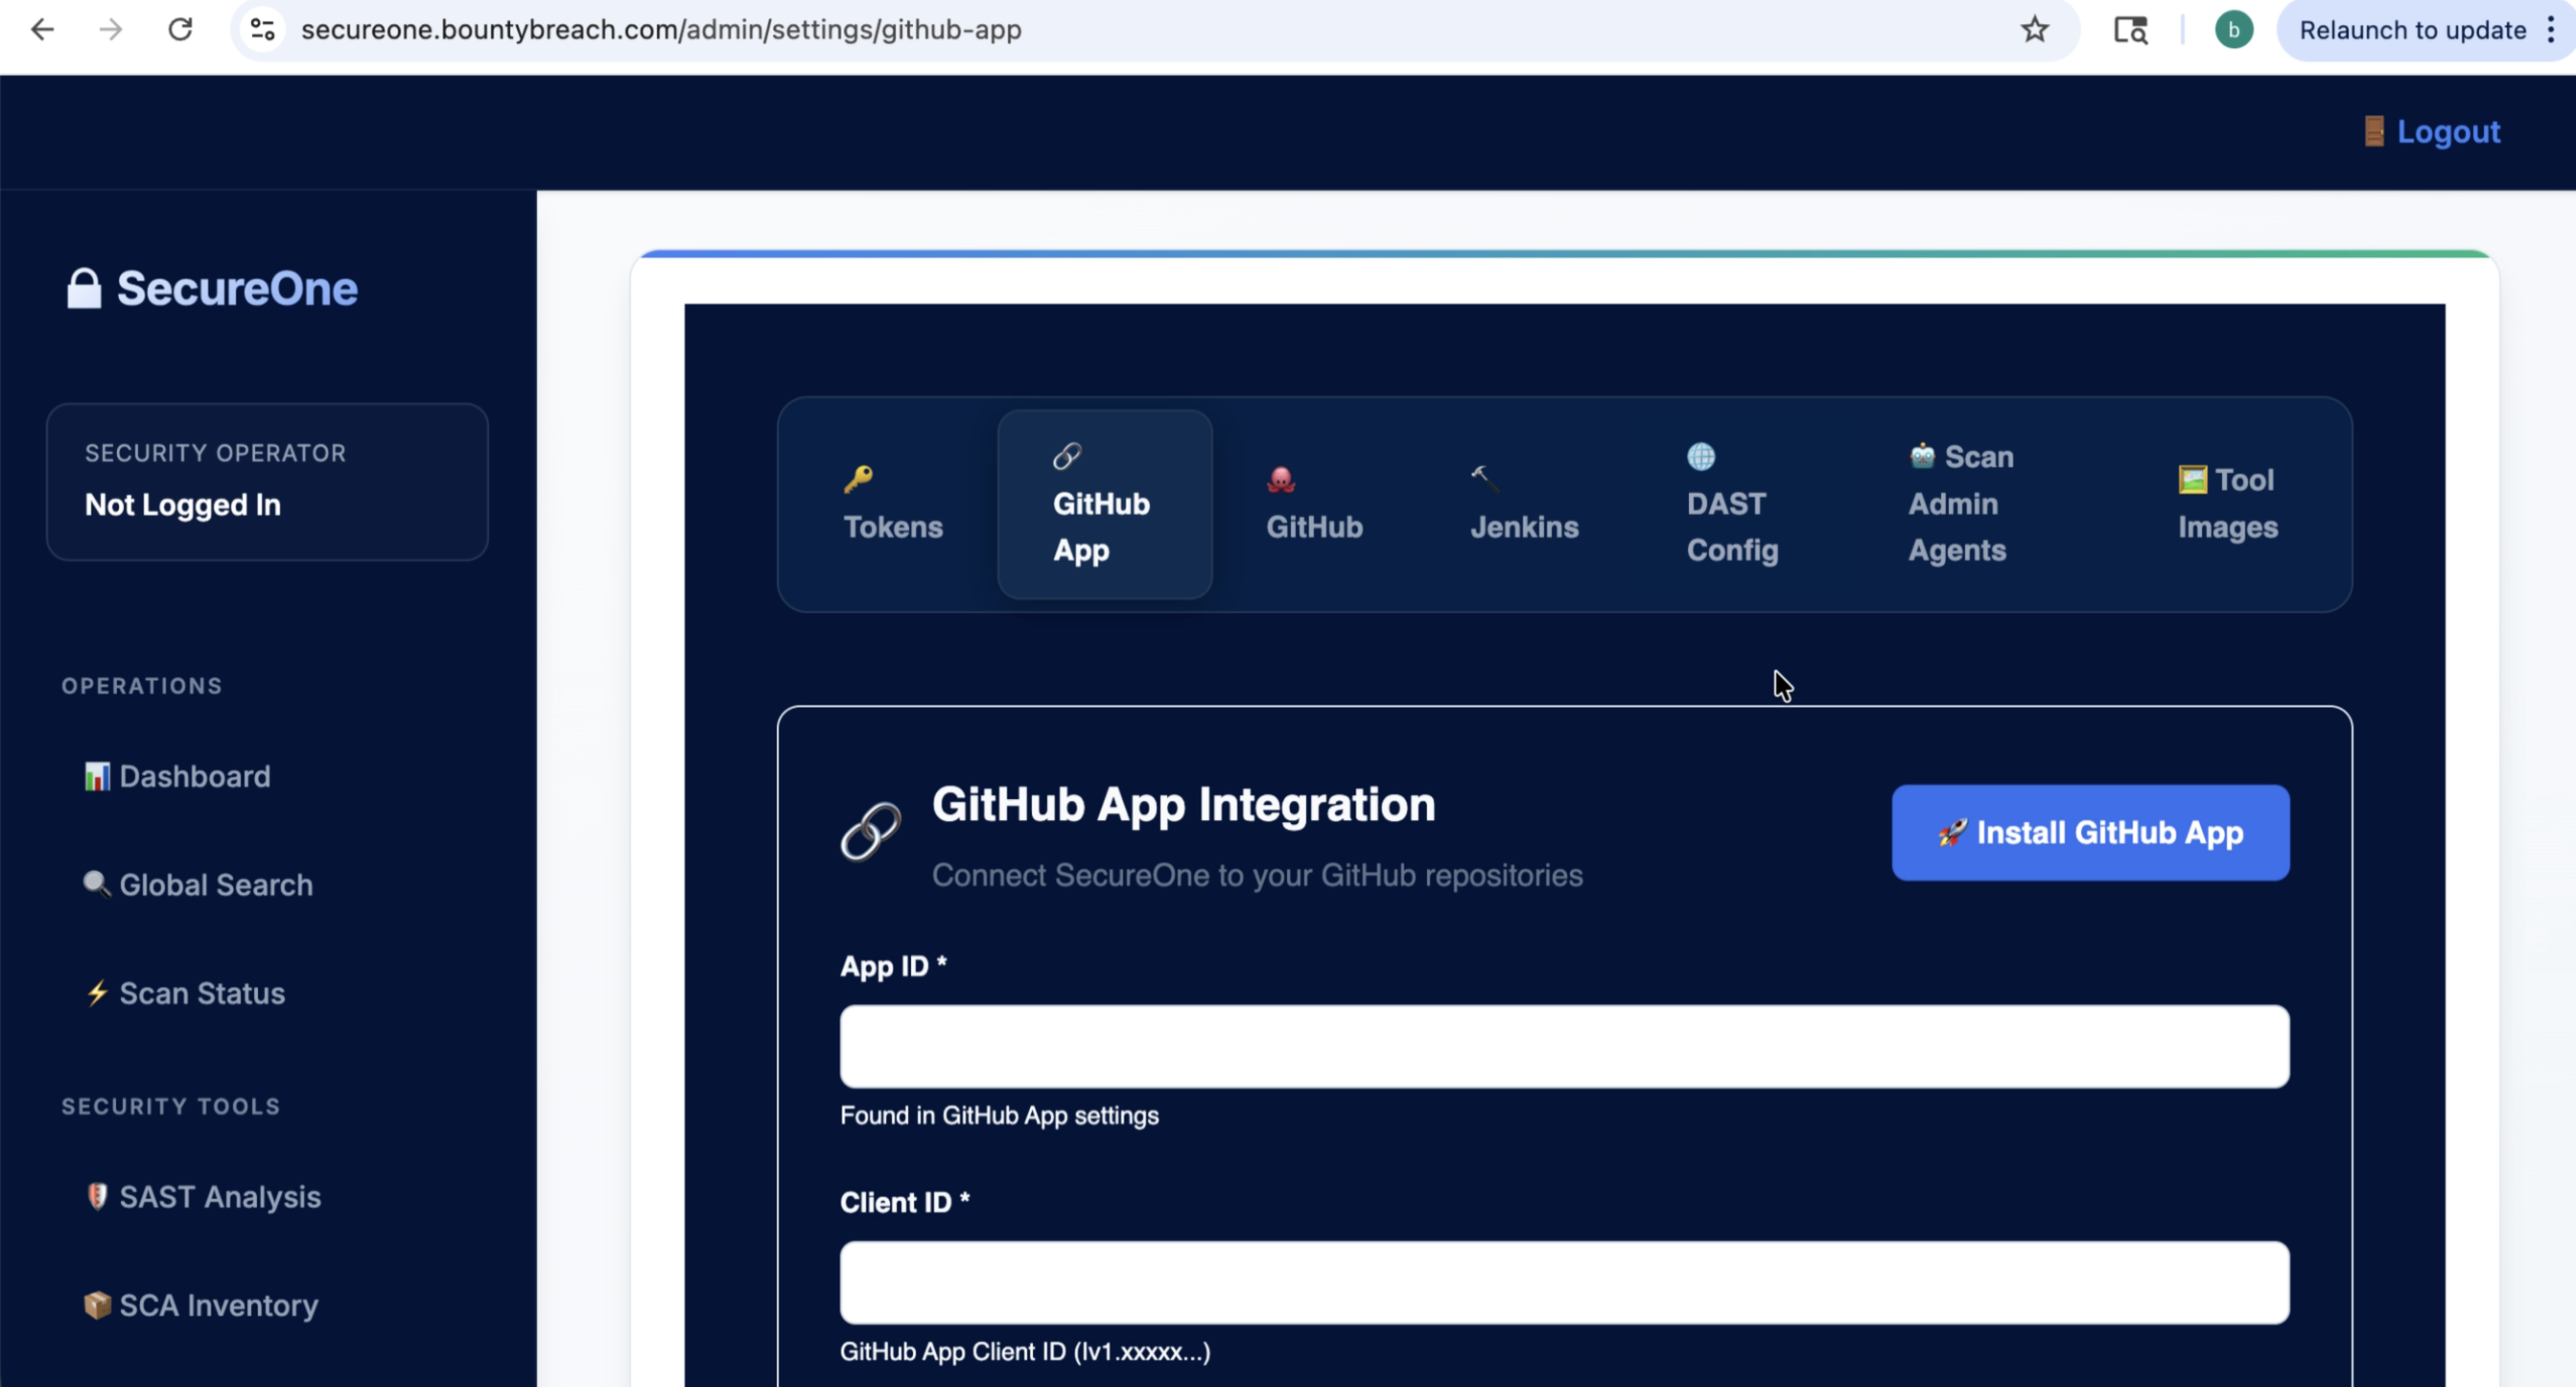
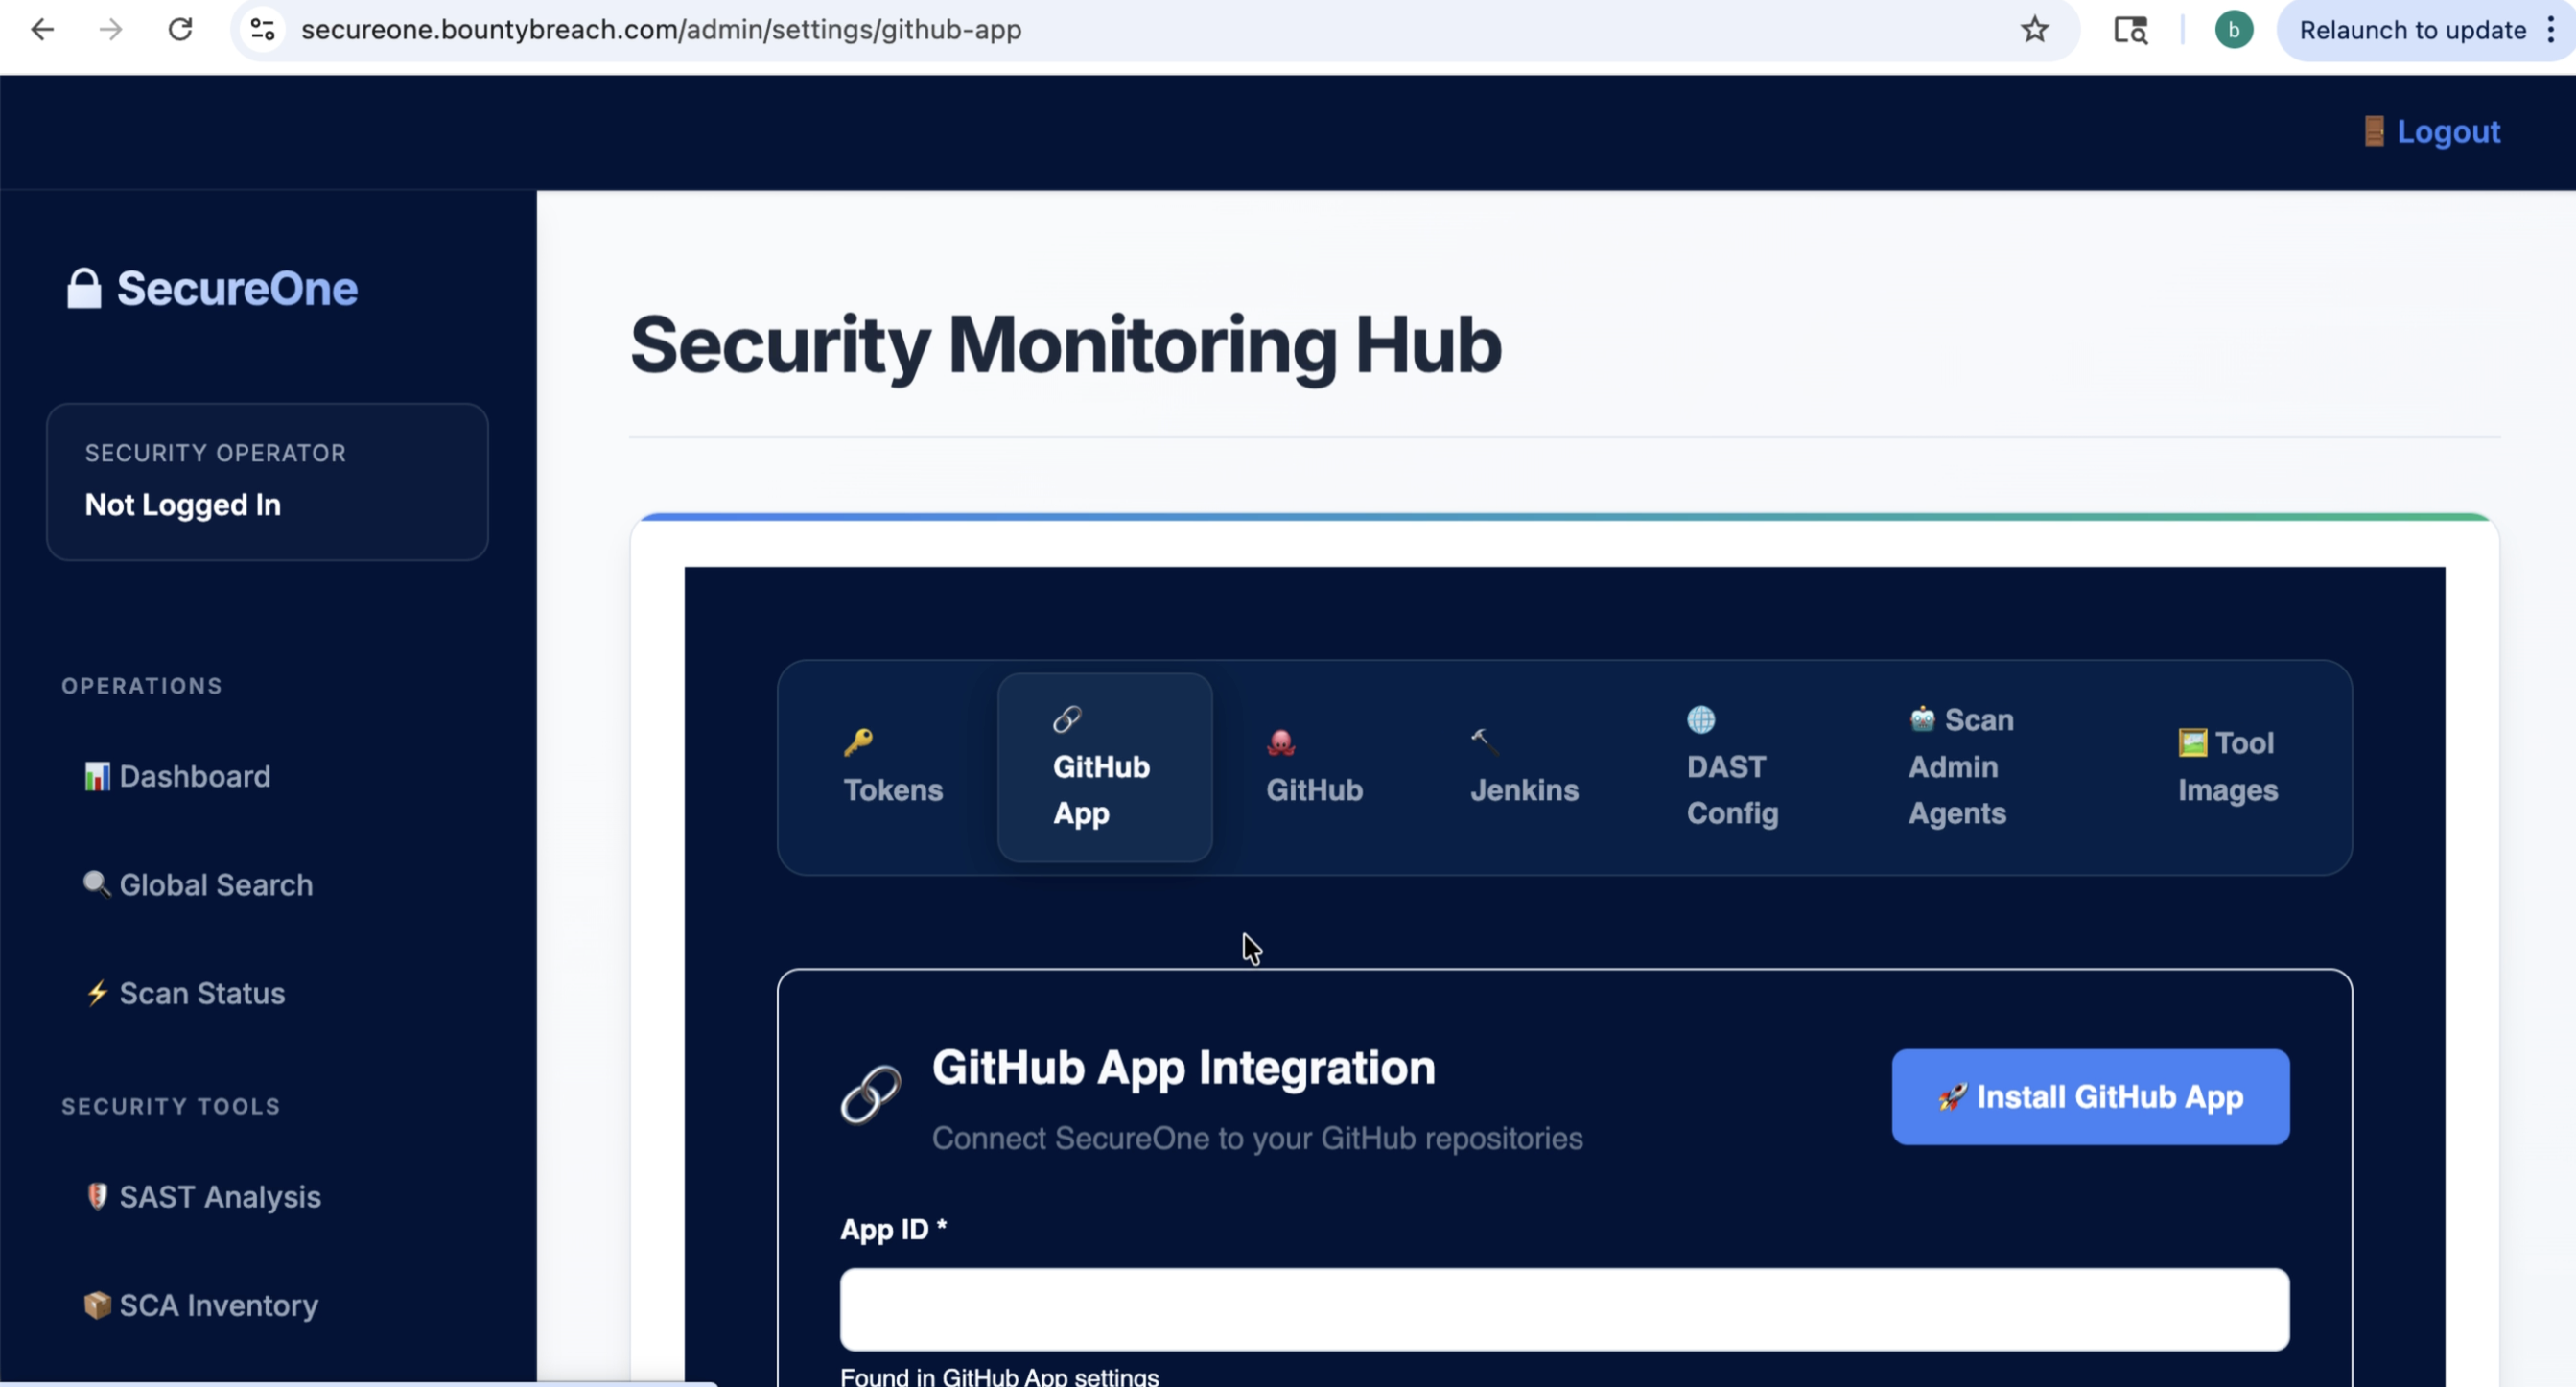
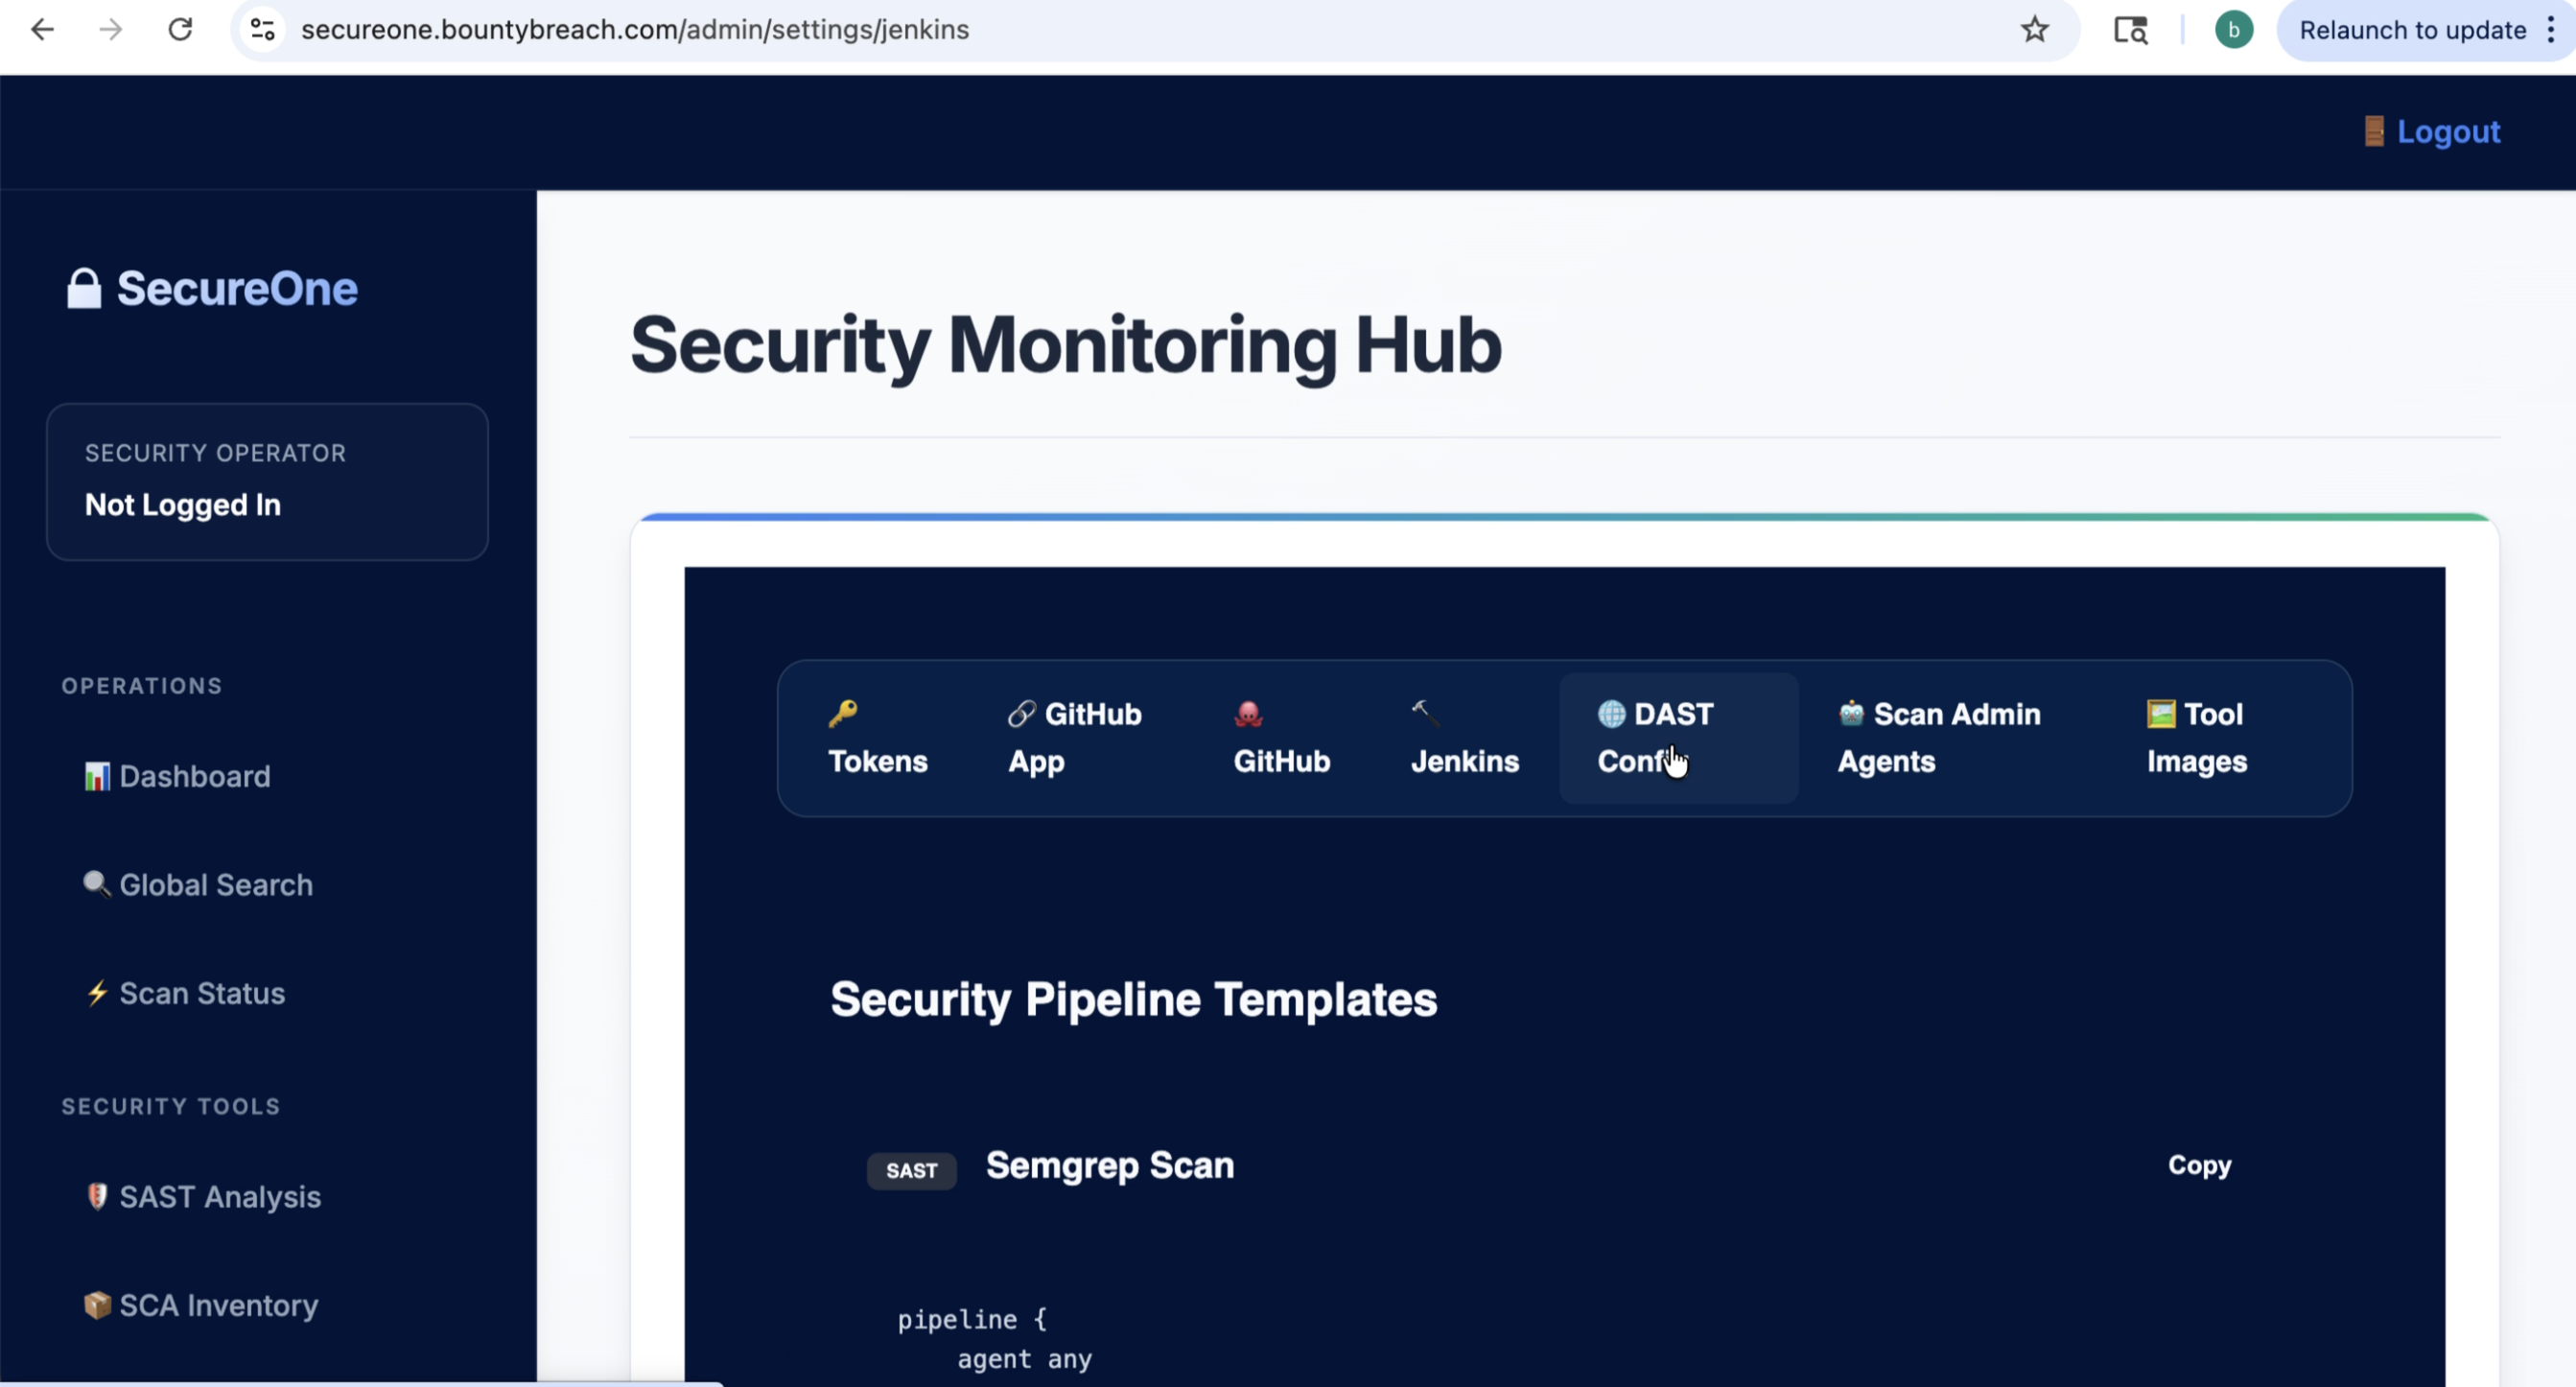
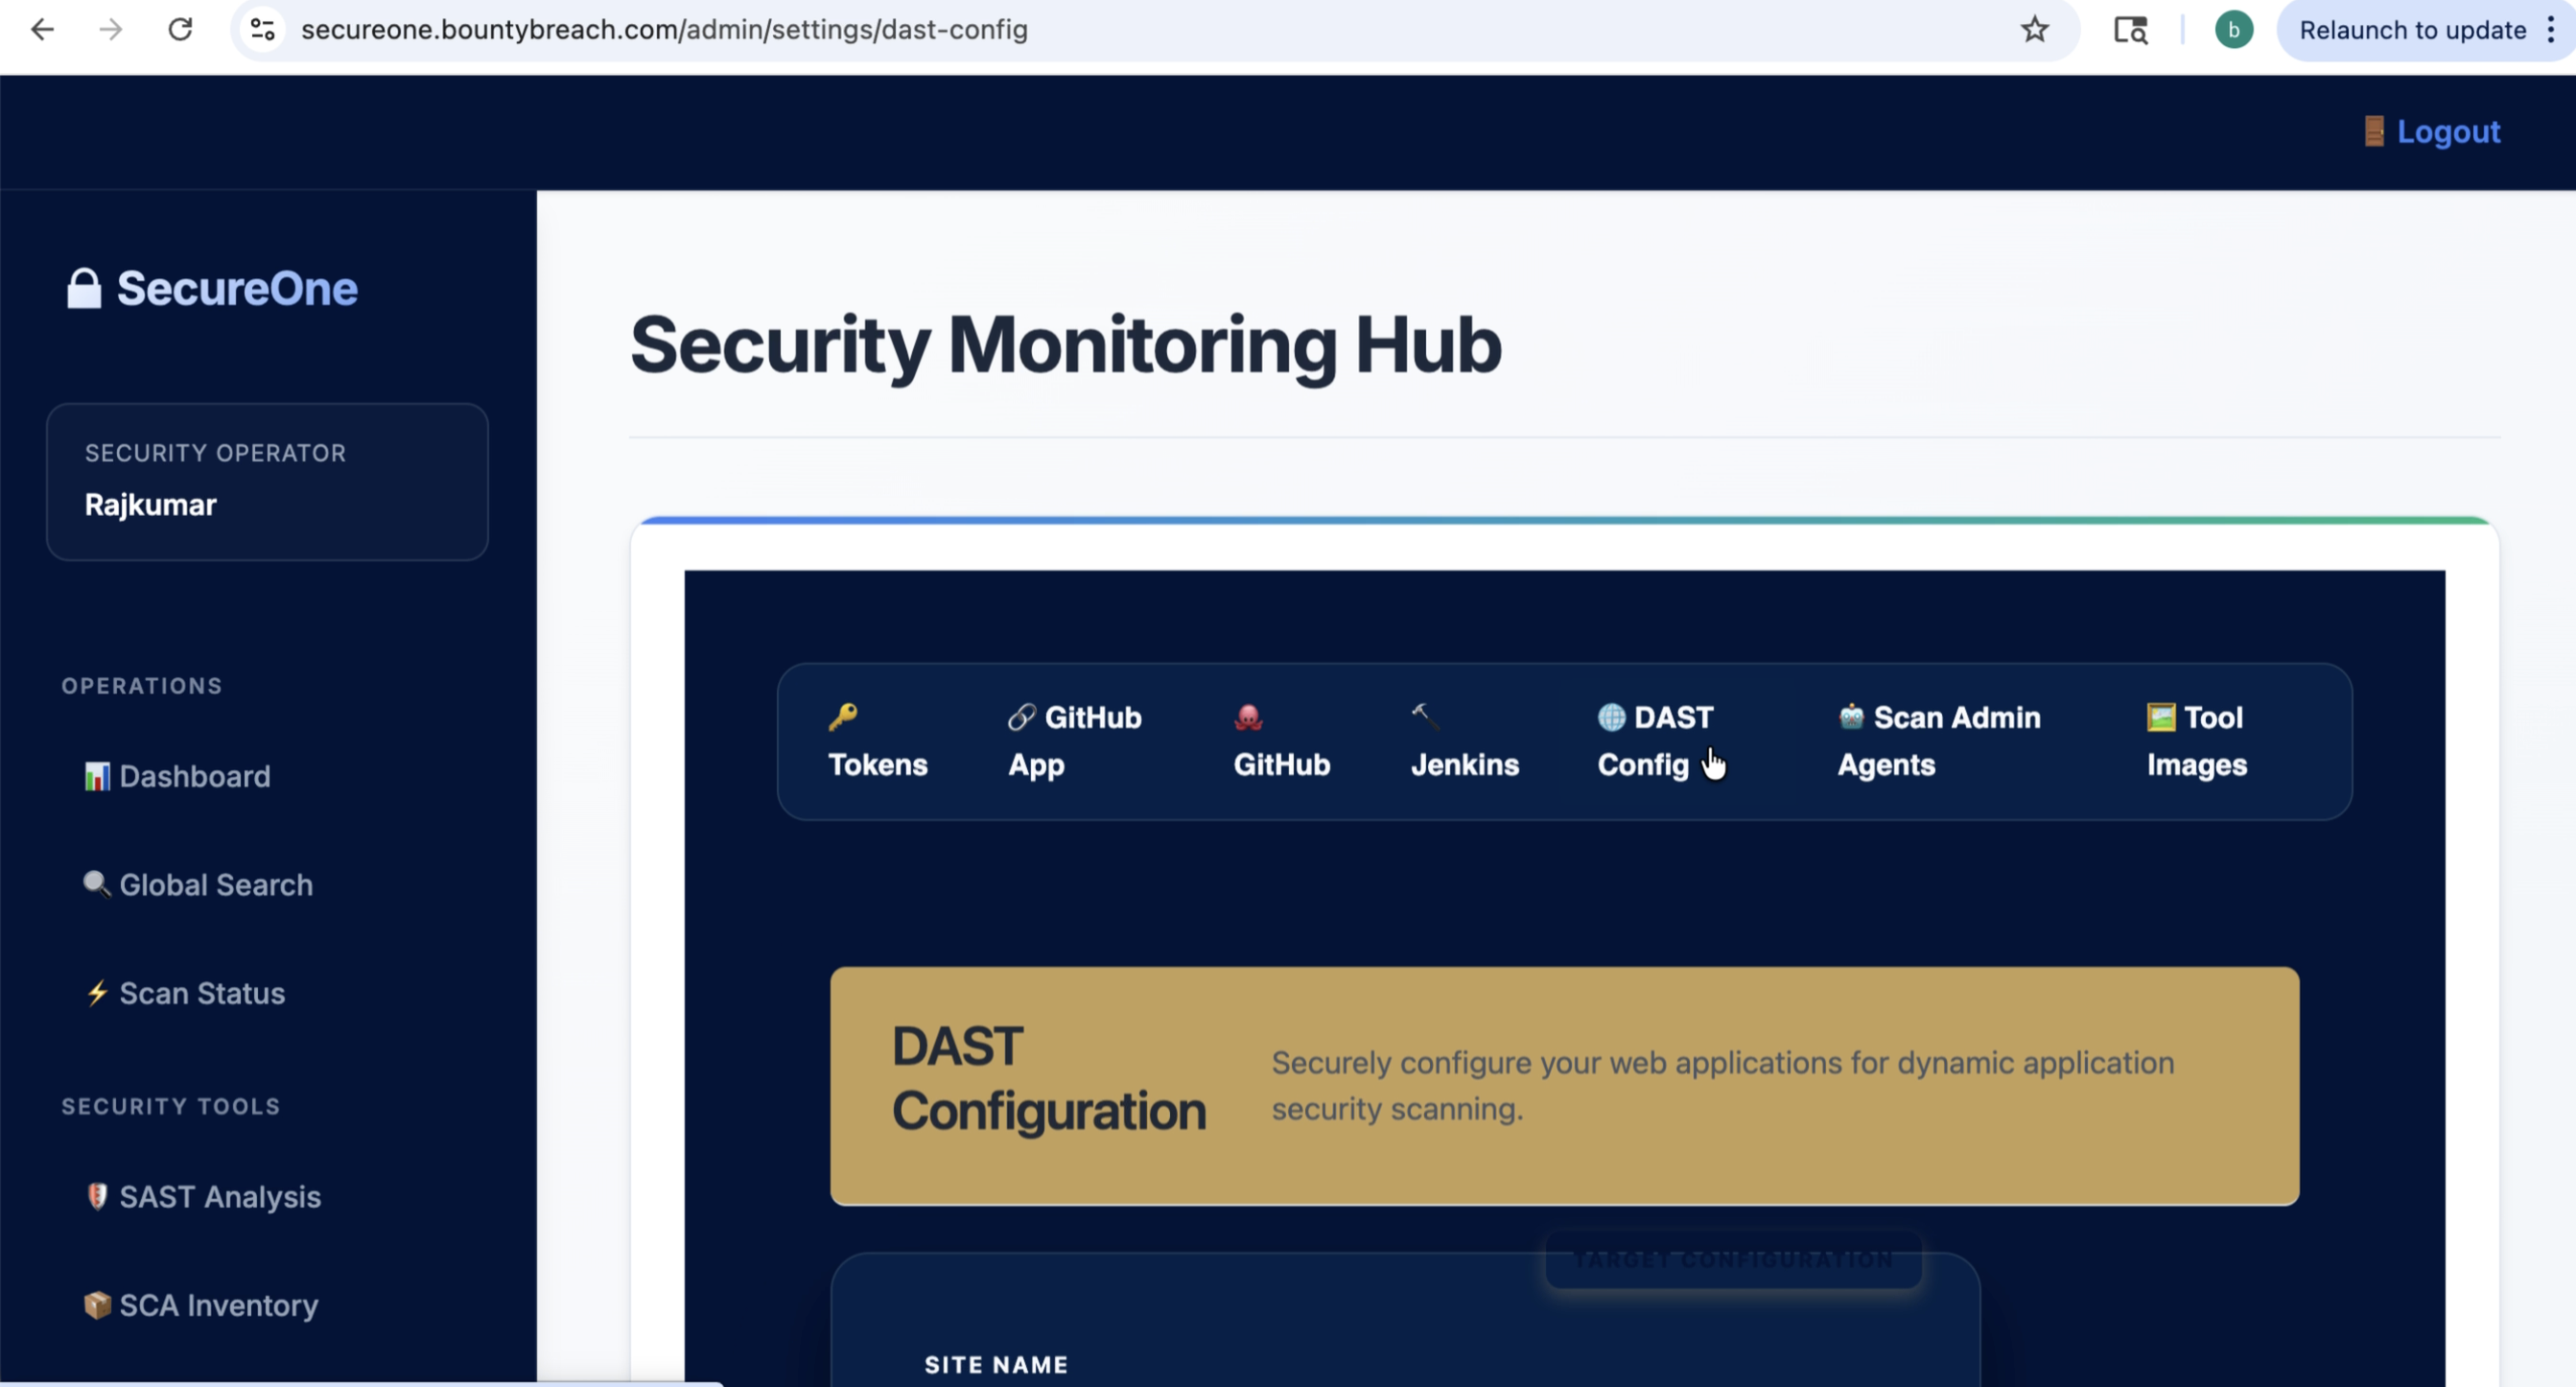
4) Connect Integrations
- Go to Settings → Integrations.
- Connect GitHub/Git provider app or token.
- Verify repository access and choose target repositories.
- Optionally connect CI/CD (for Jenkins or pipeline-triggered scans).
 Step 11 screenshot
 Step 12 screenshot
 Step 13 screenshot
 Step 14 screenshot
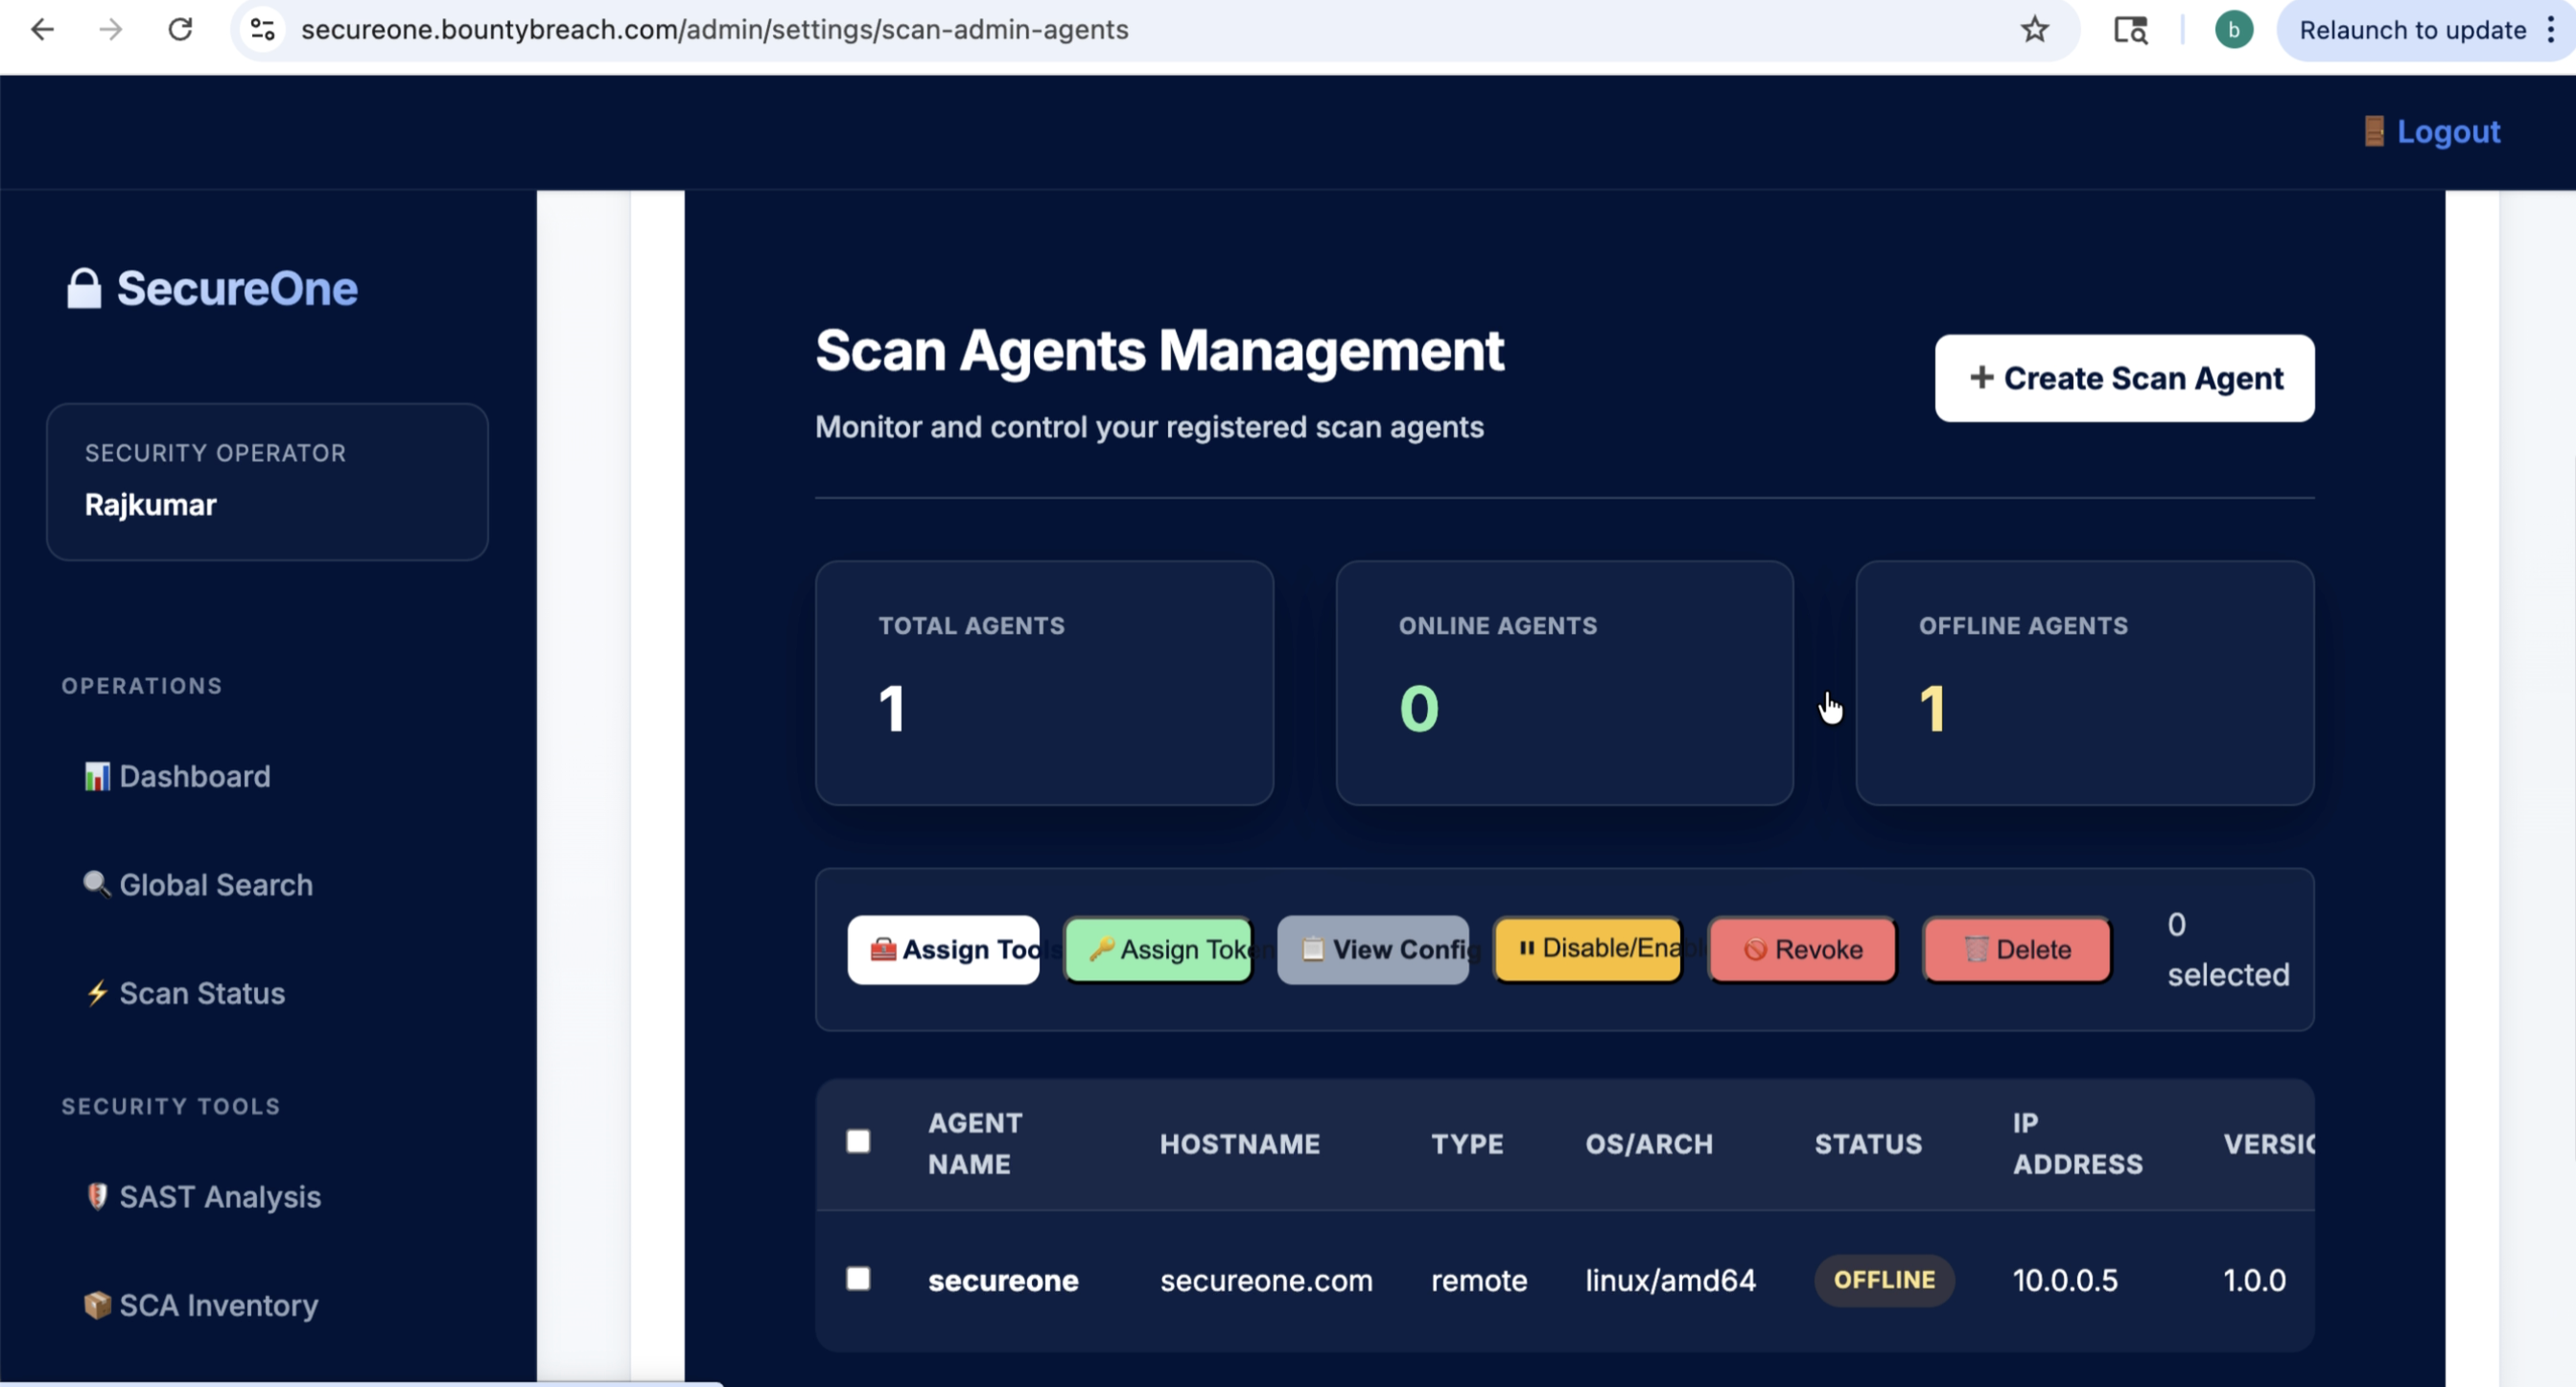
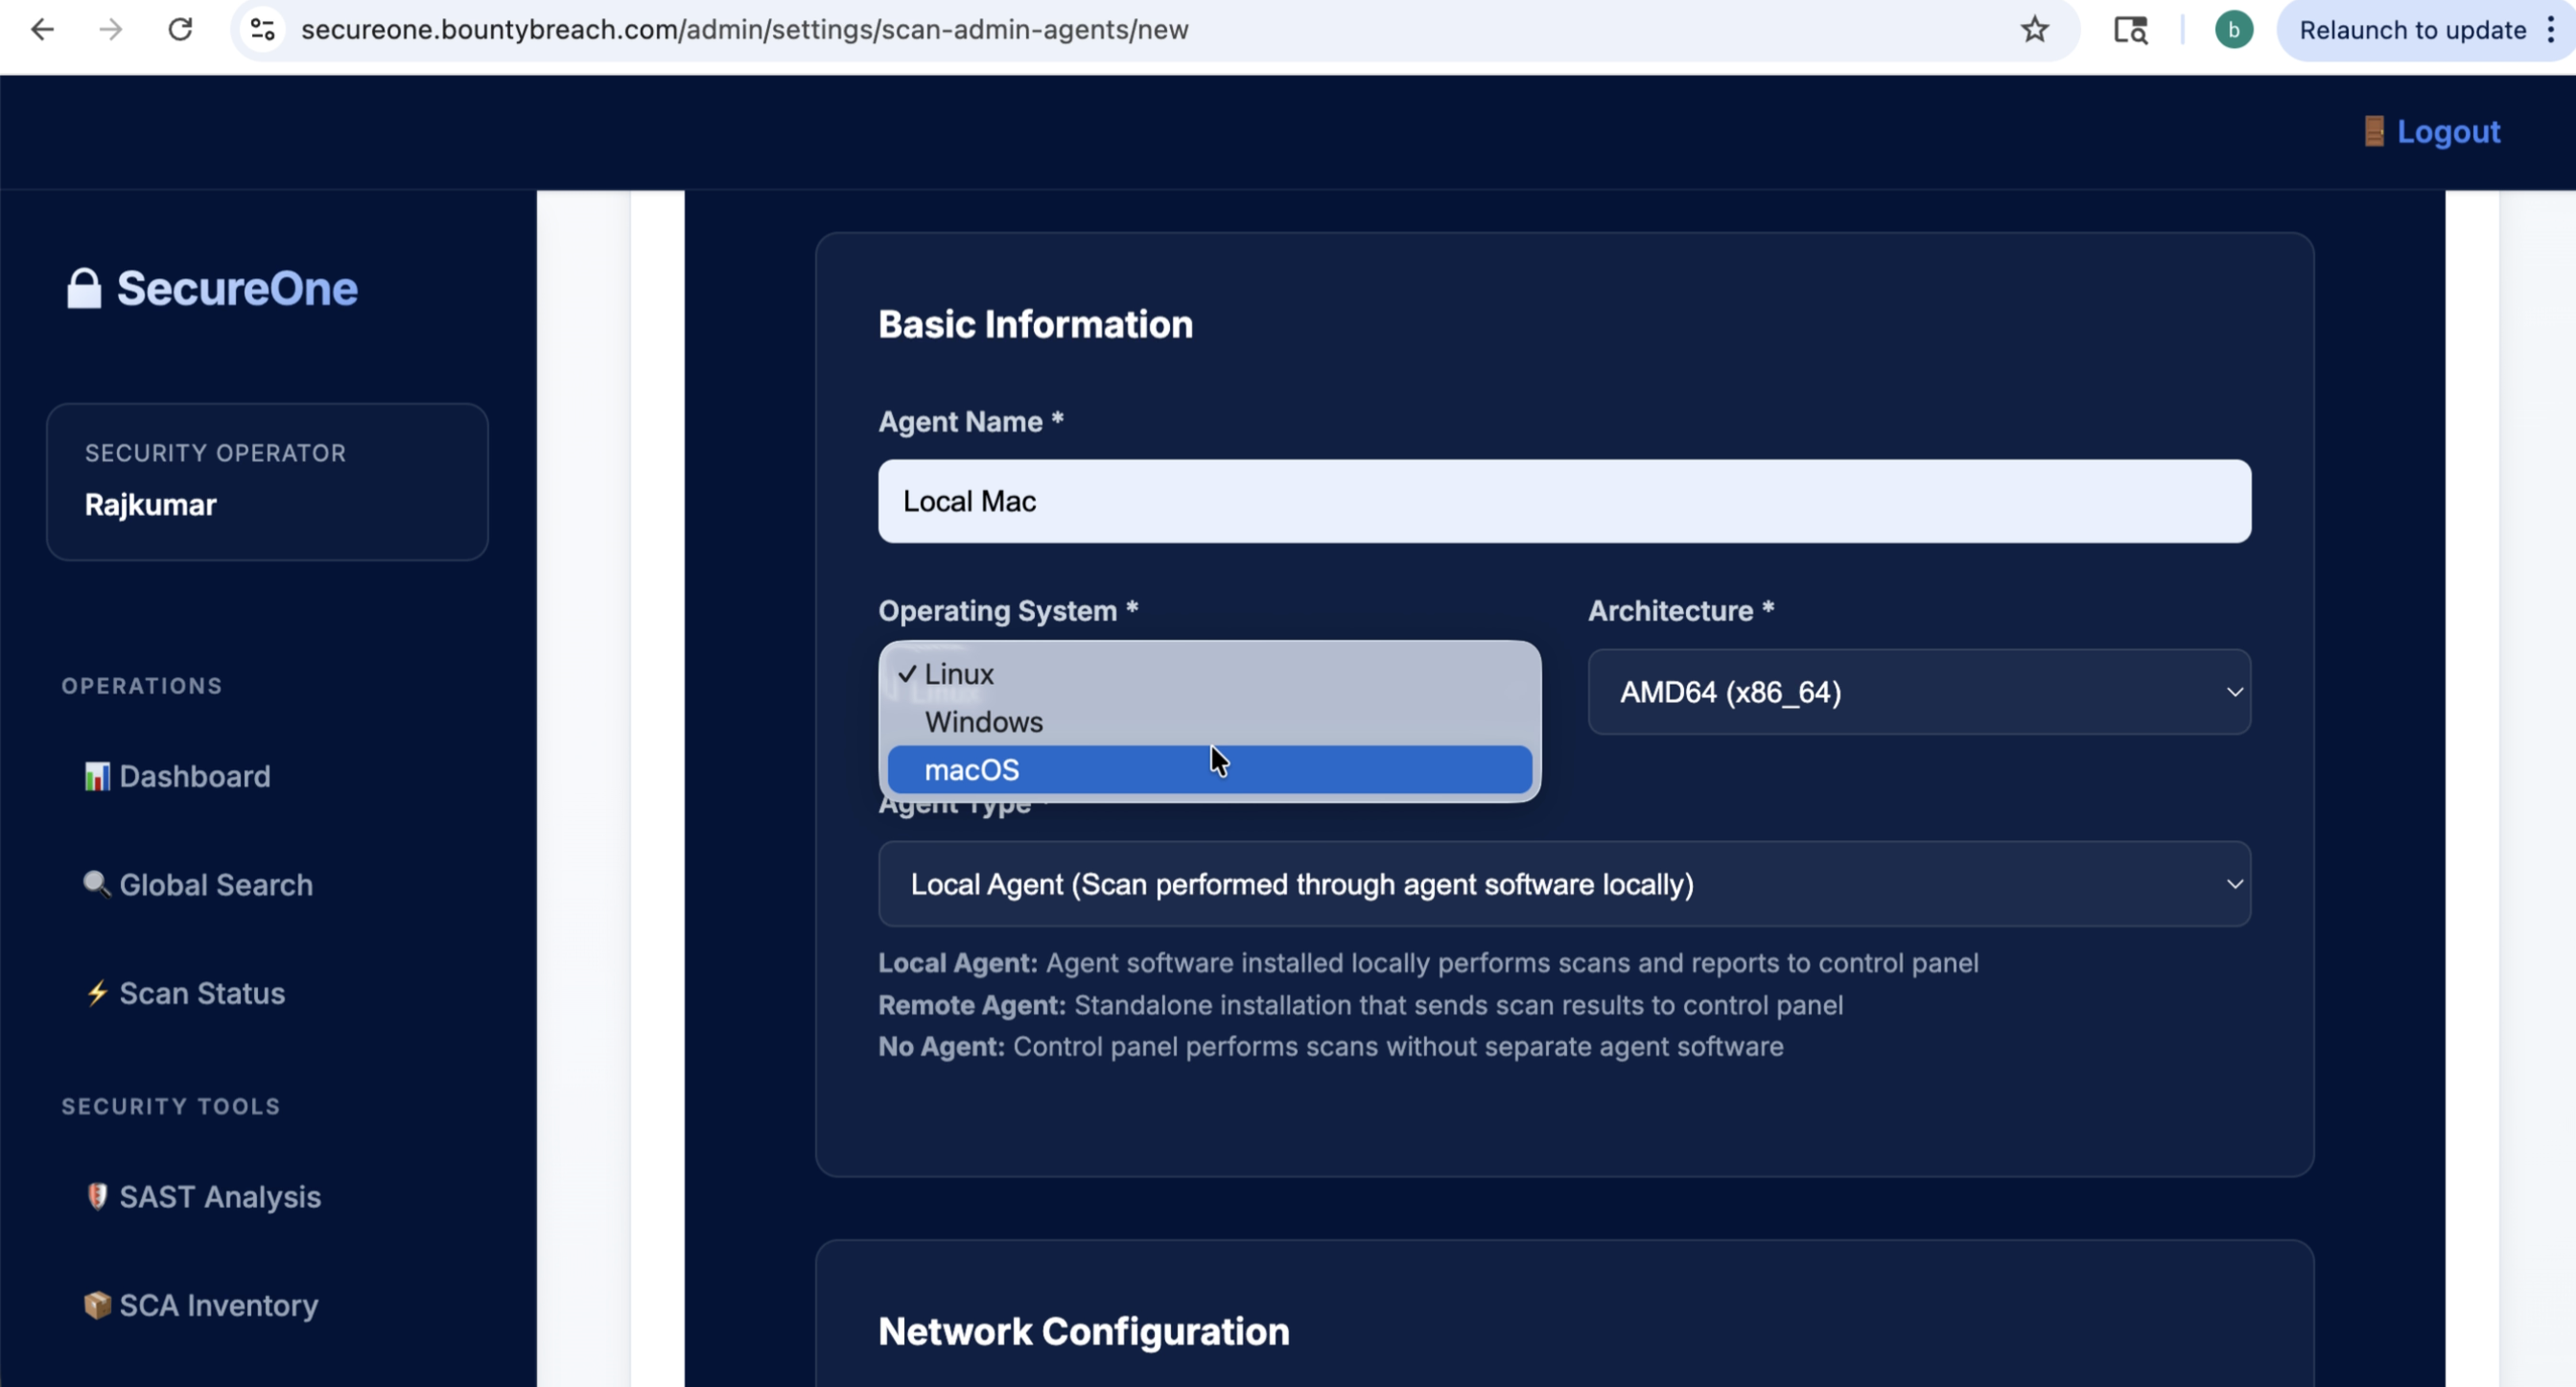
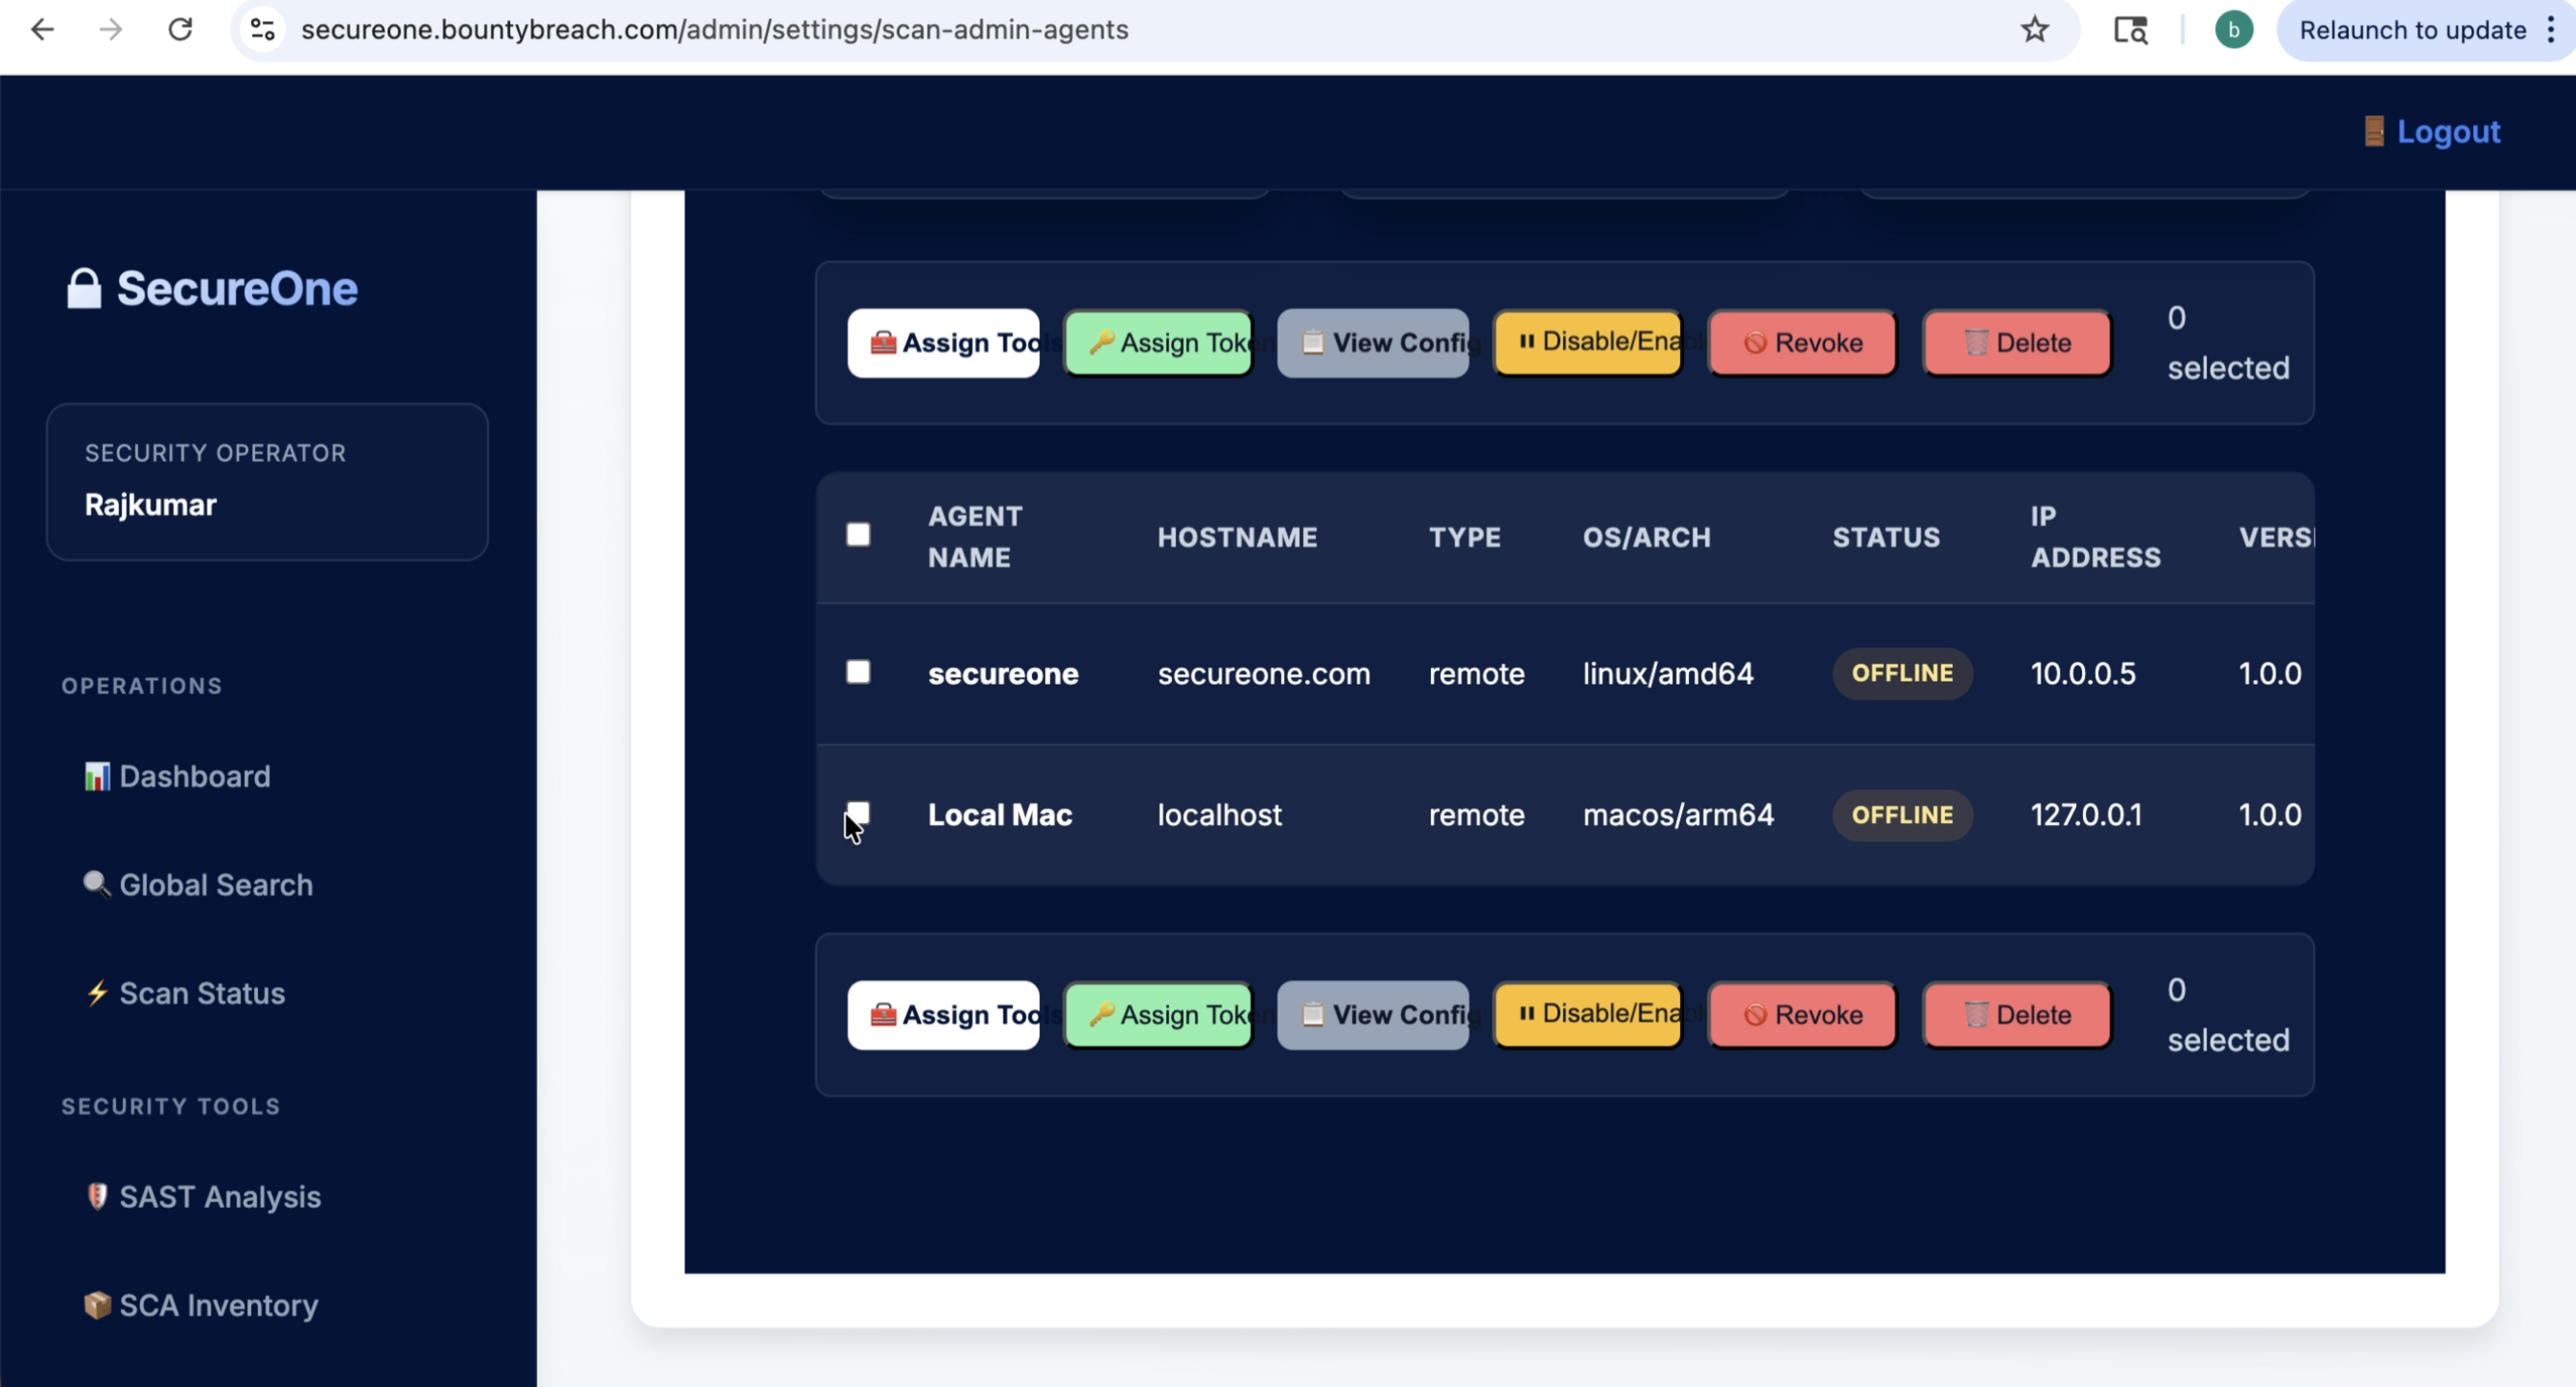
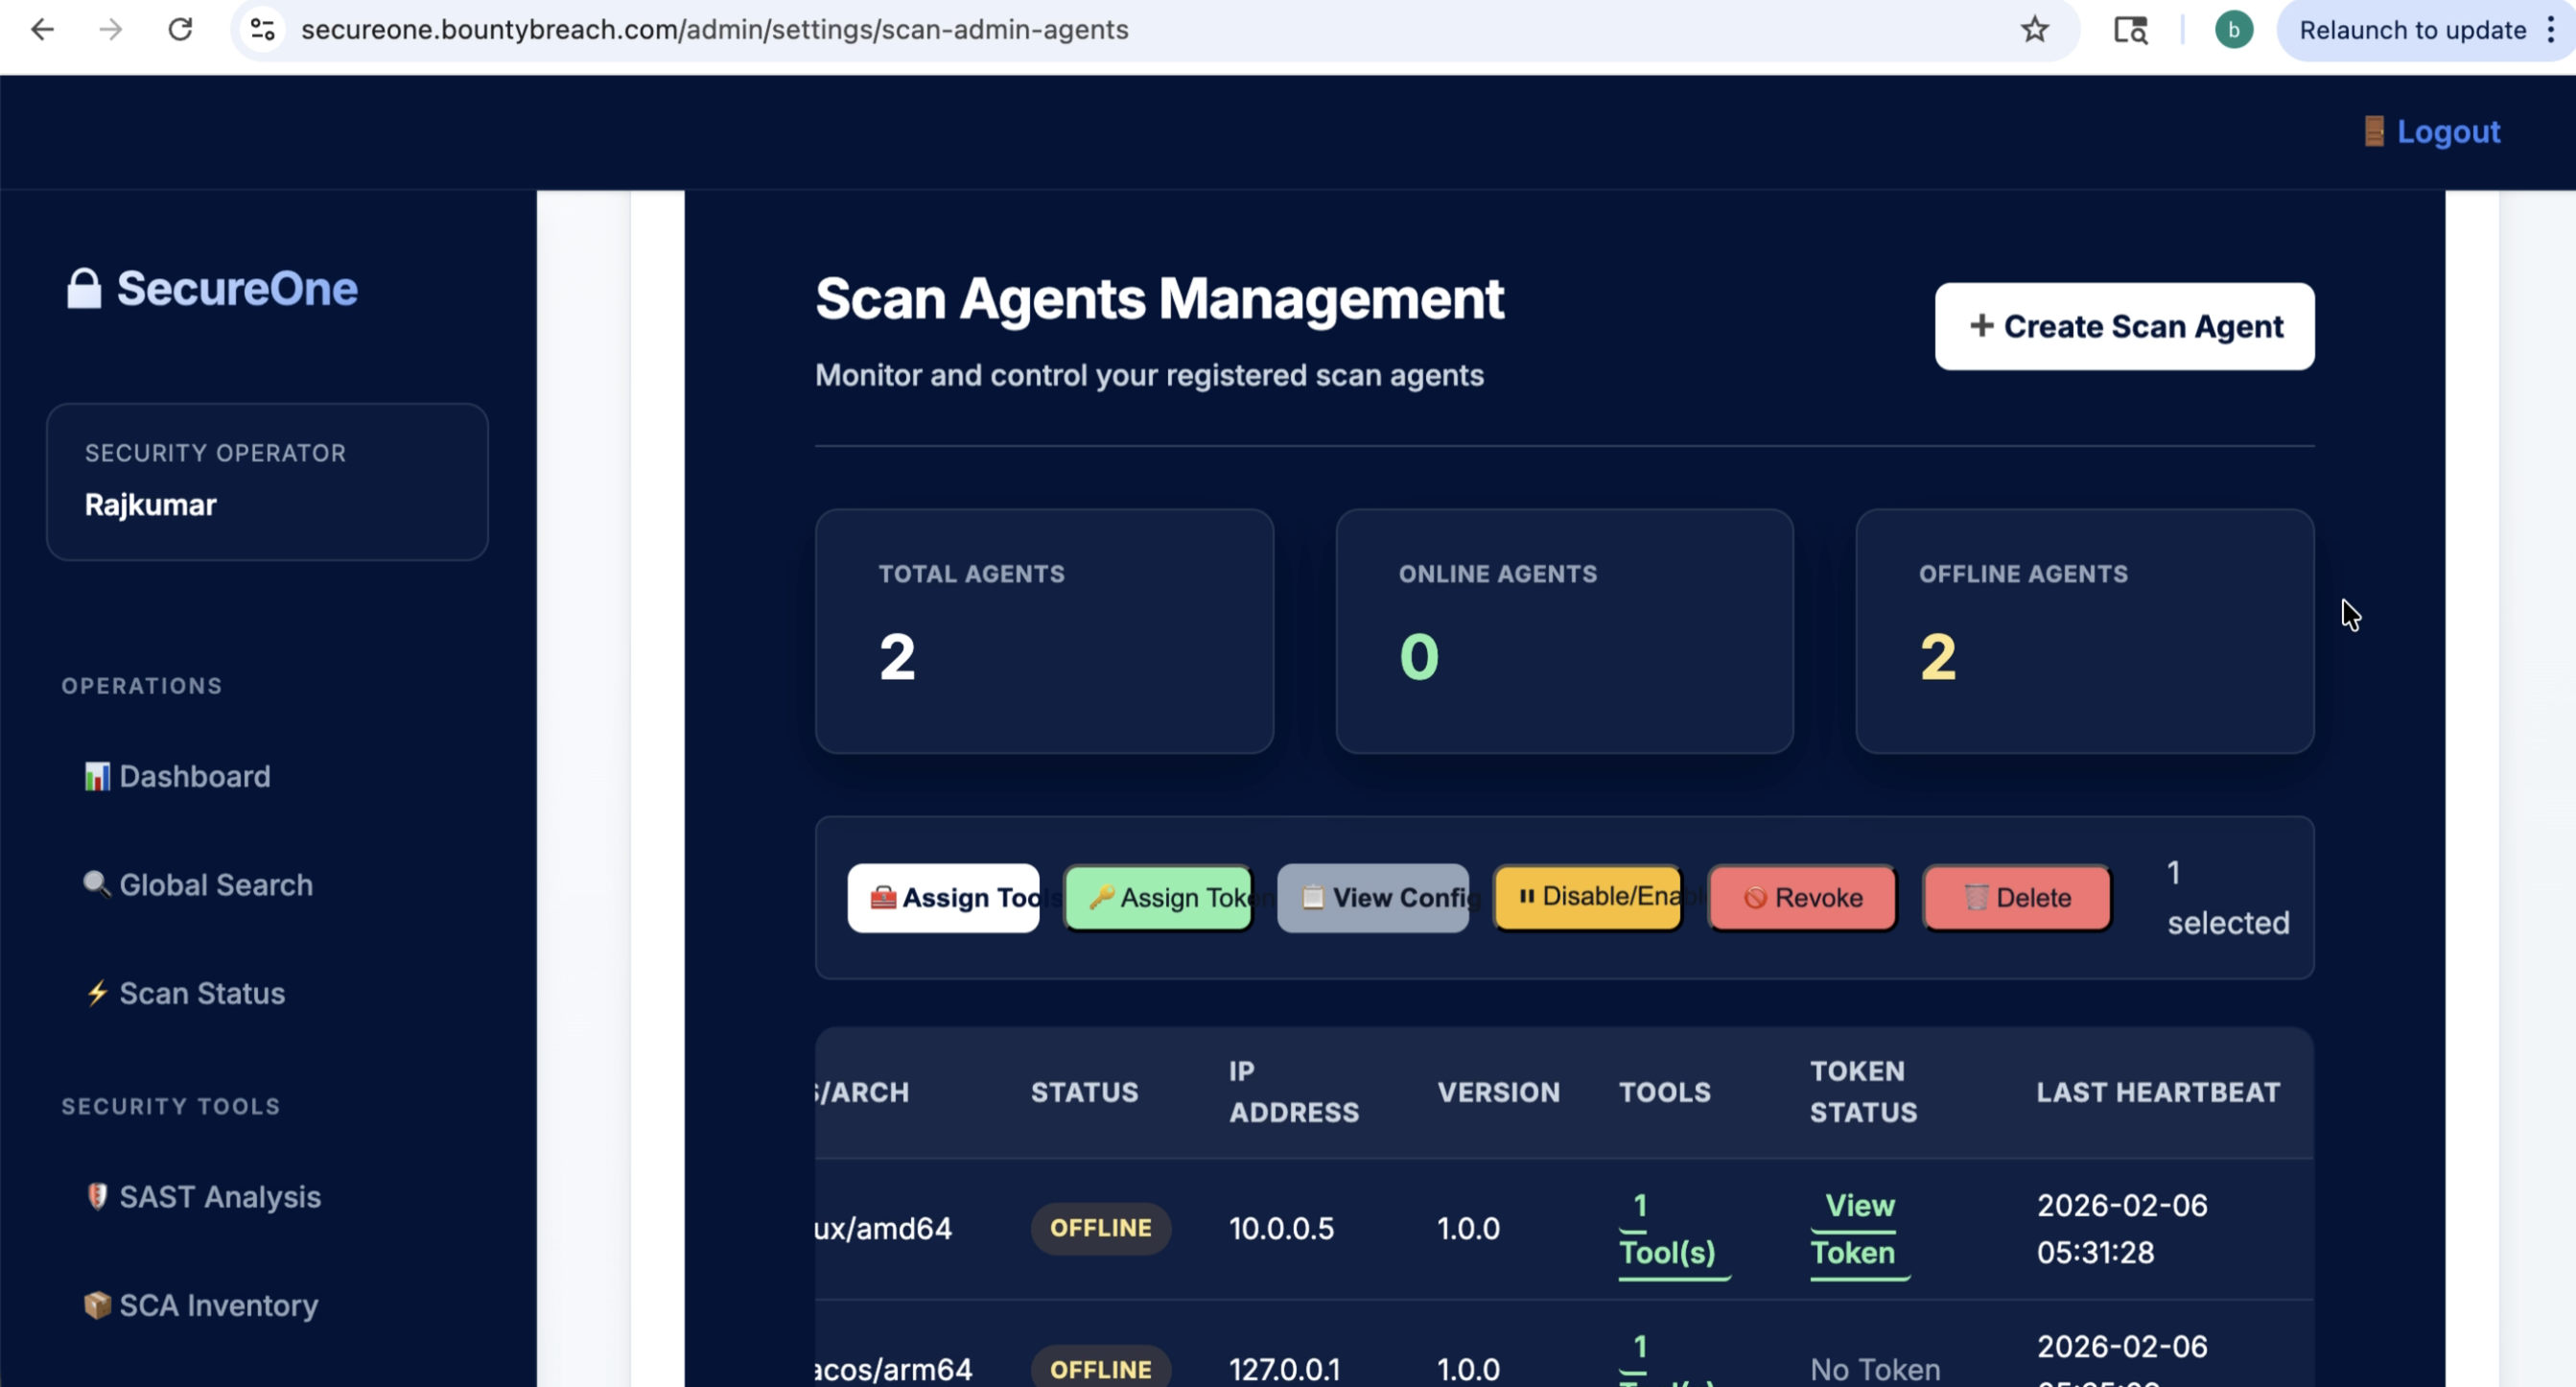
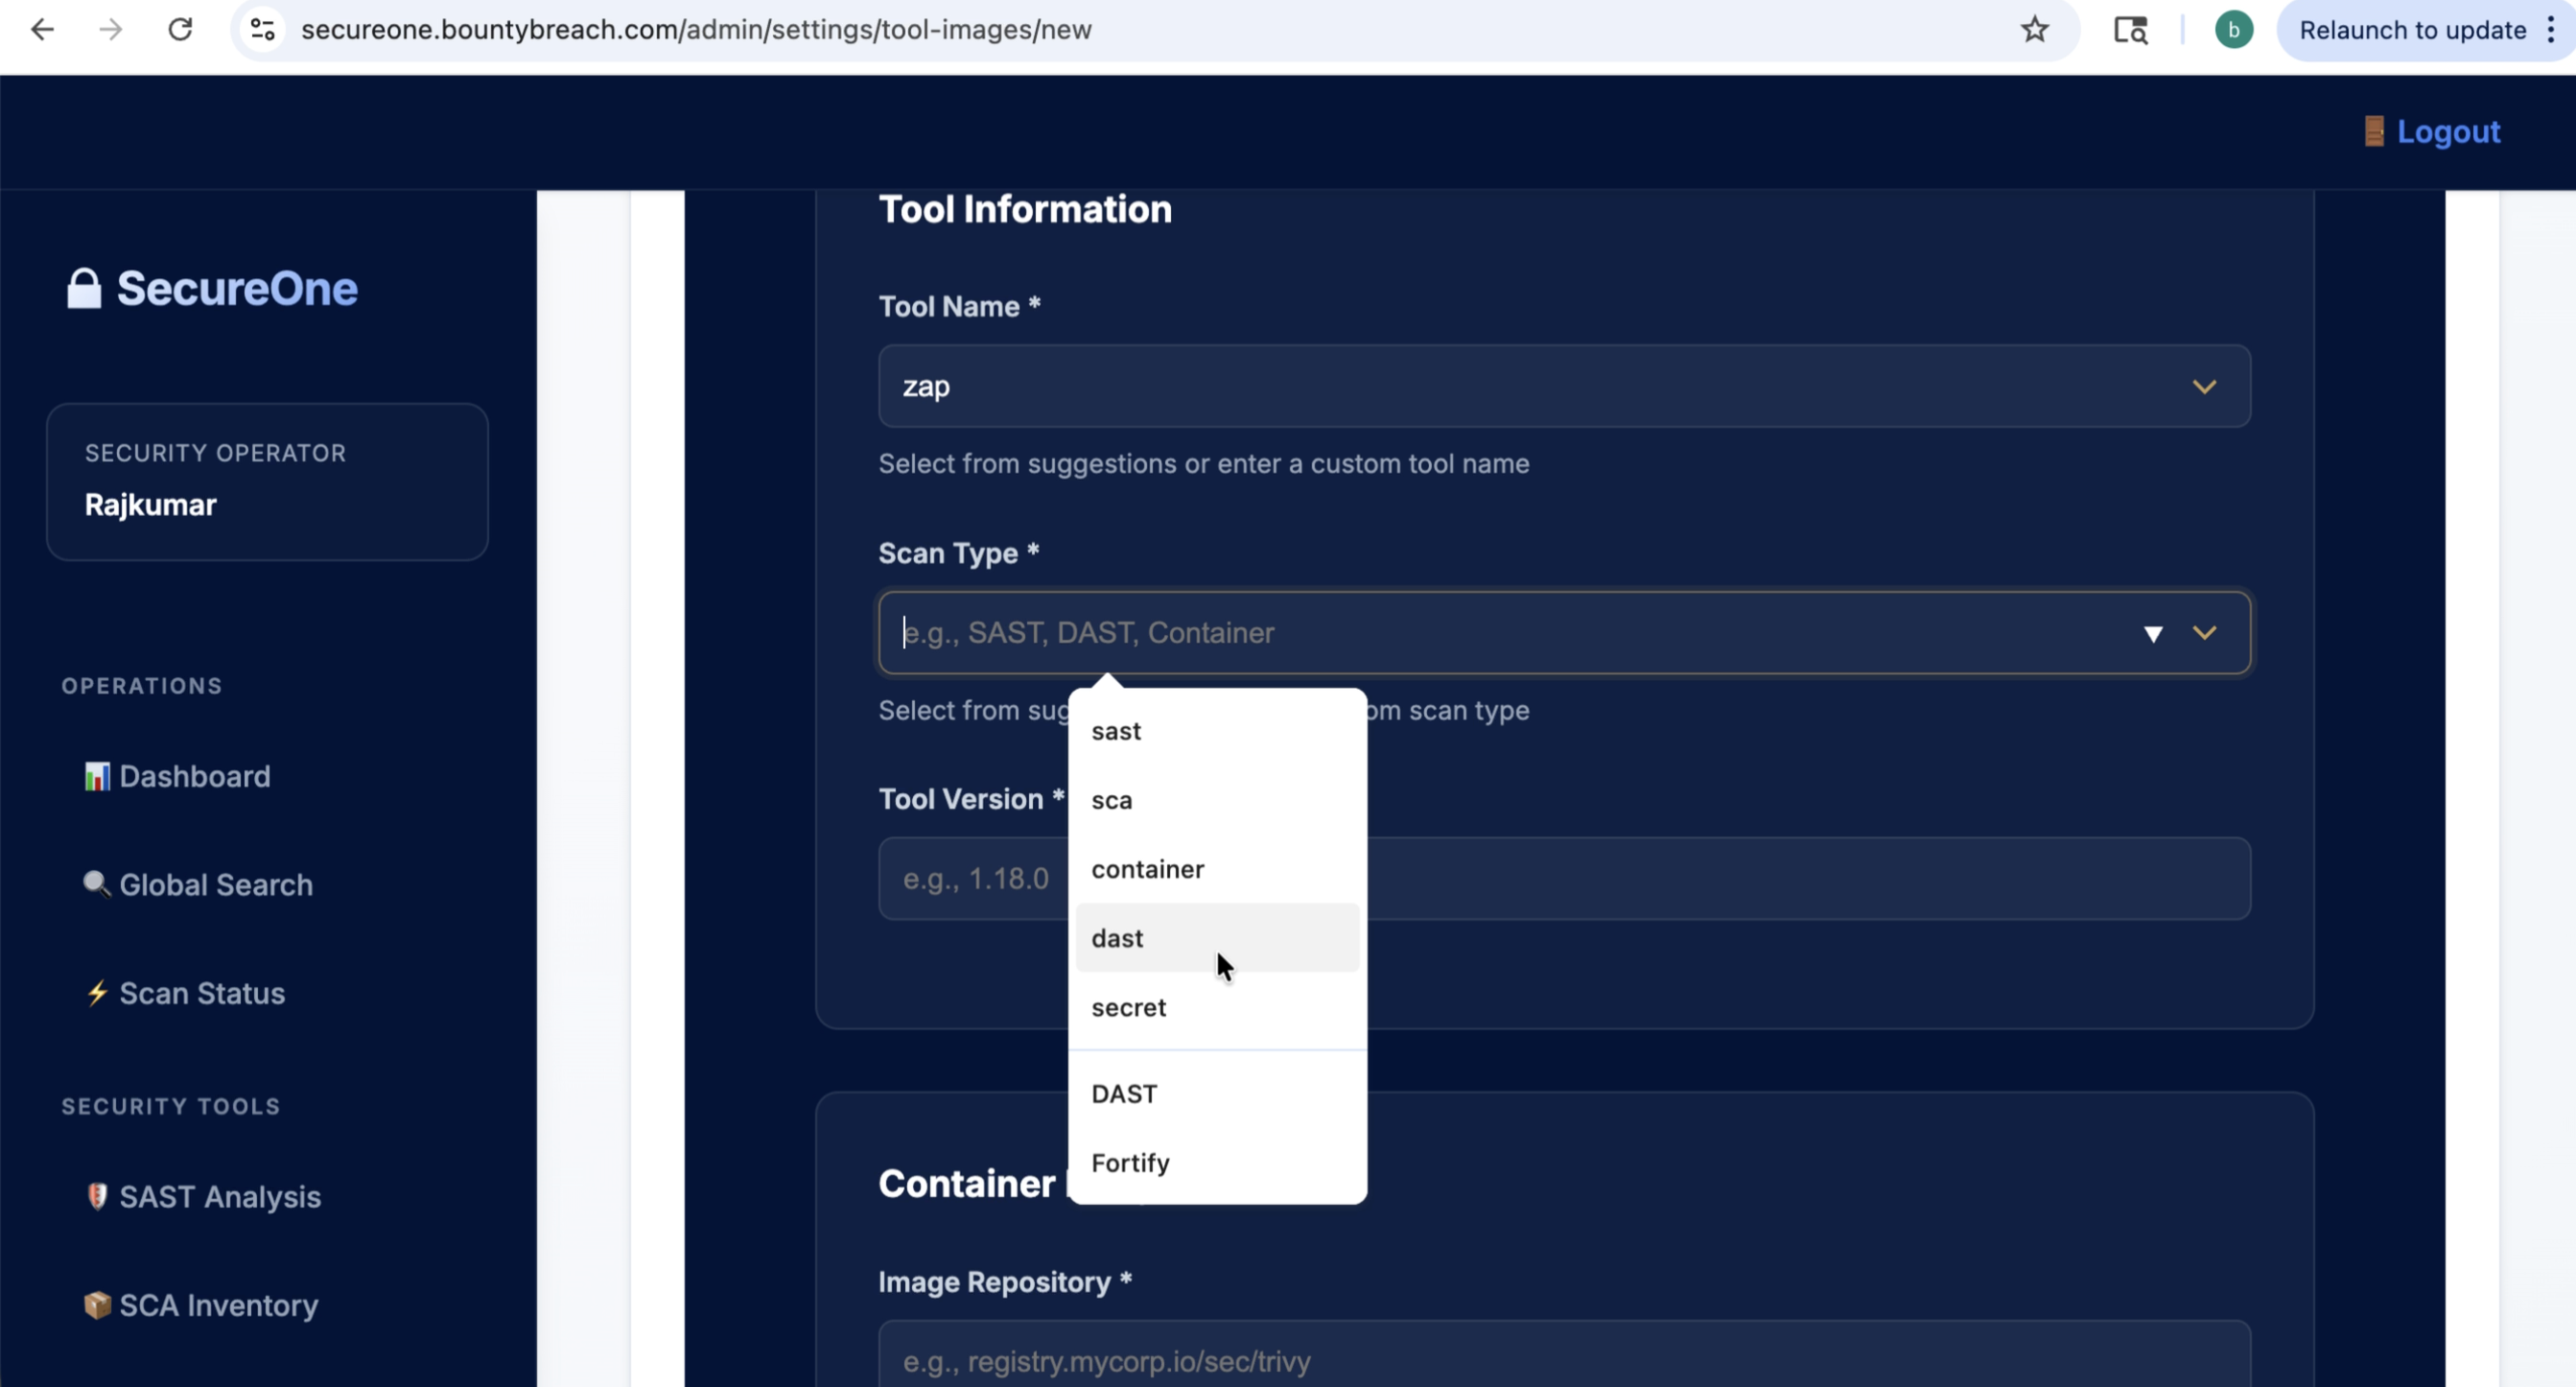
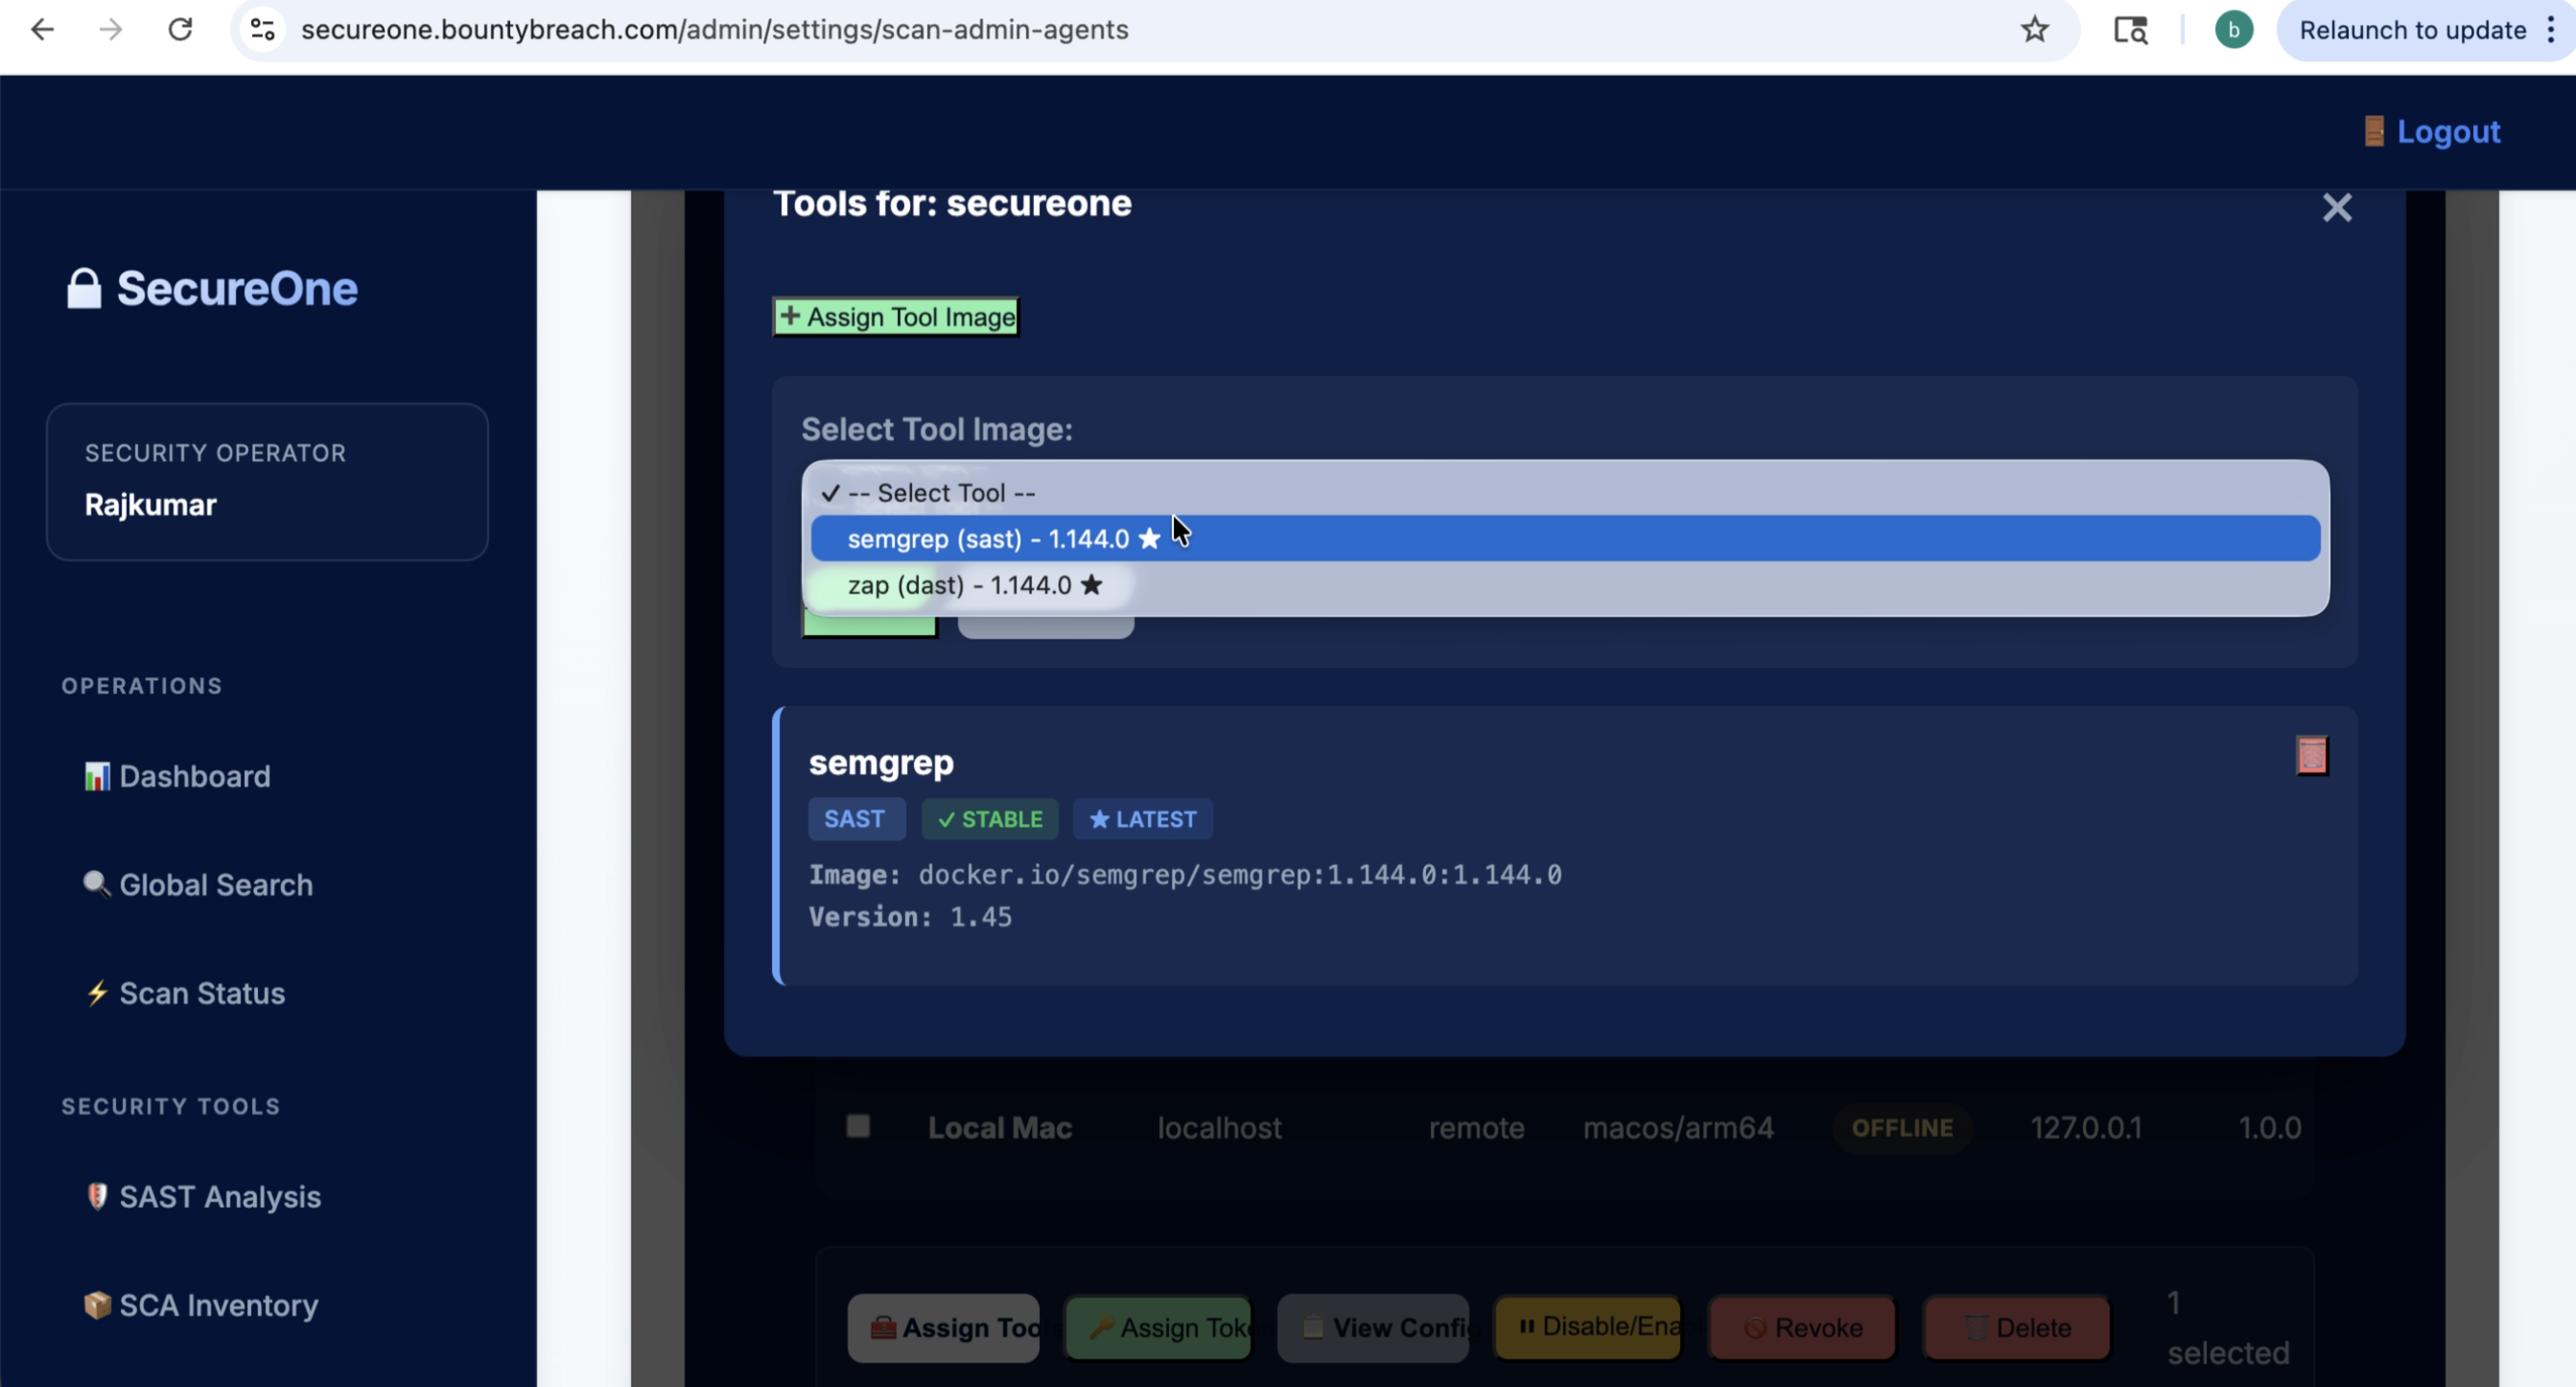
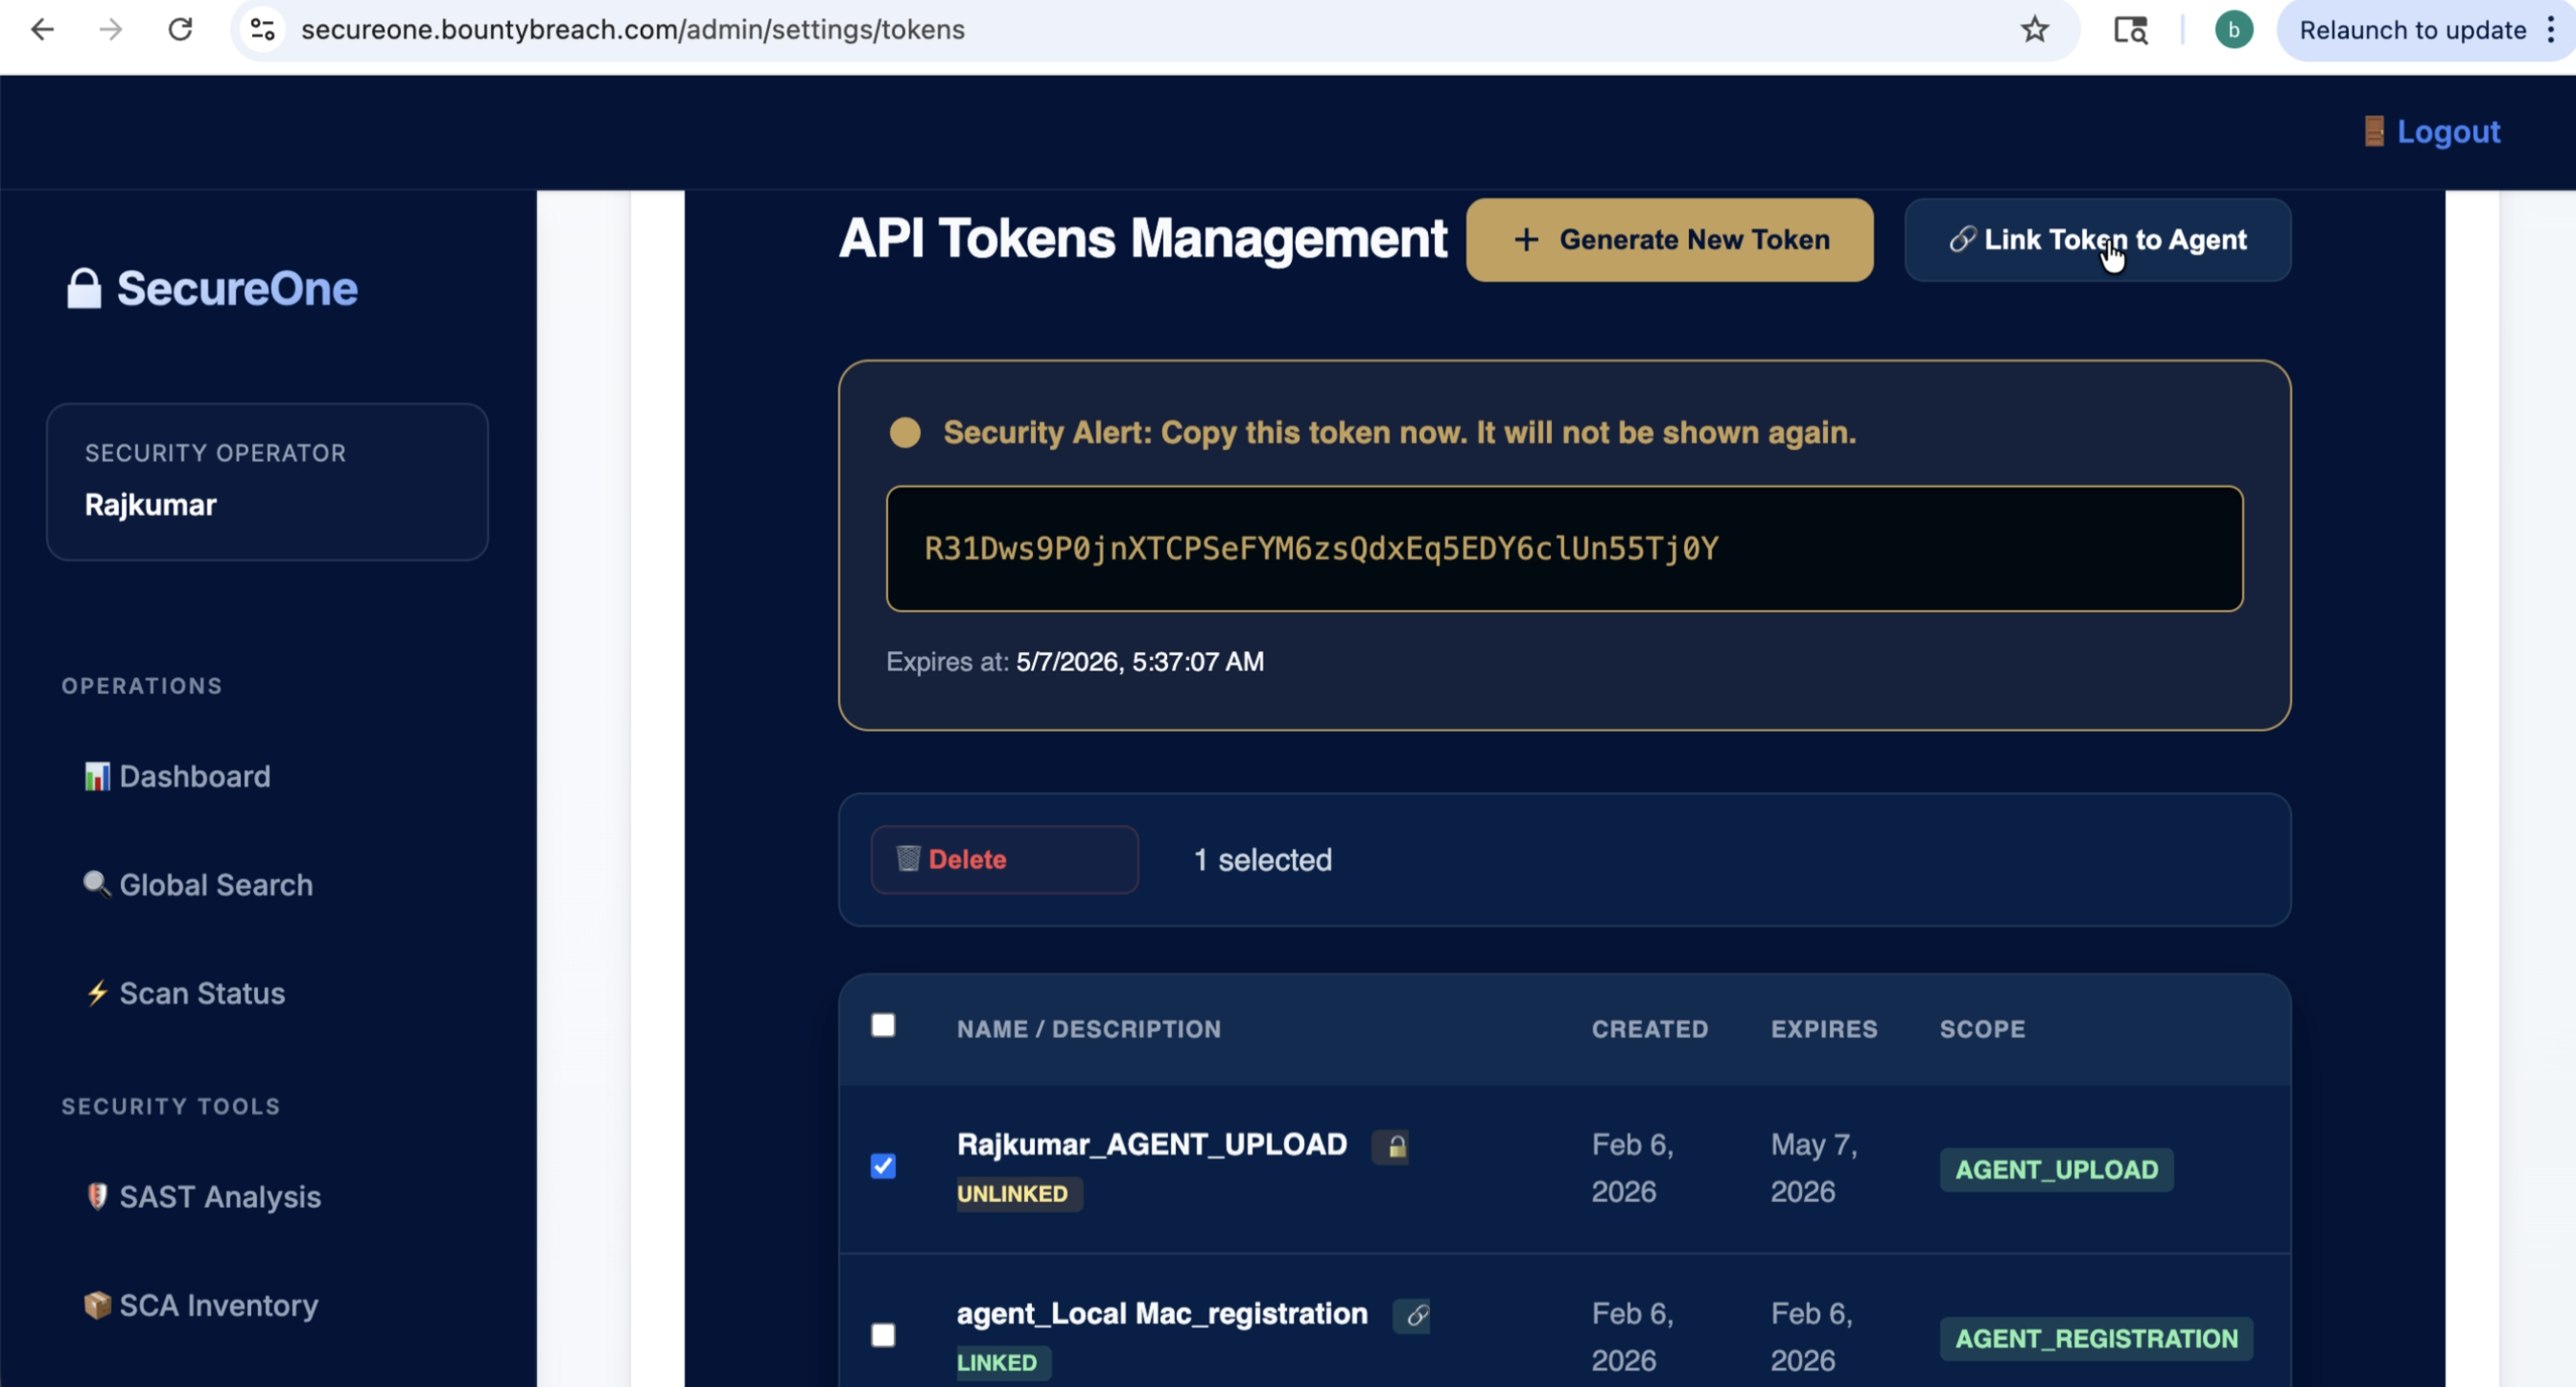
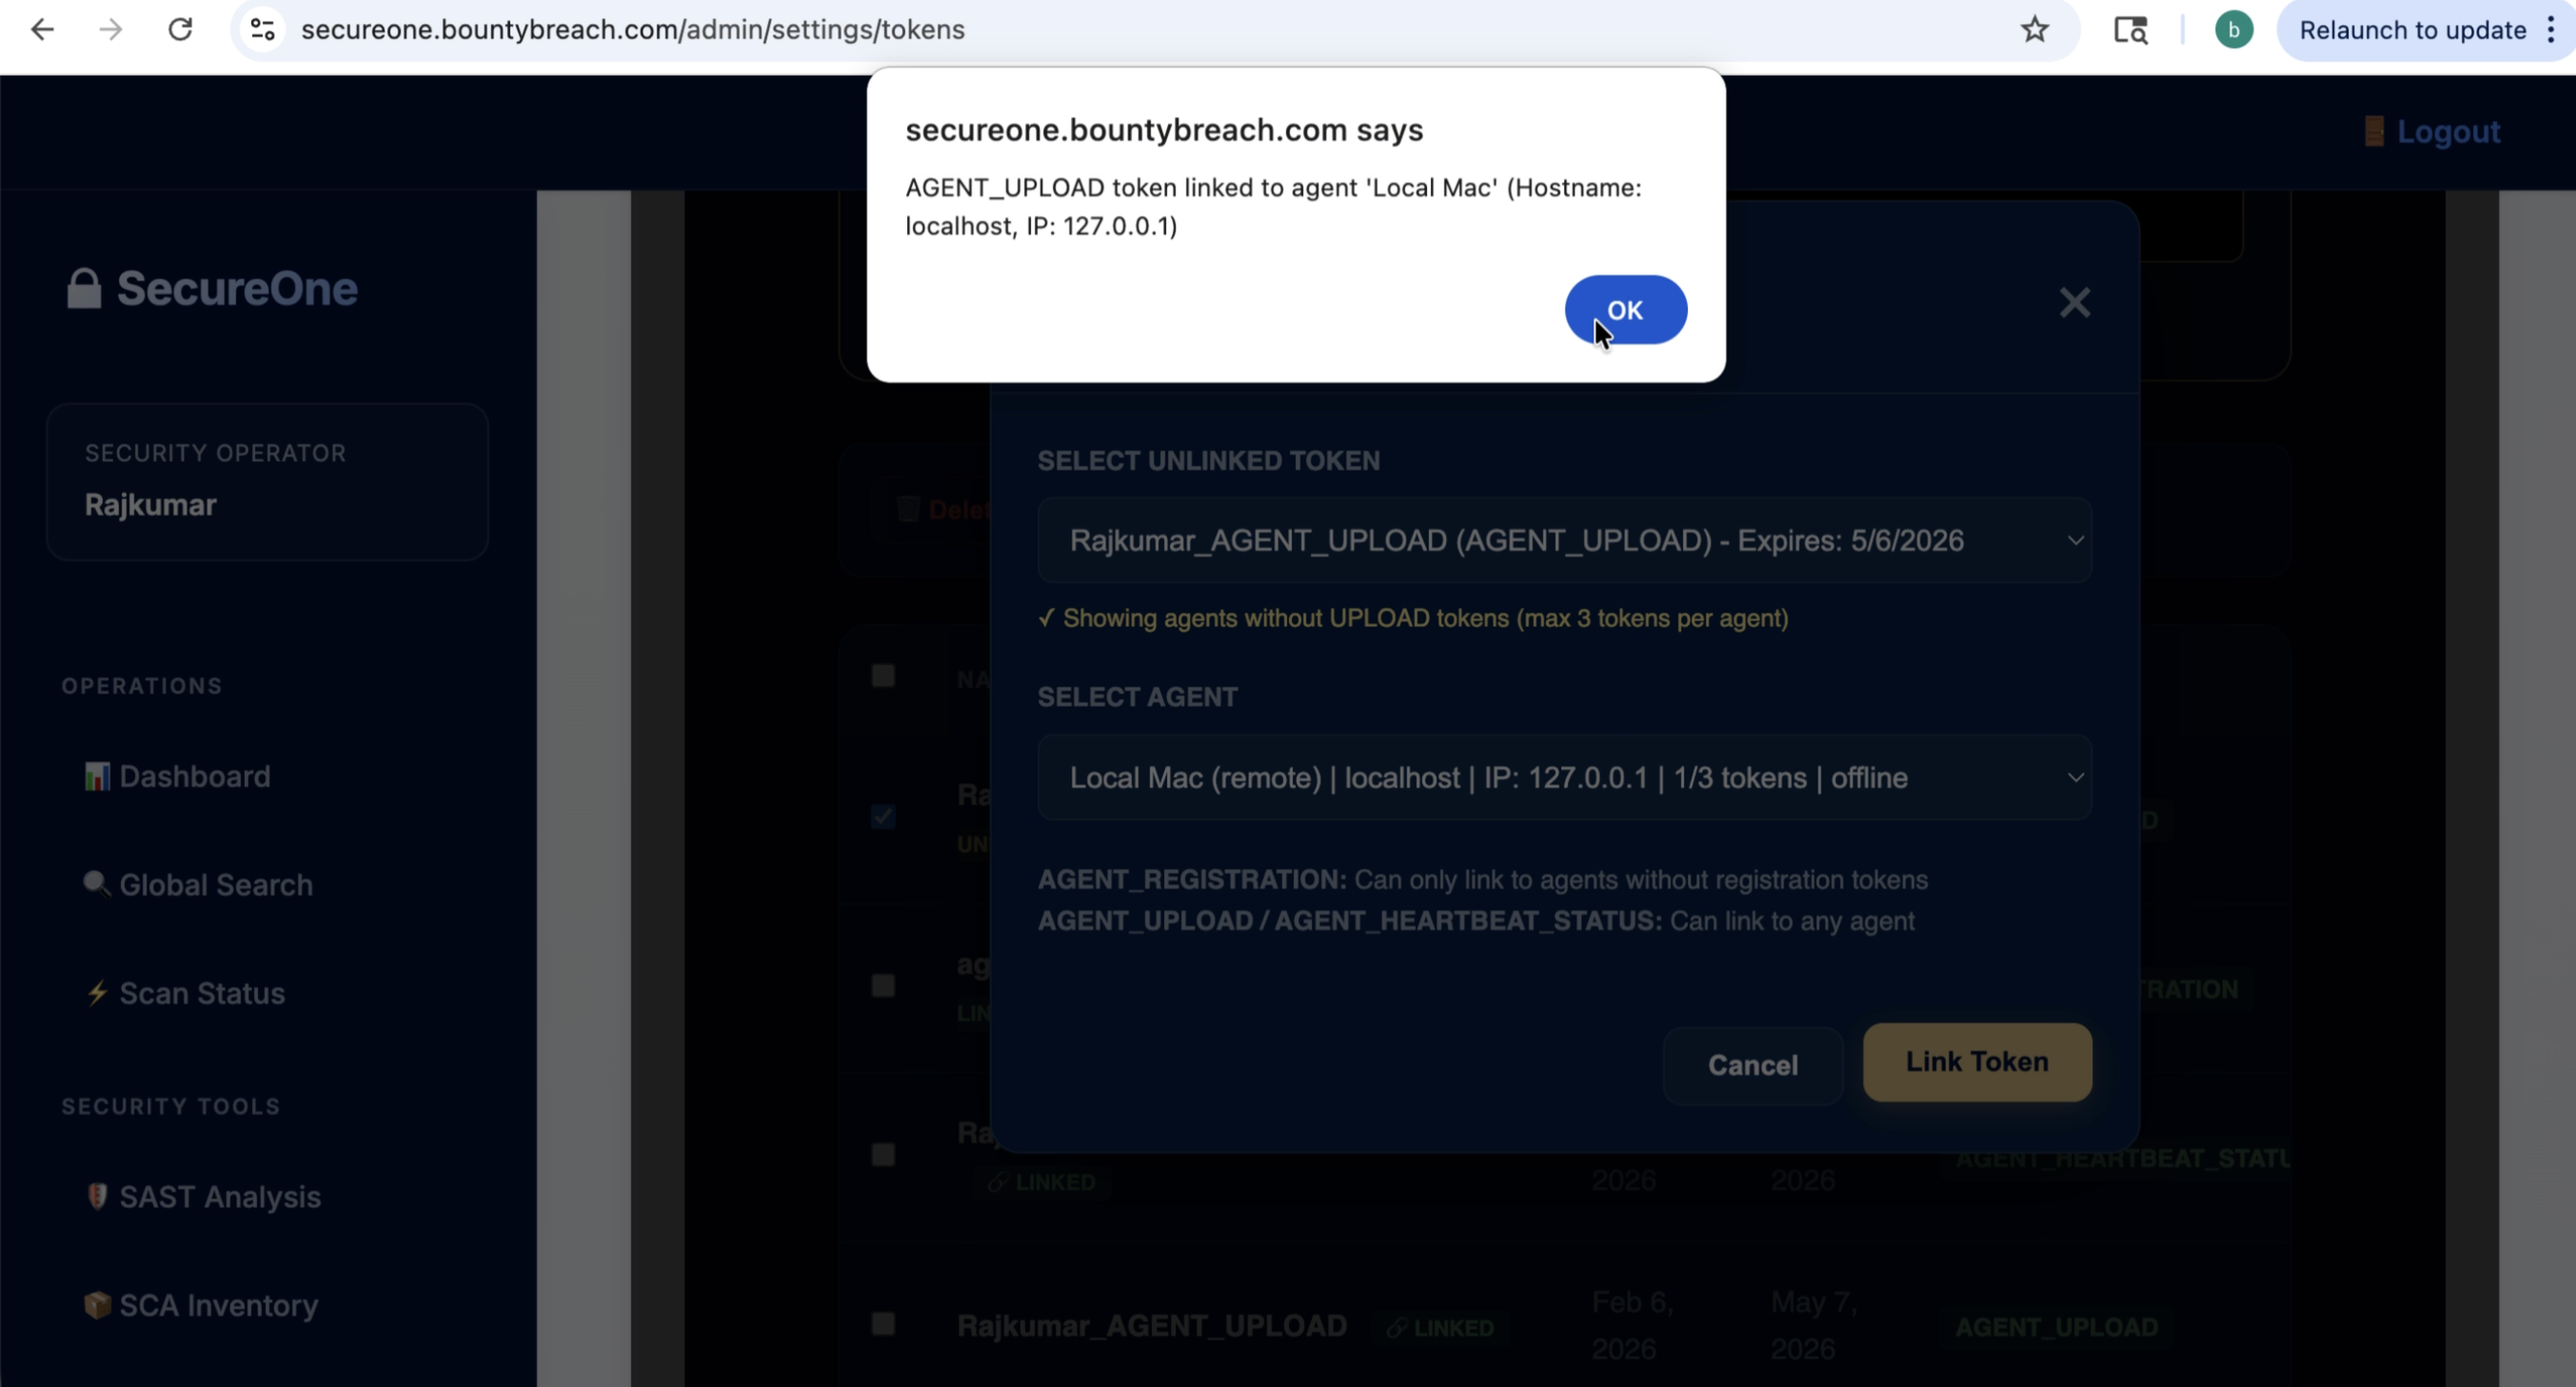
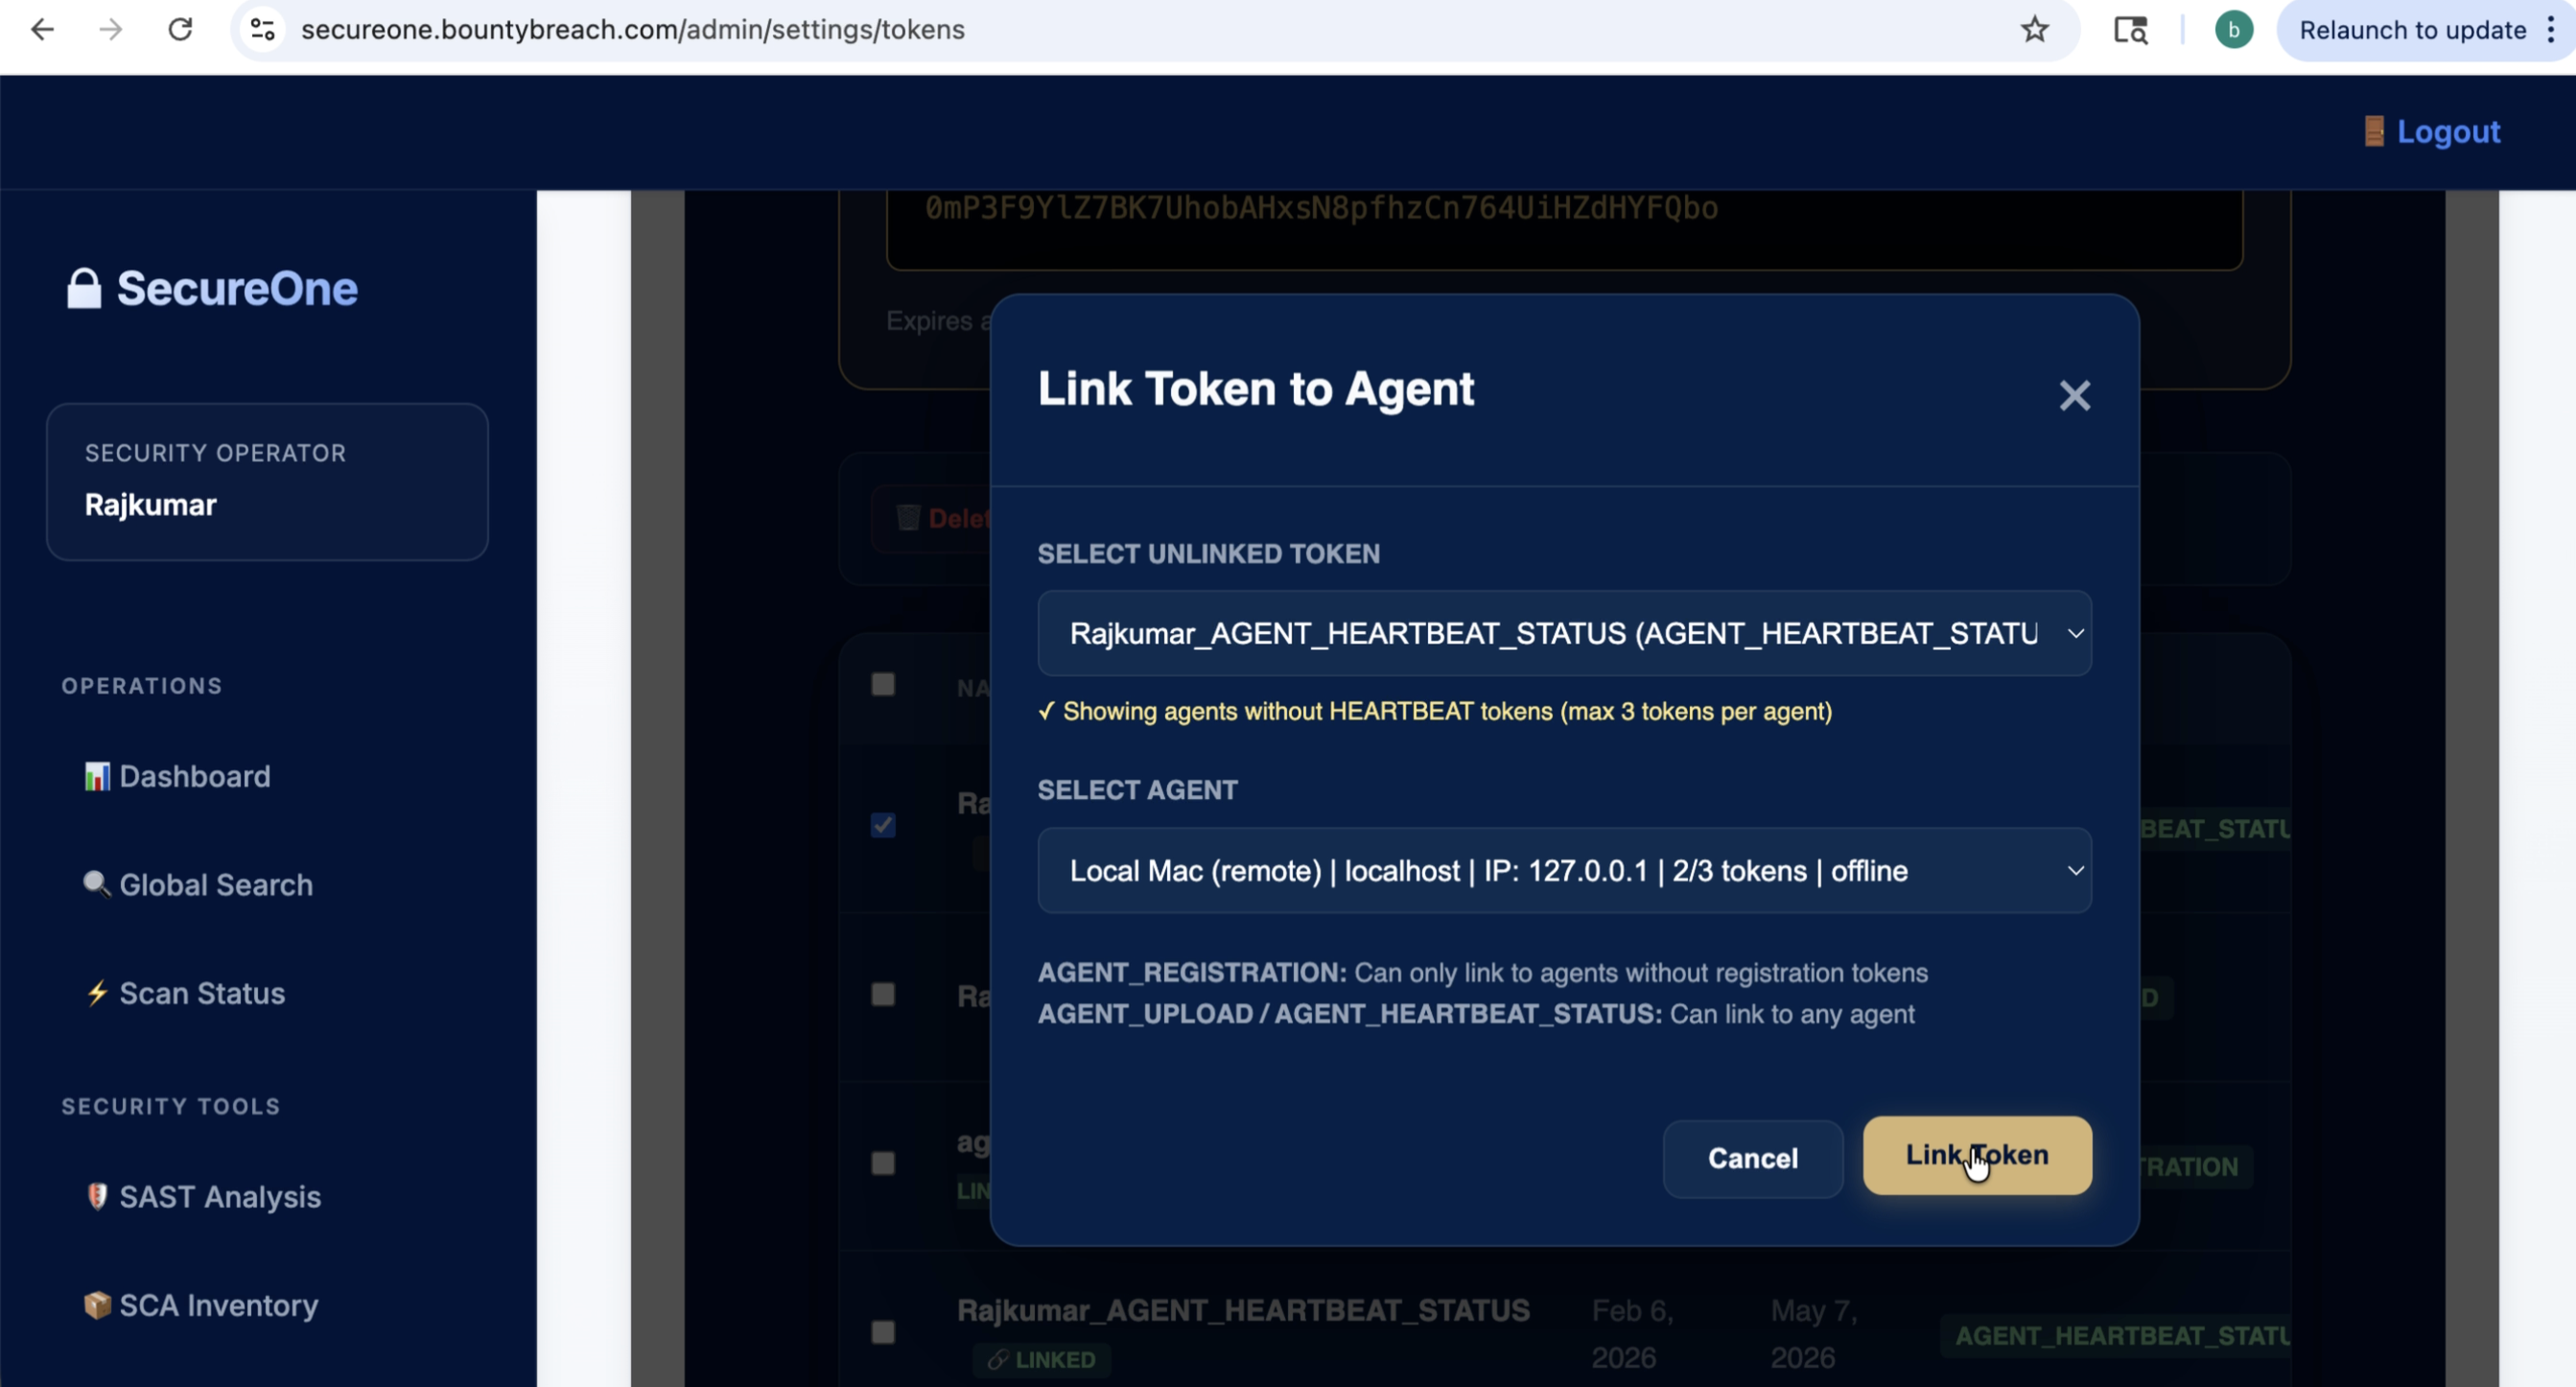
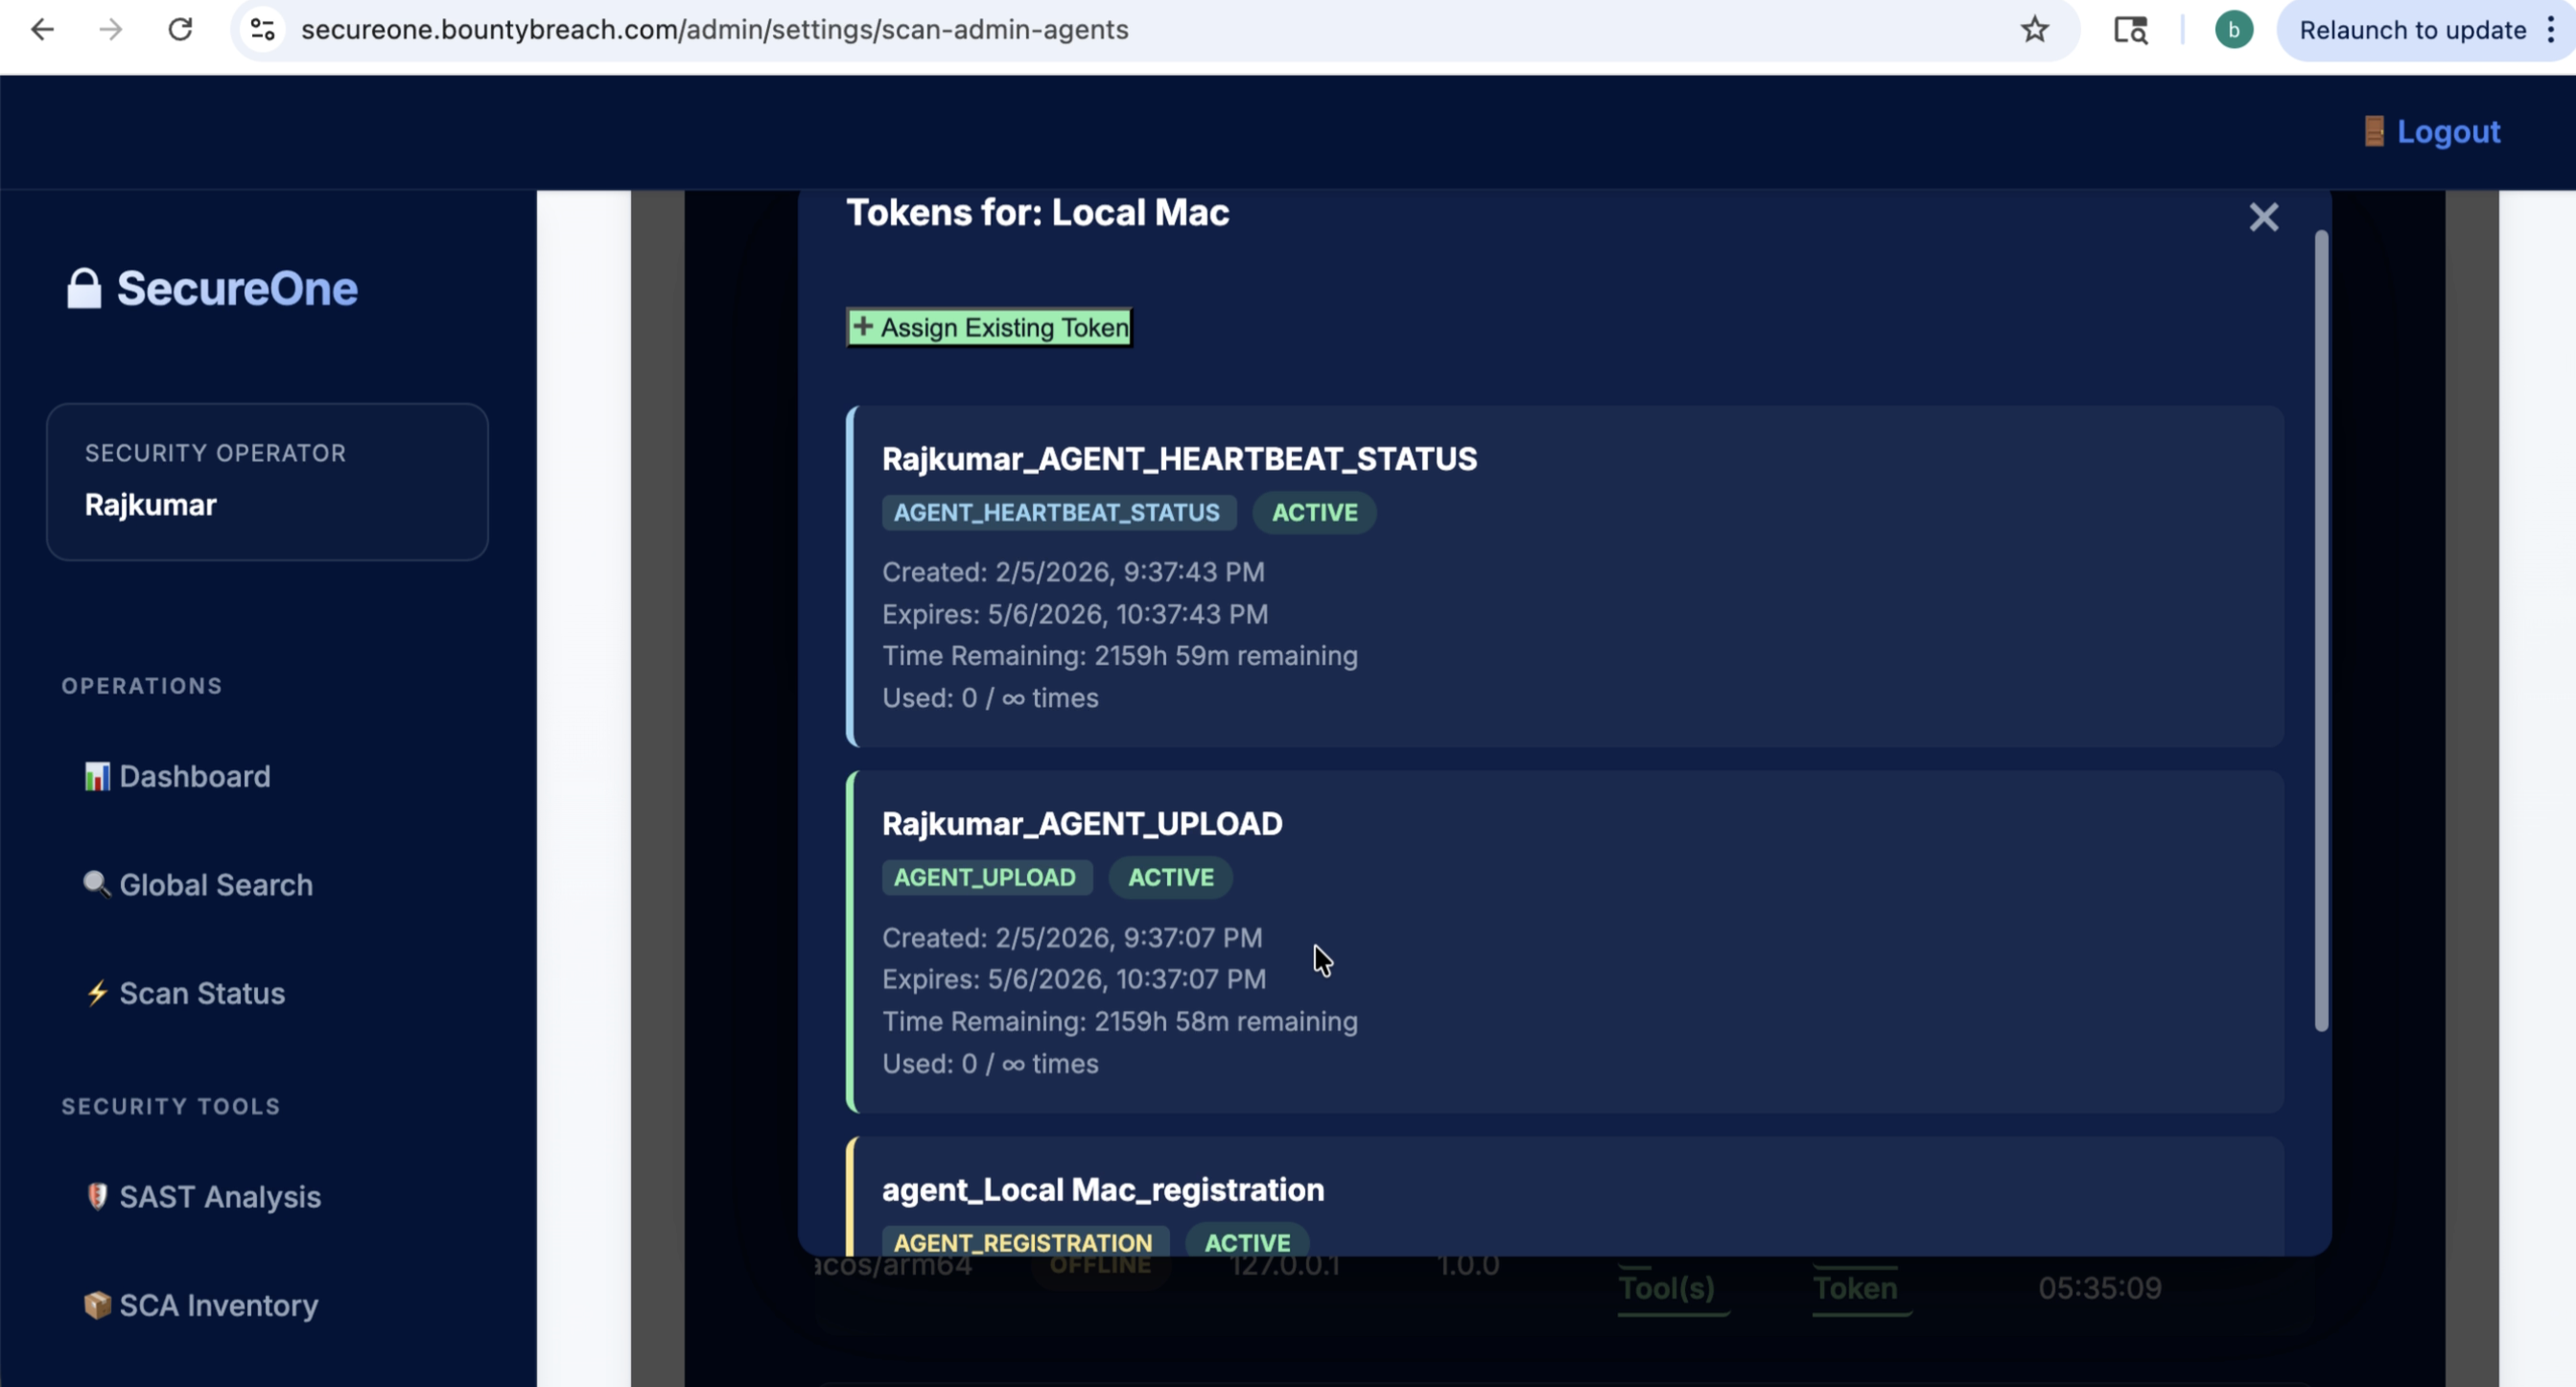
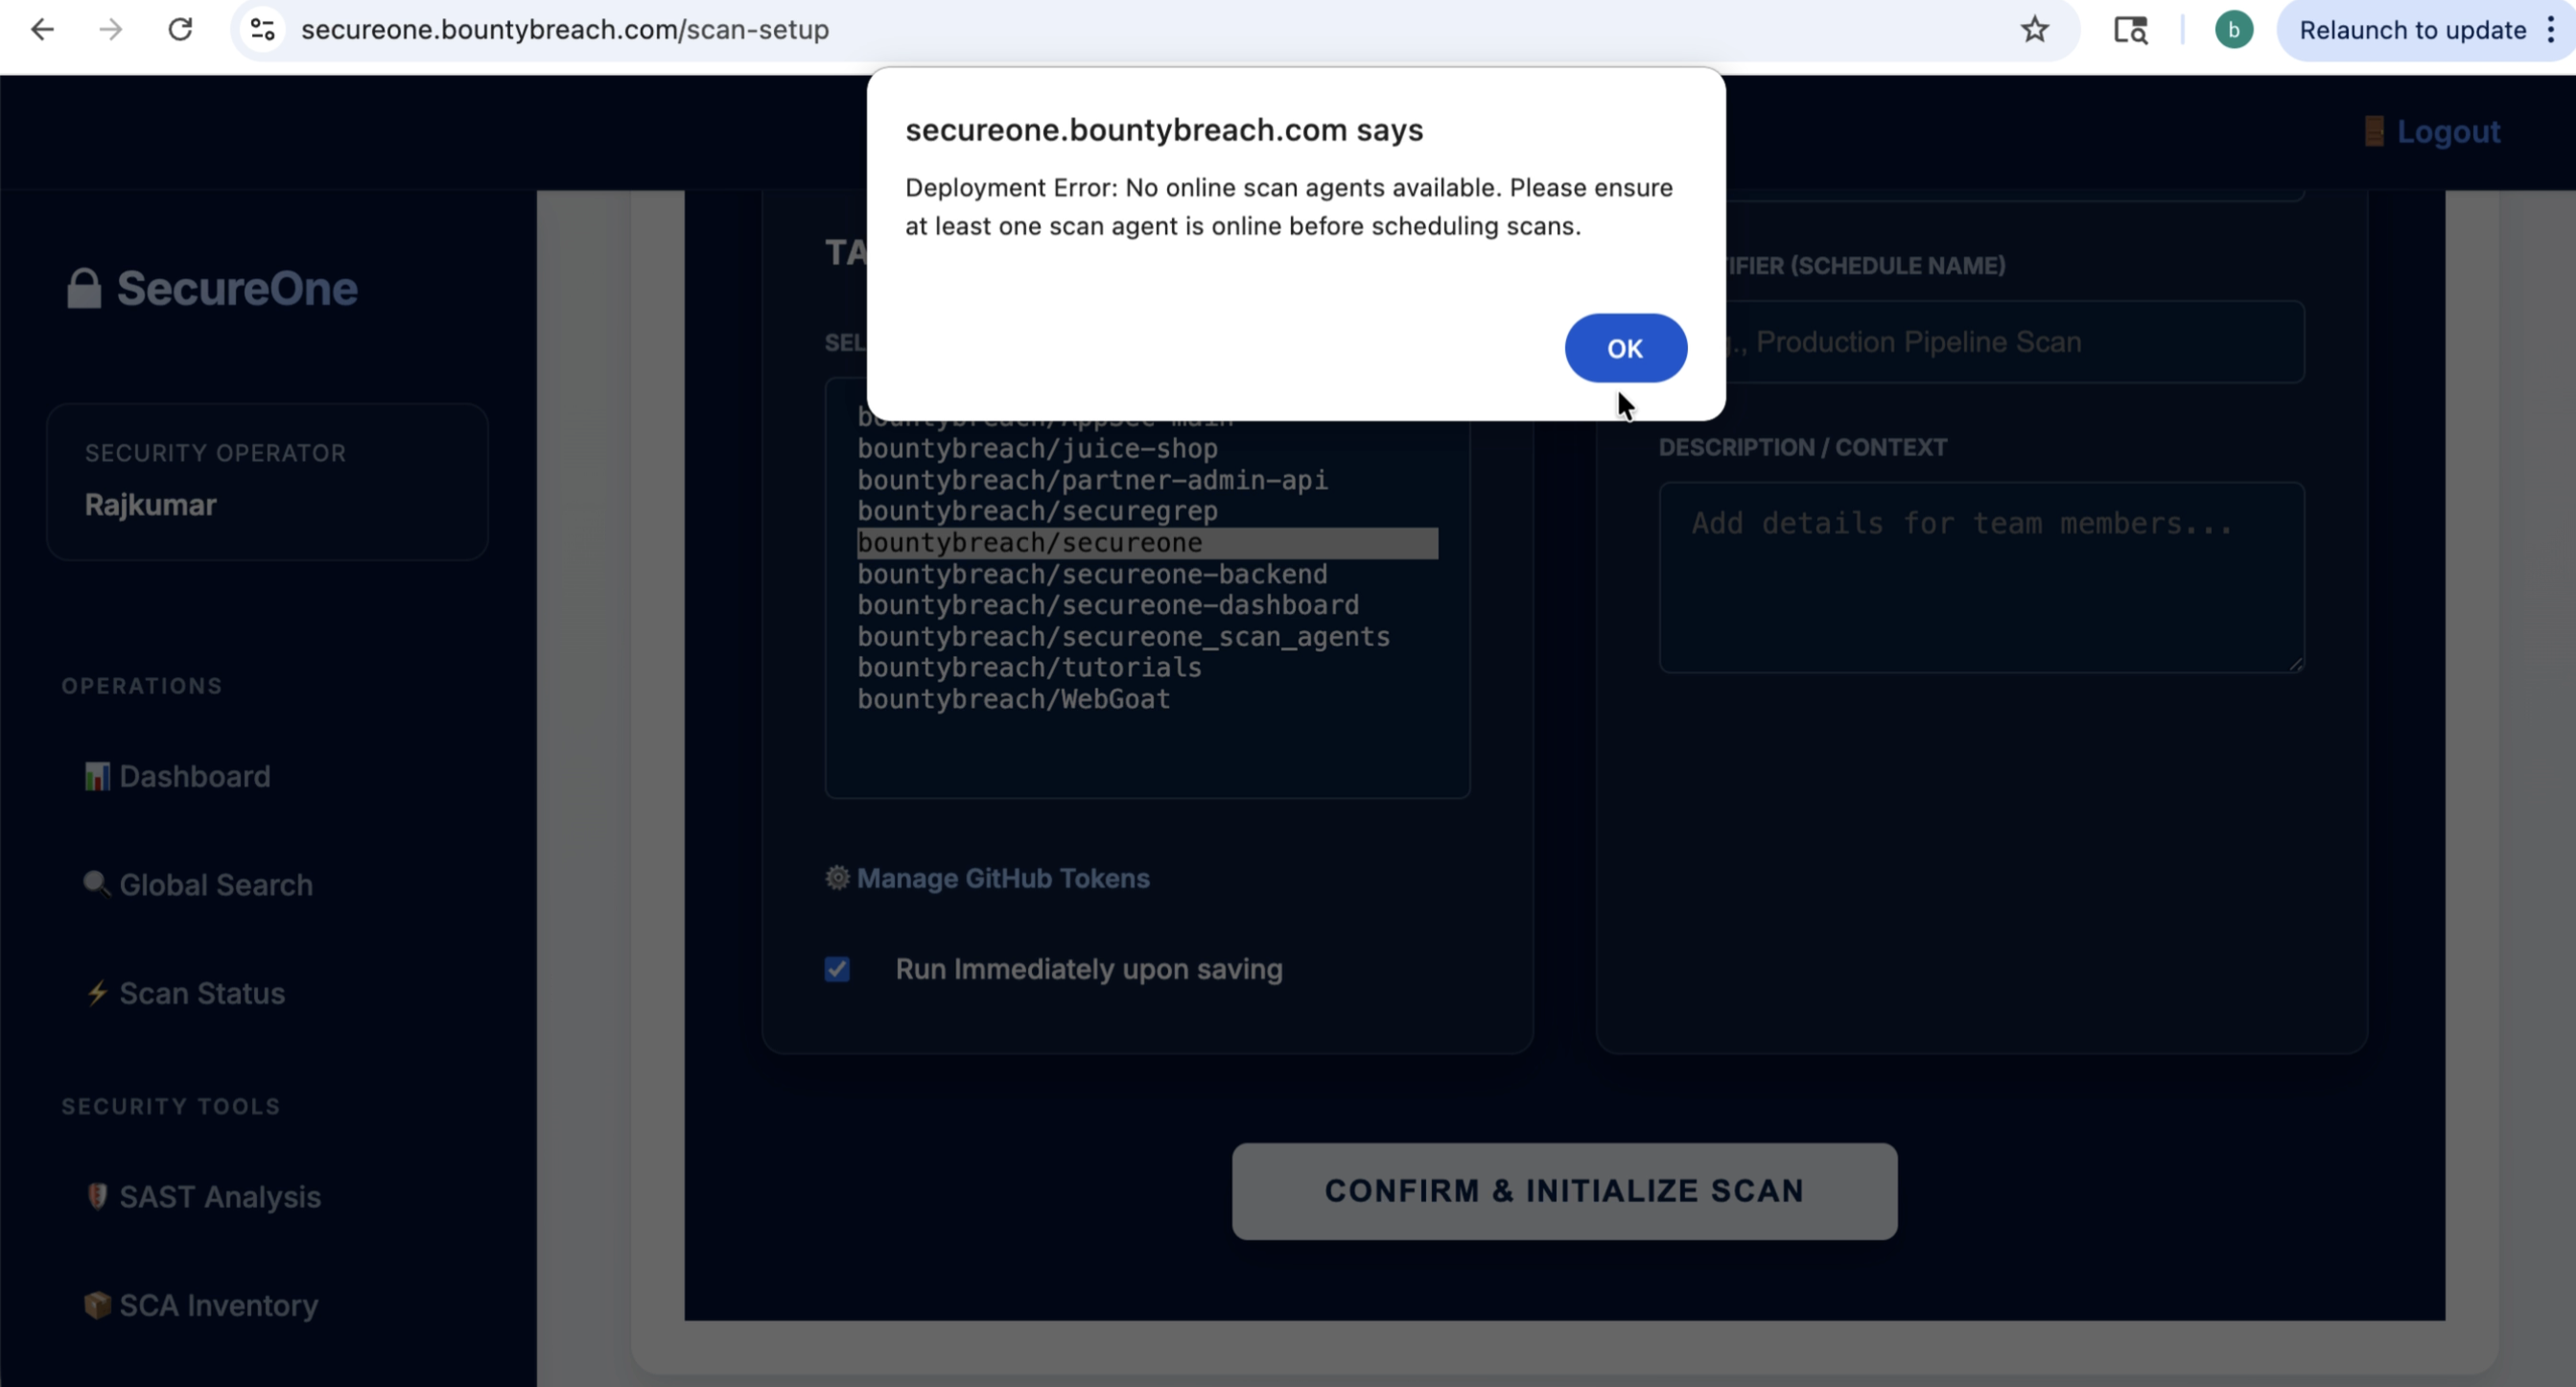
5) Register Scan Agent
- Open Agents and generate registration/upload/heartbeat tokens.
- Start the agent with your config and tokens.
- Confirm agent status changes to Online.
- Validate tool image settings (SAST/SCA/Secrets/DAST) if required.
Tip: Start with one agent for onboarding, then scale per team/workspace.
 Step 15 screenshot
 Step 16 screenshot
 Step 17 screenshot
 Step 18 screenshot
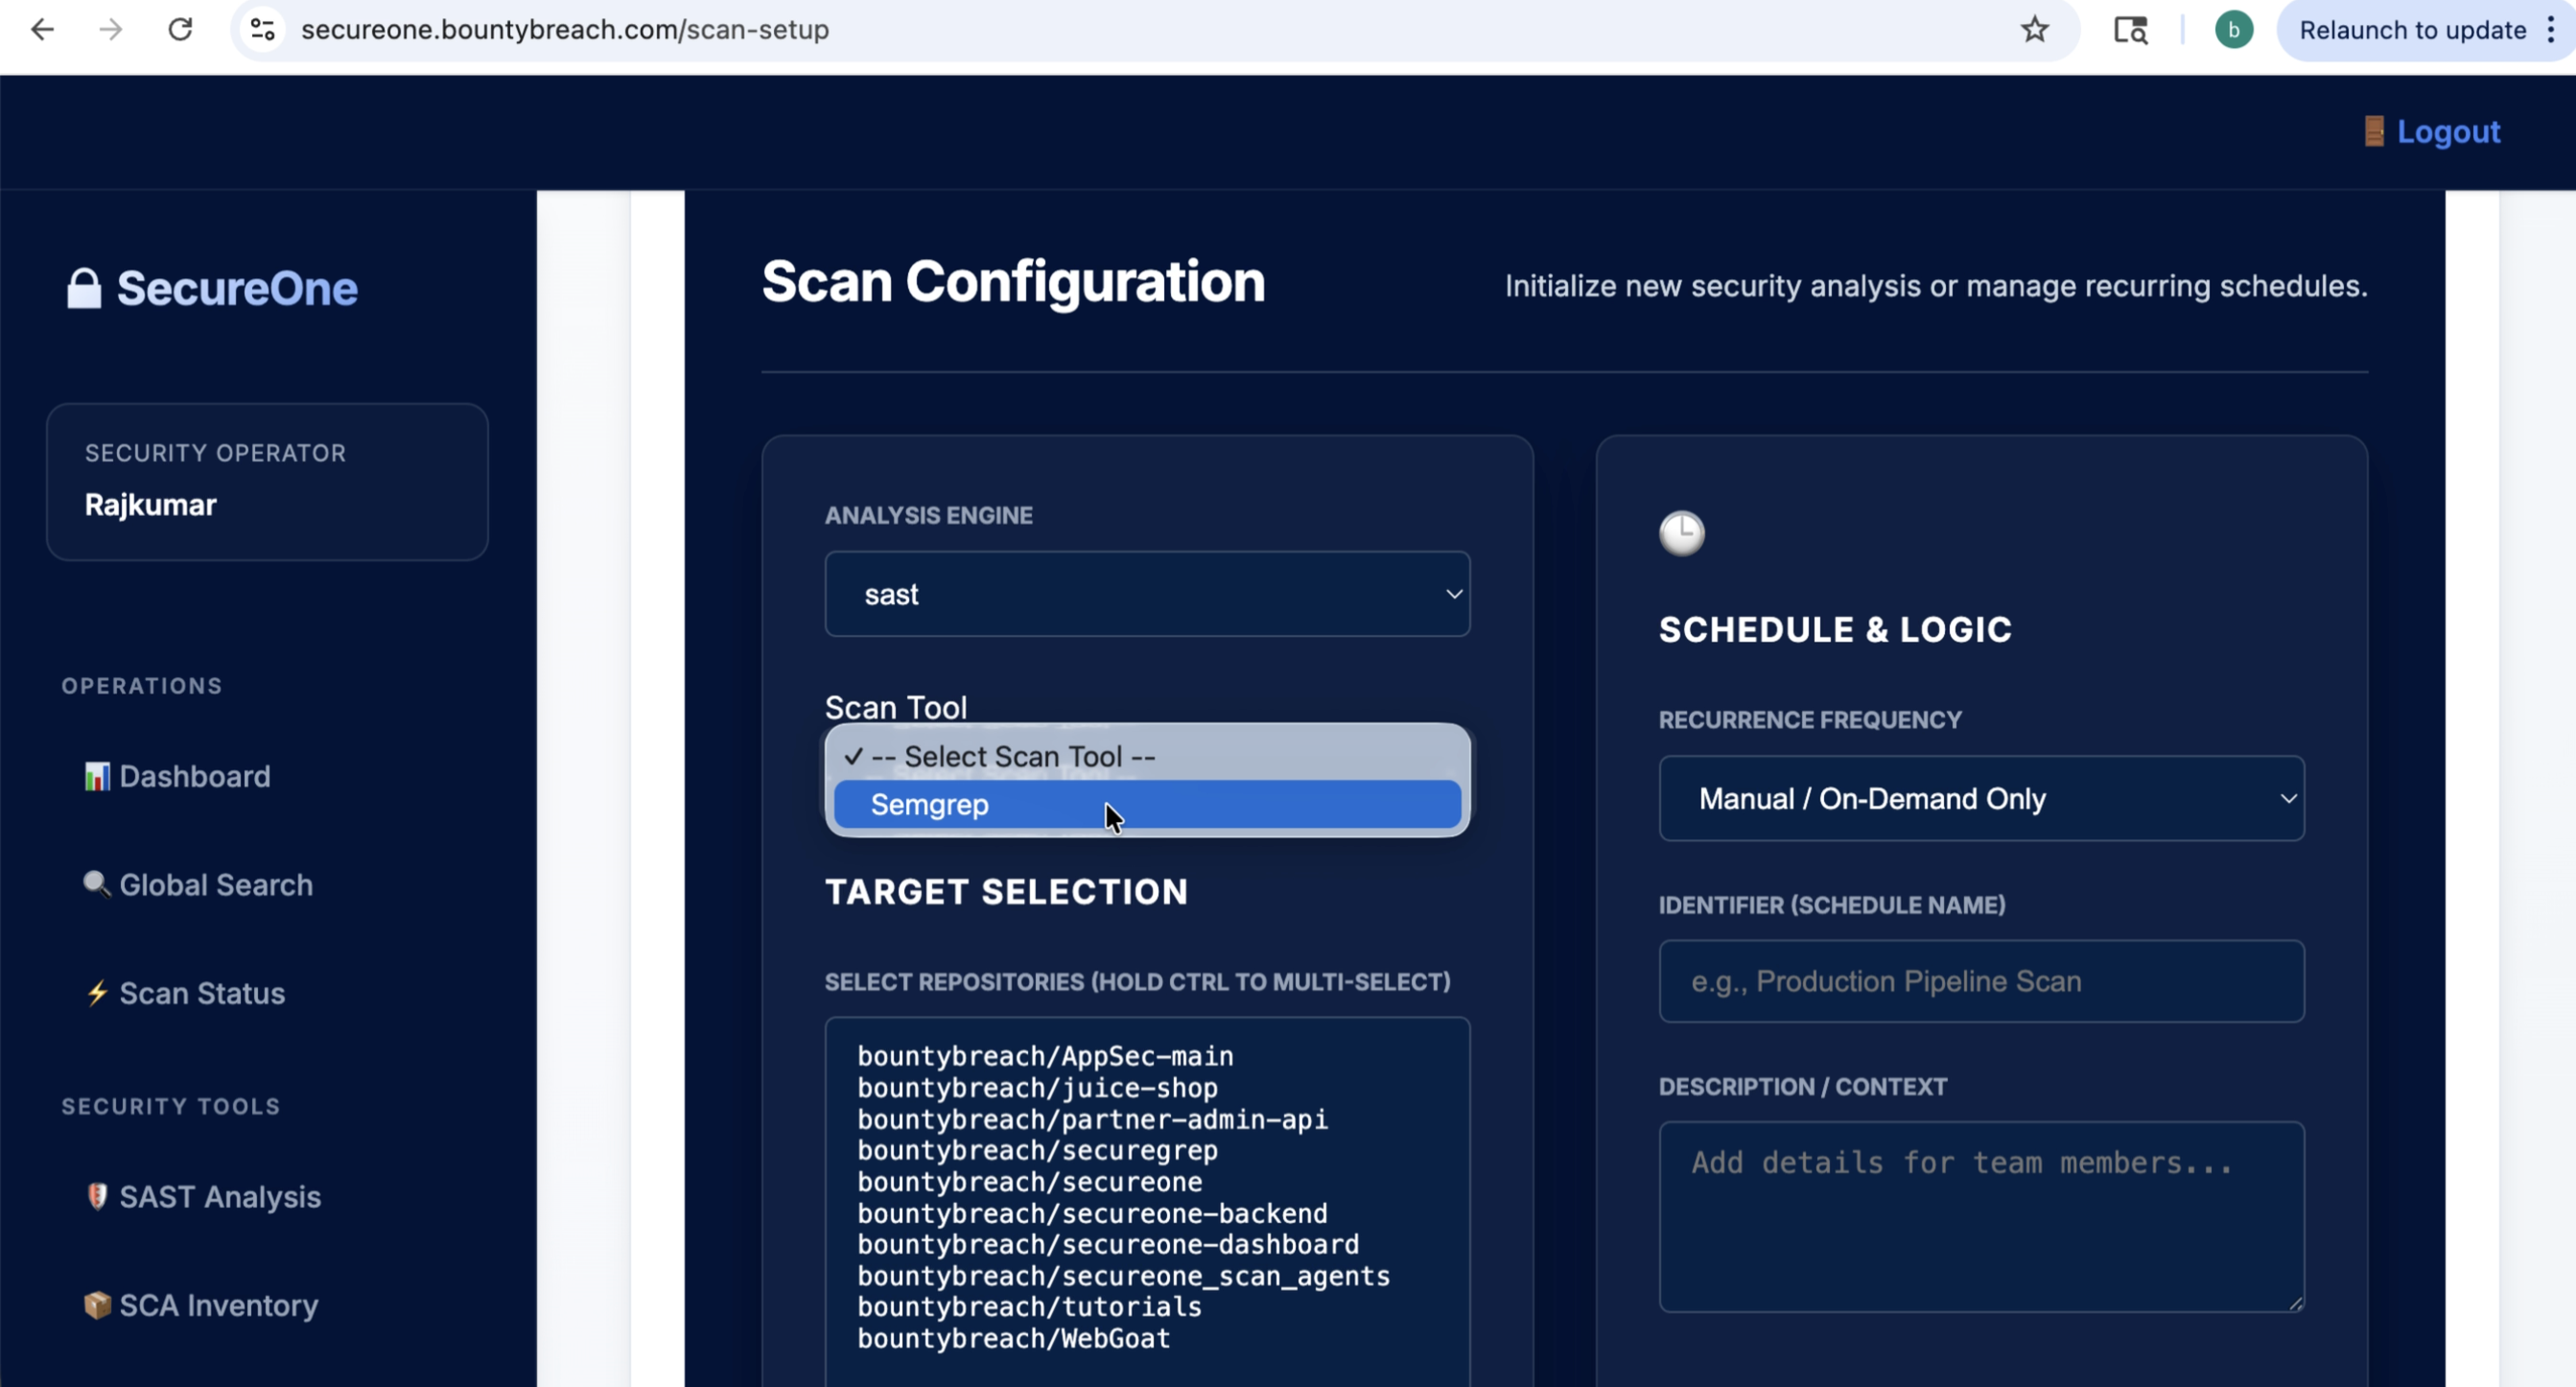
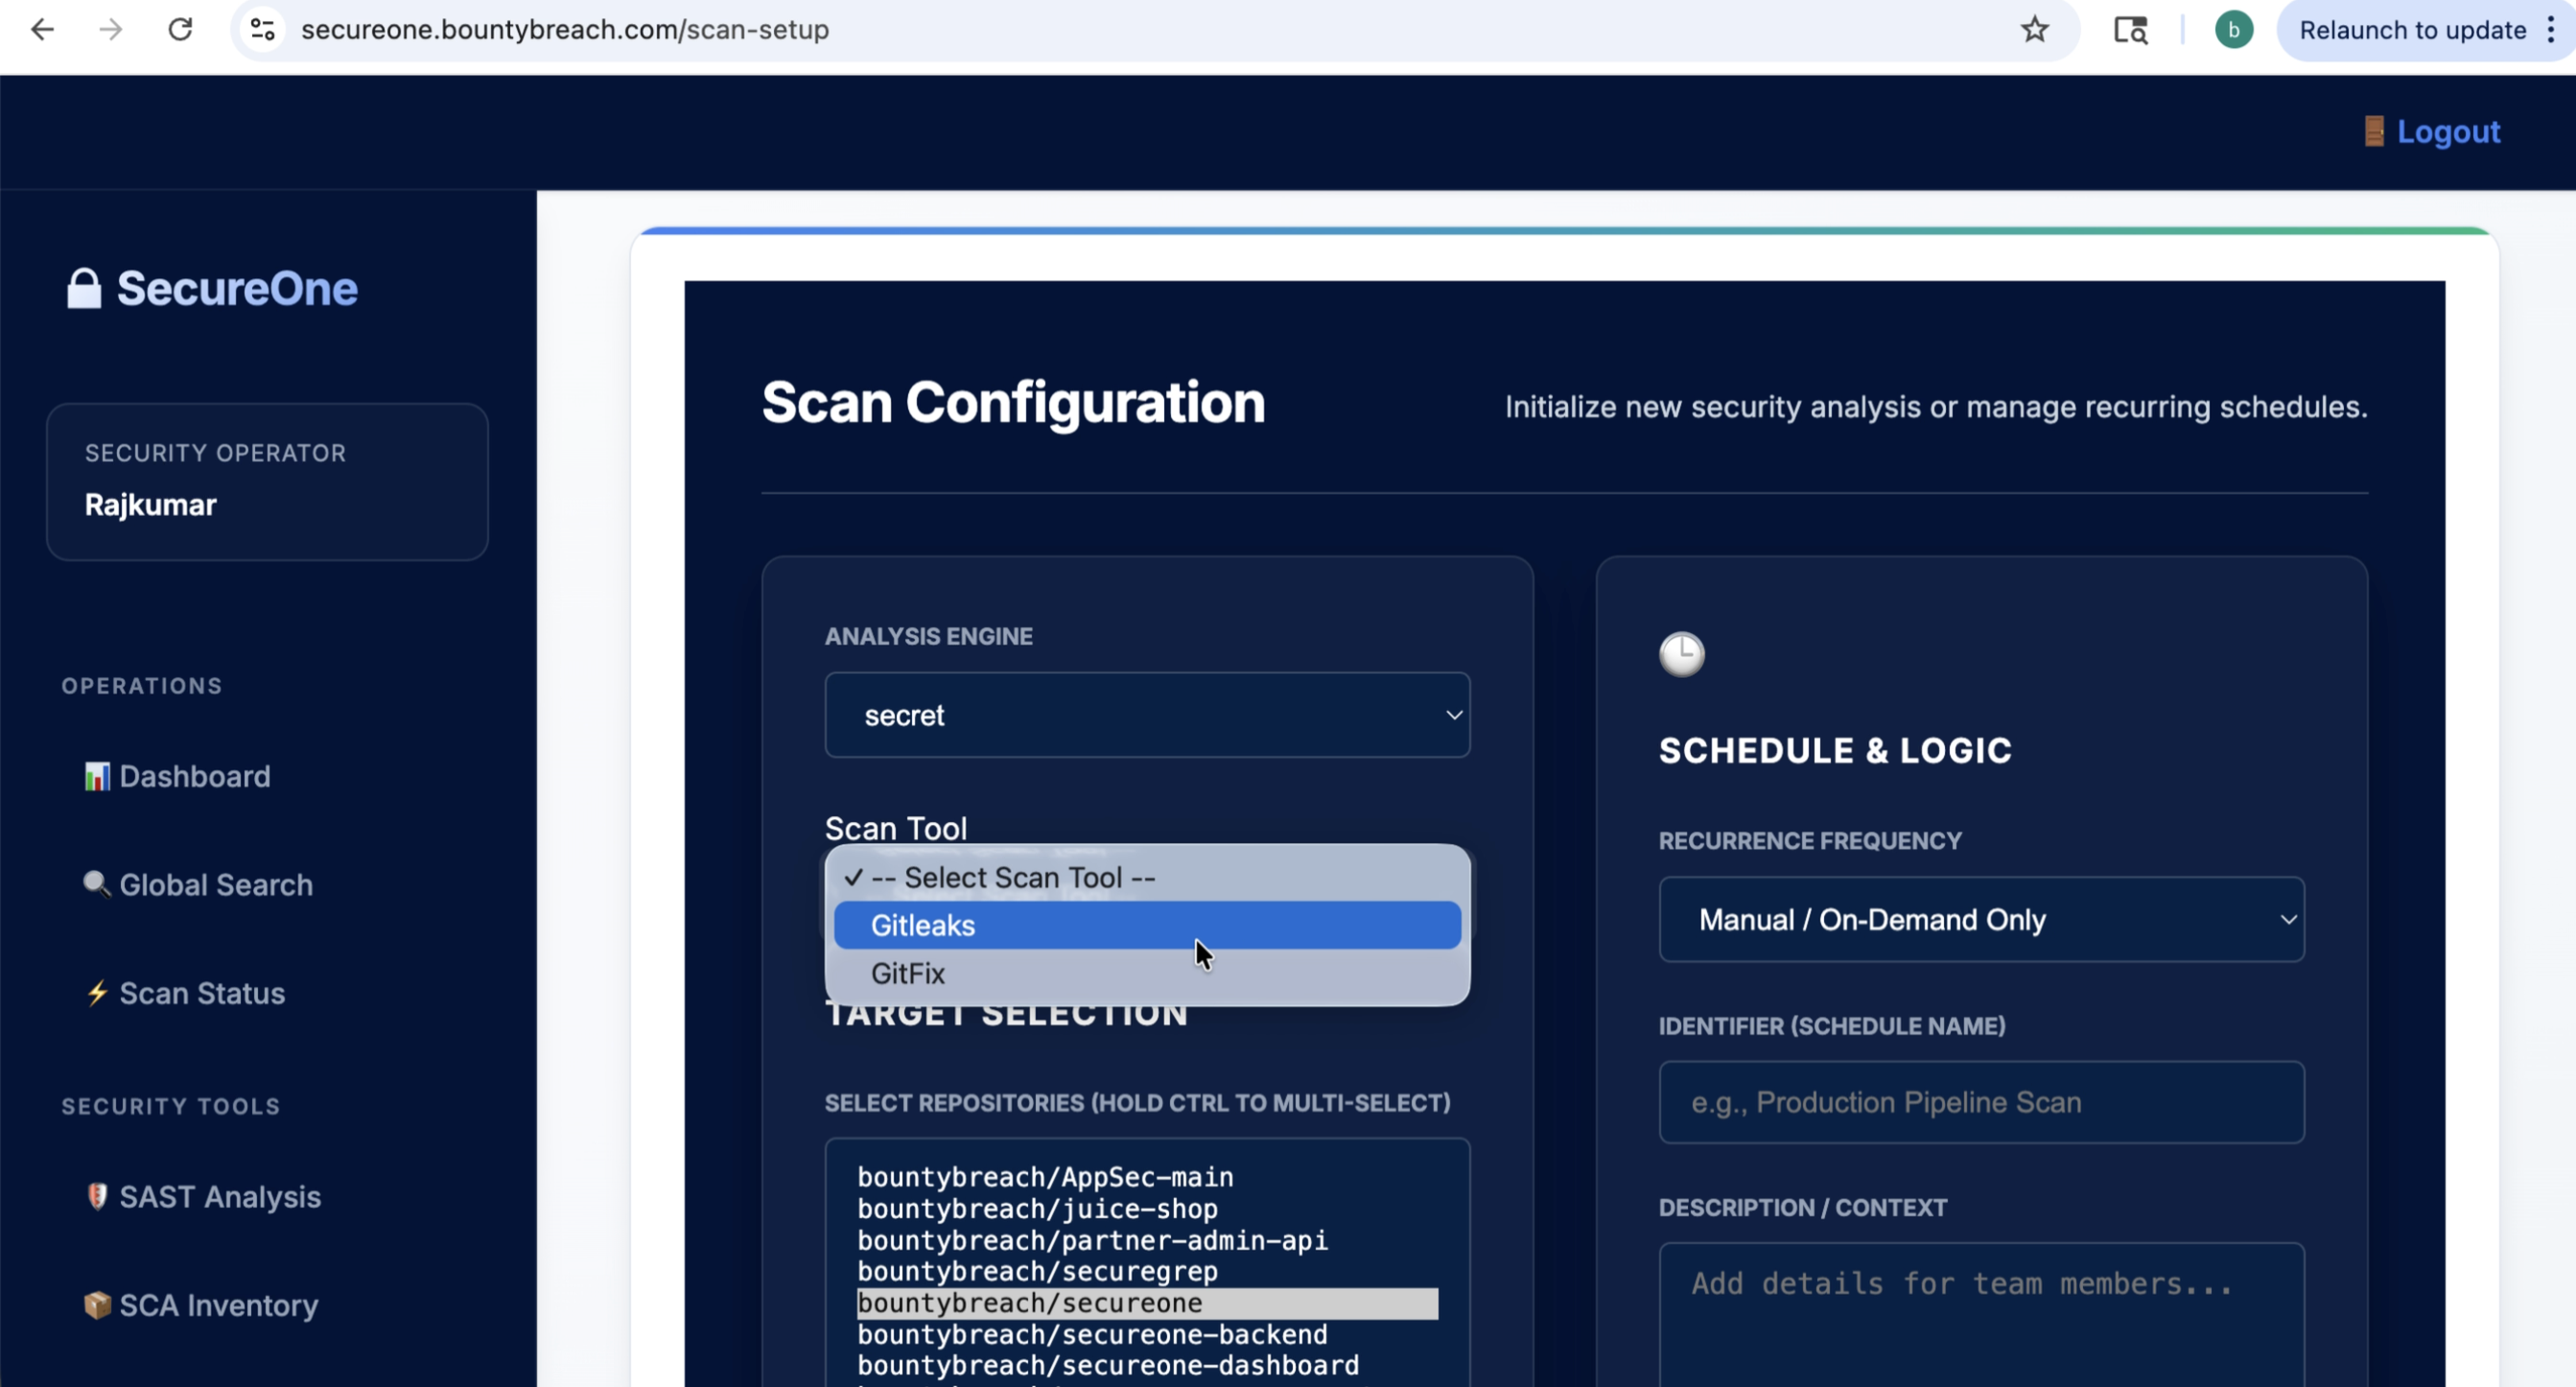
6) Configure Scan
- Open Scans → New Scan.
- Select repository, branch, and scan types (SAST/SCA/Secrets/DAST).
- Choose policy thresholds (e.g., fail on critical findings).
- Save as a reusable template if your team runs similar scans.
 Step 19 screenshot
 Step 20 screenshot
 Step 21 screenshot
 Step 22 screenshot
 Step 23 screenshot
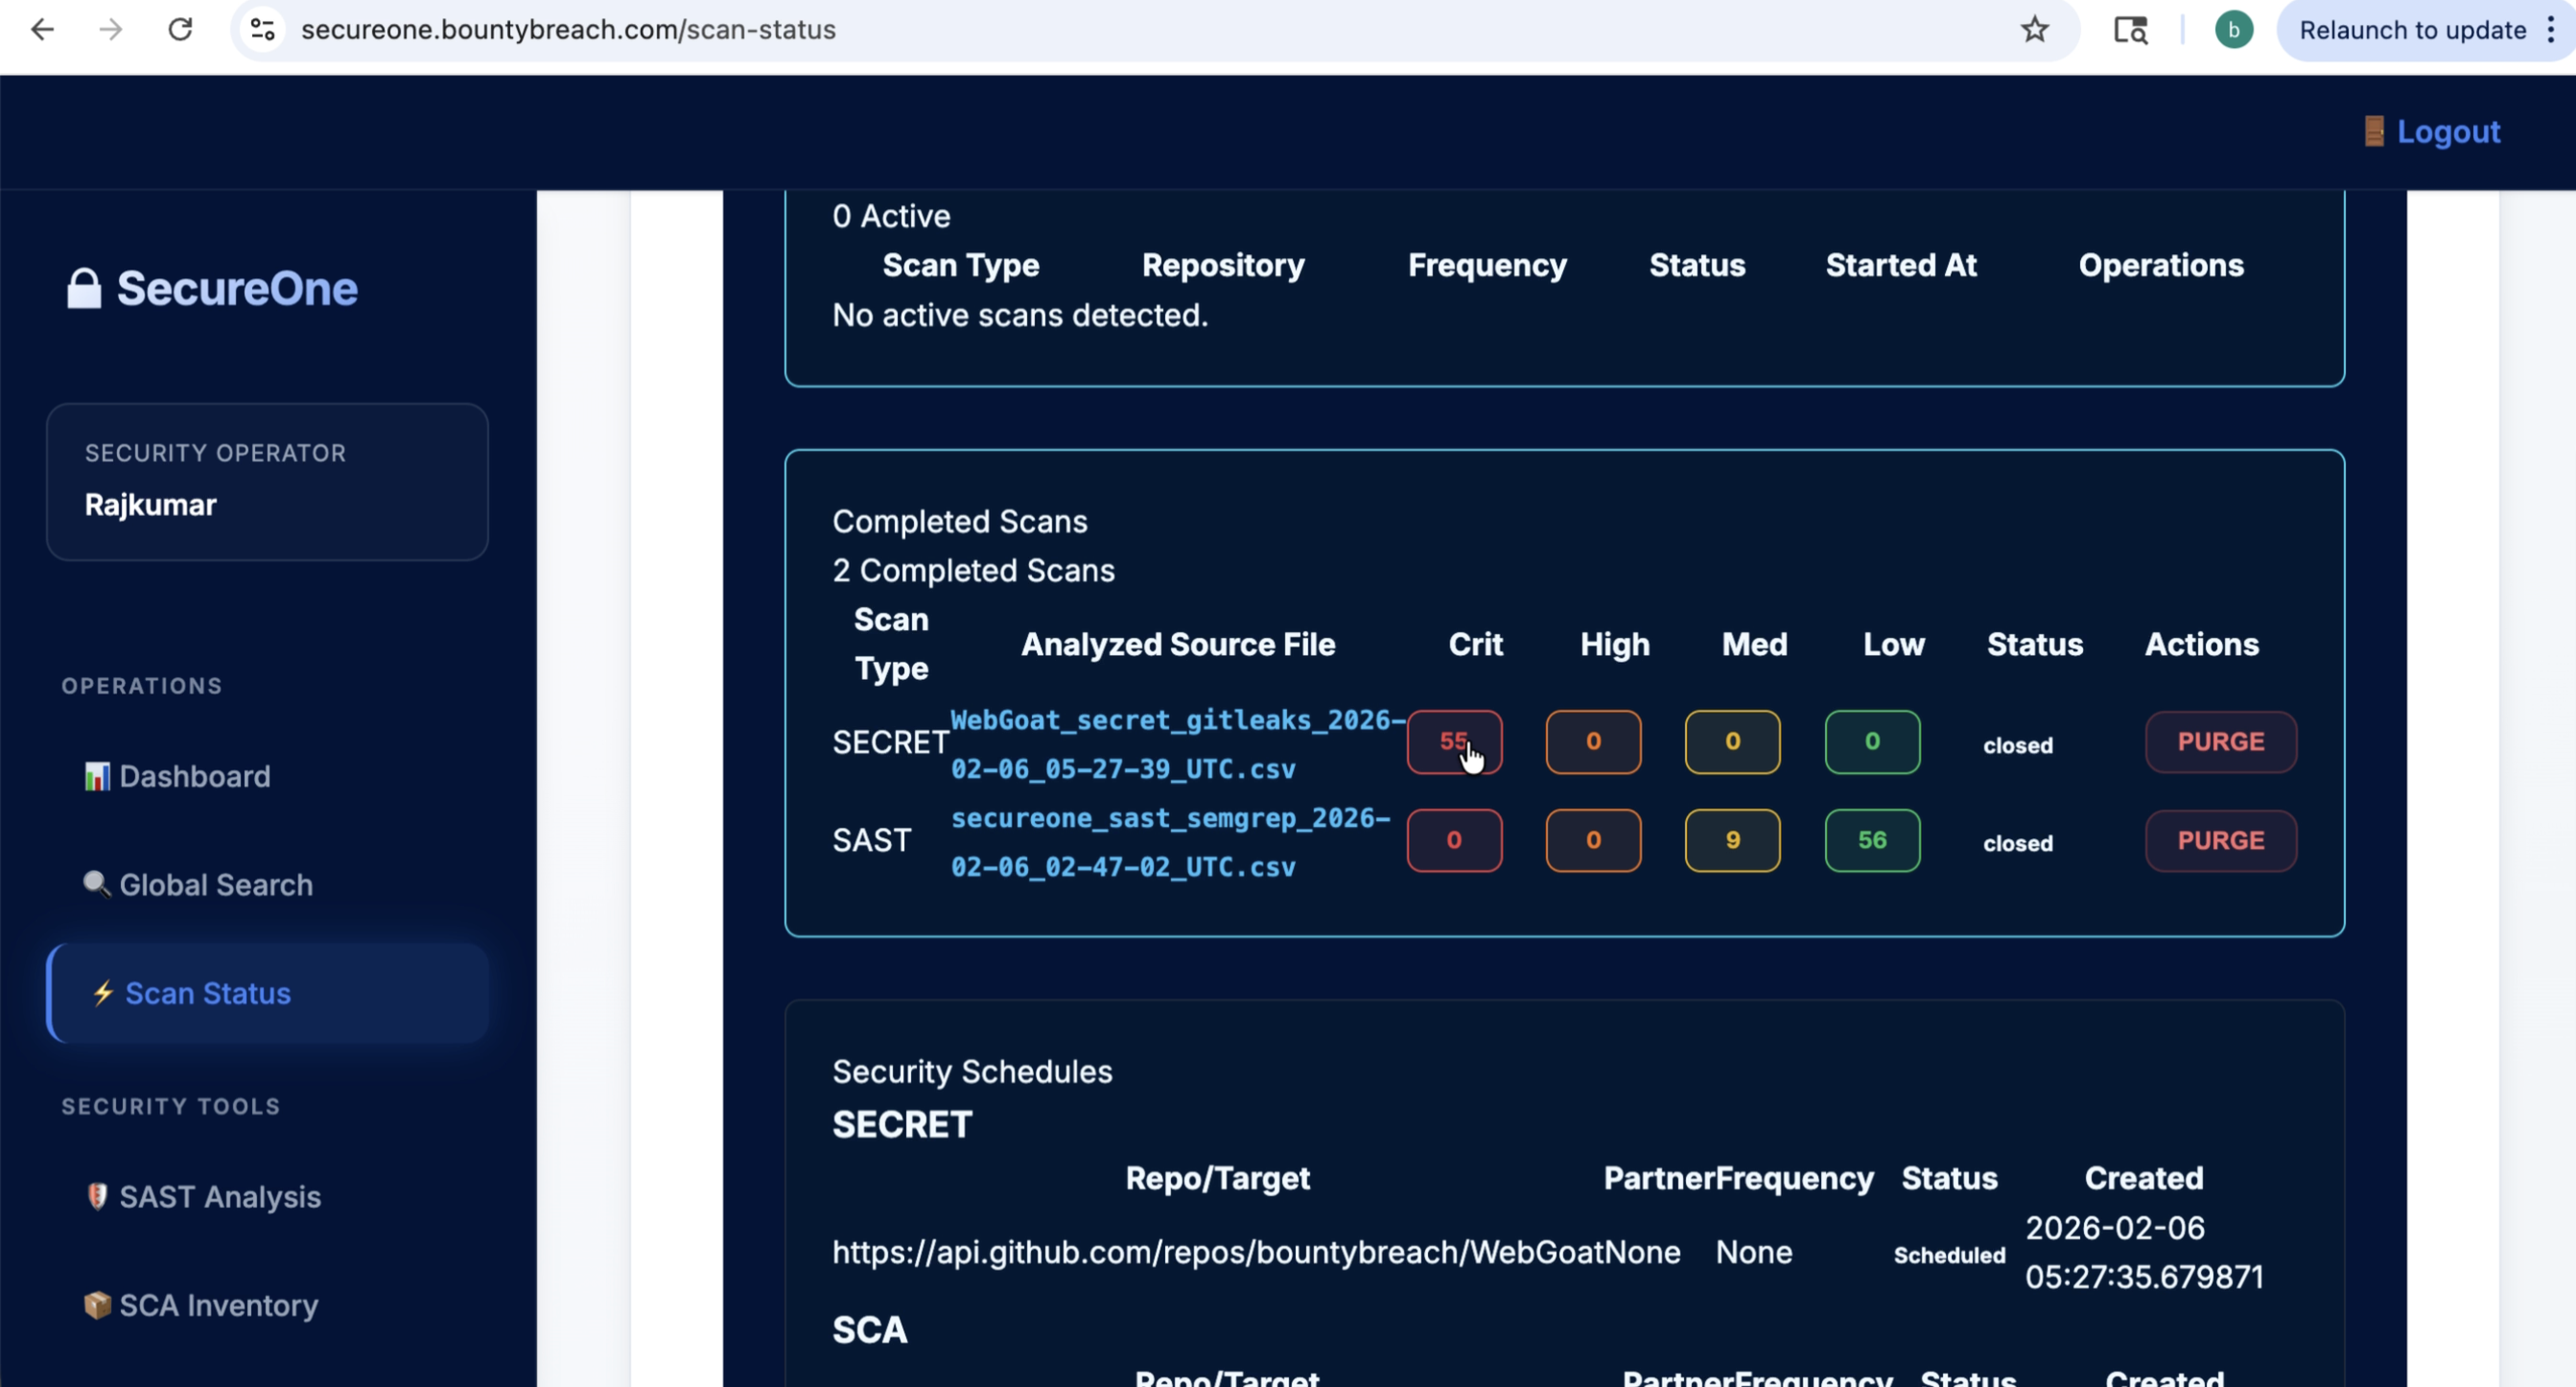
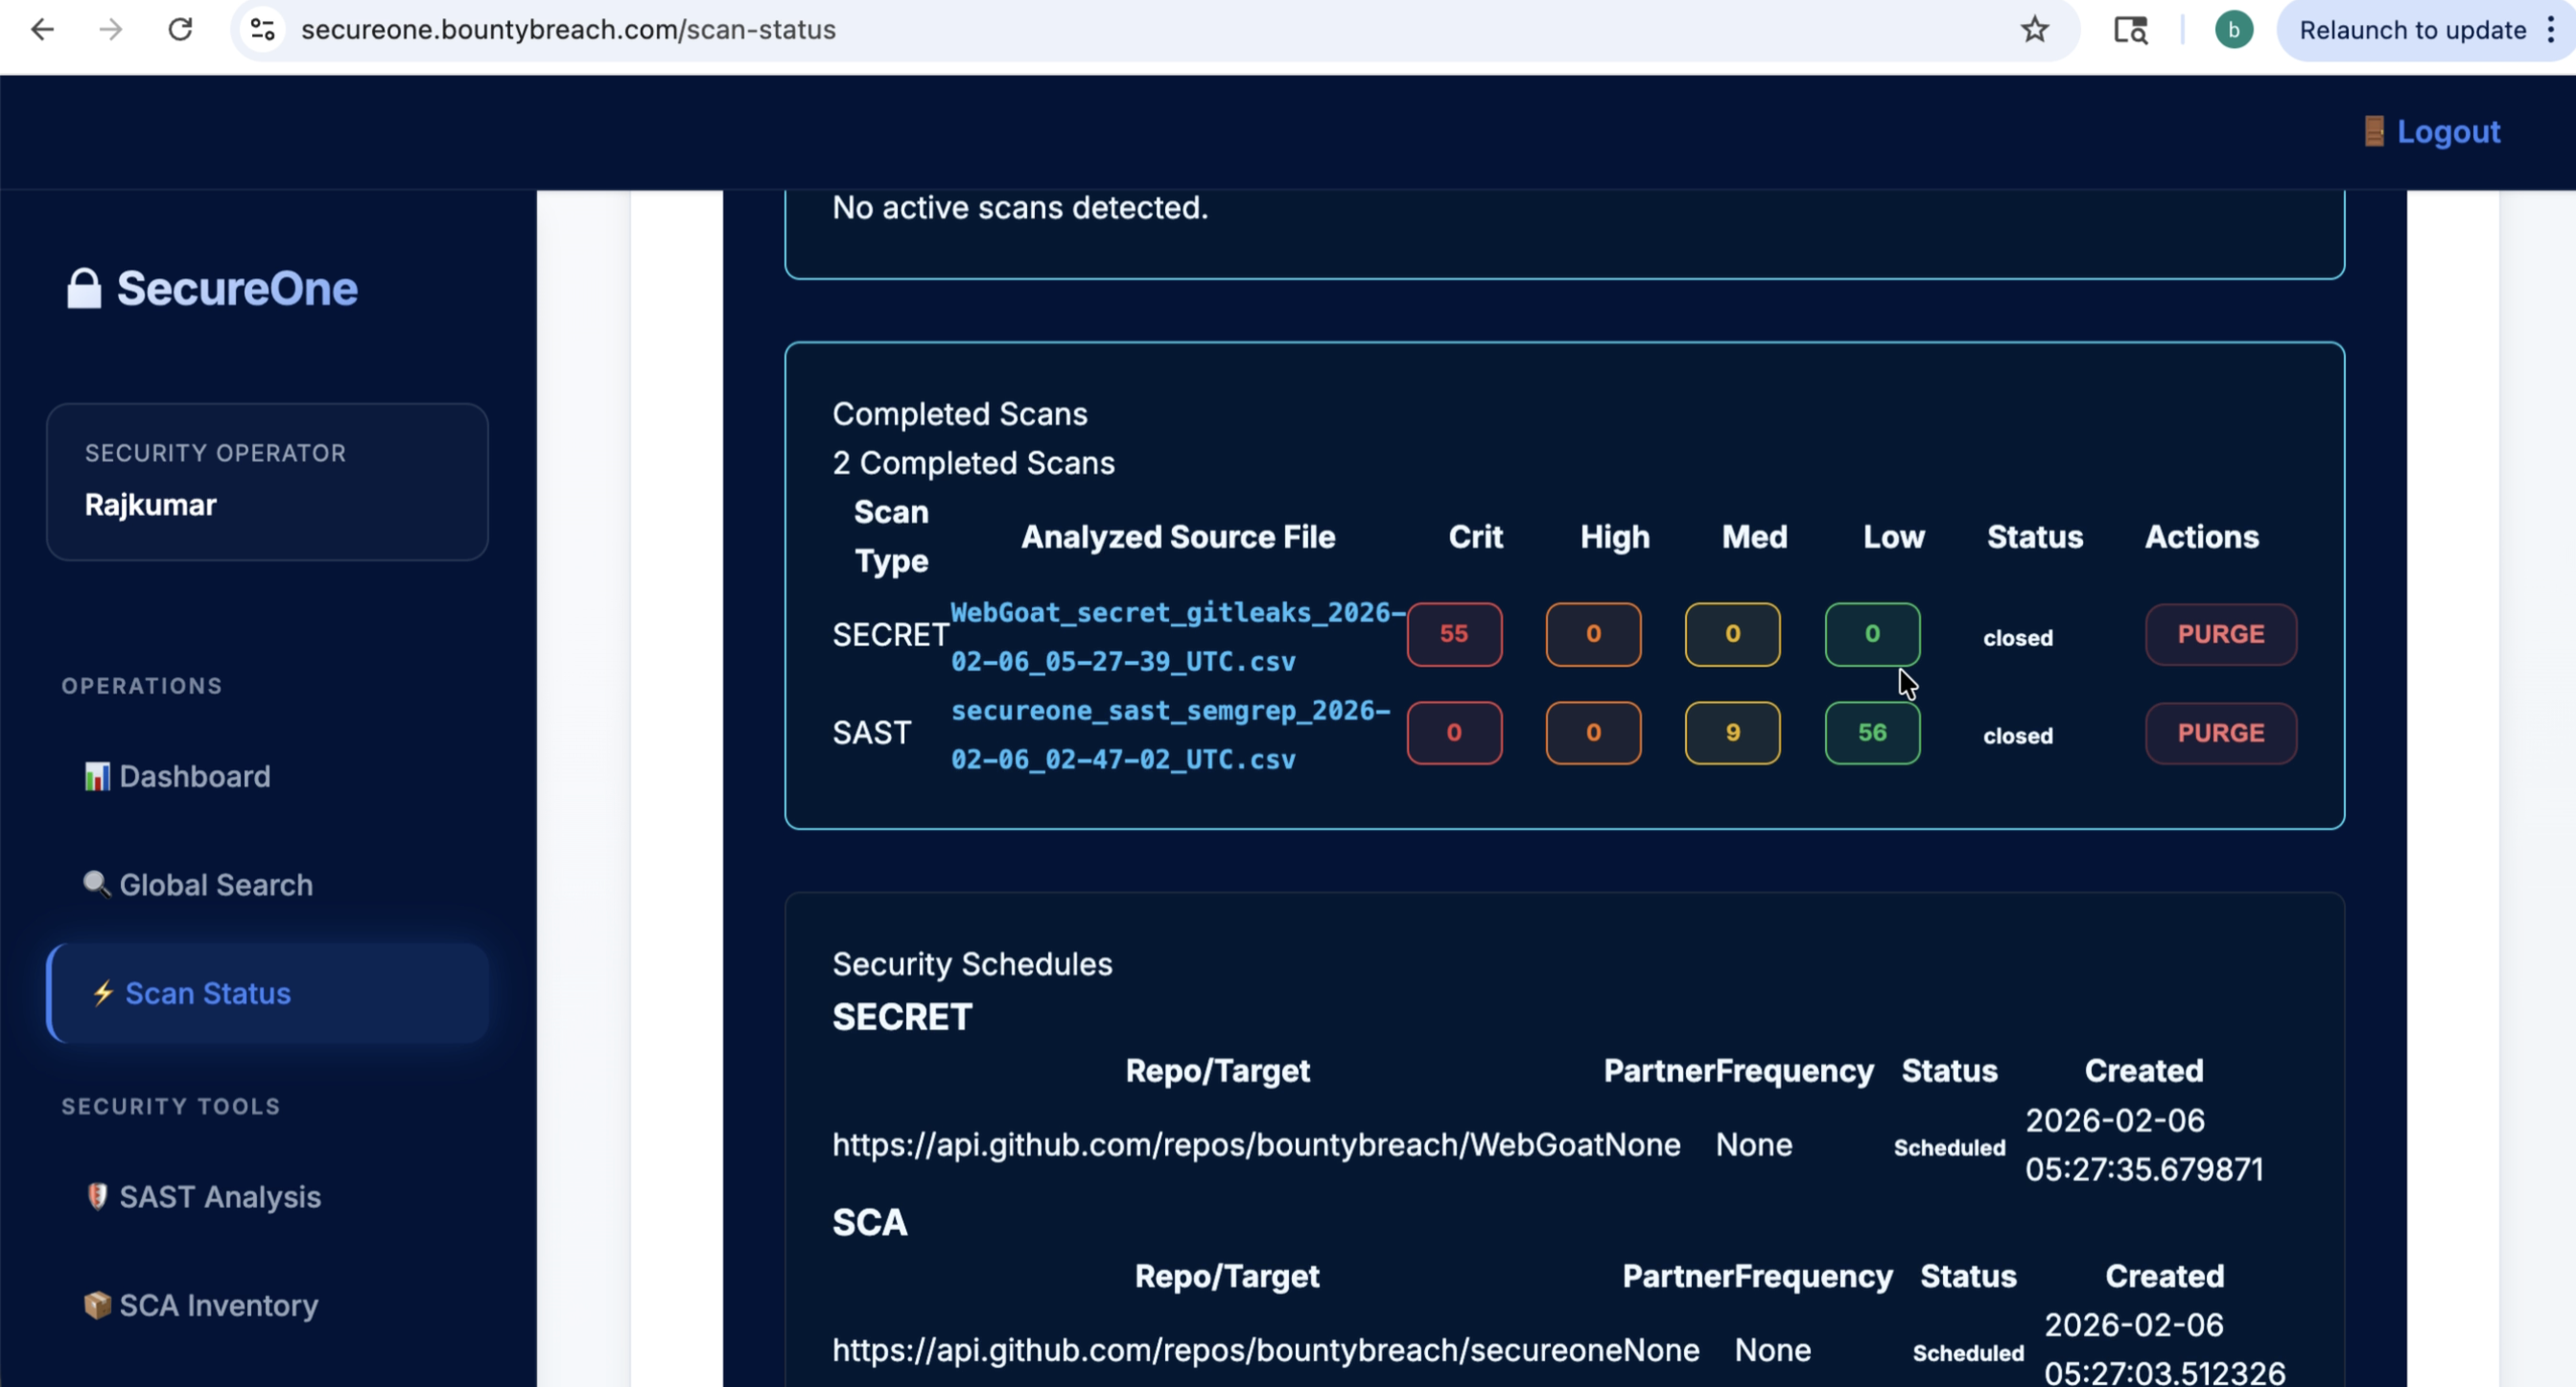
7) Run First Scan
- Trigger a manual scan from UI (or via pipeline if integrated).
- Monitor queue, agent assignment, and execution status.
- Wait until scan status shows Completed.
 Step 24 screenshot
 Step 25 screenshot
 Step 26 screenshot
 Step 27 screenshot
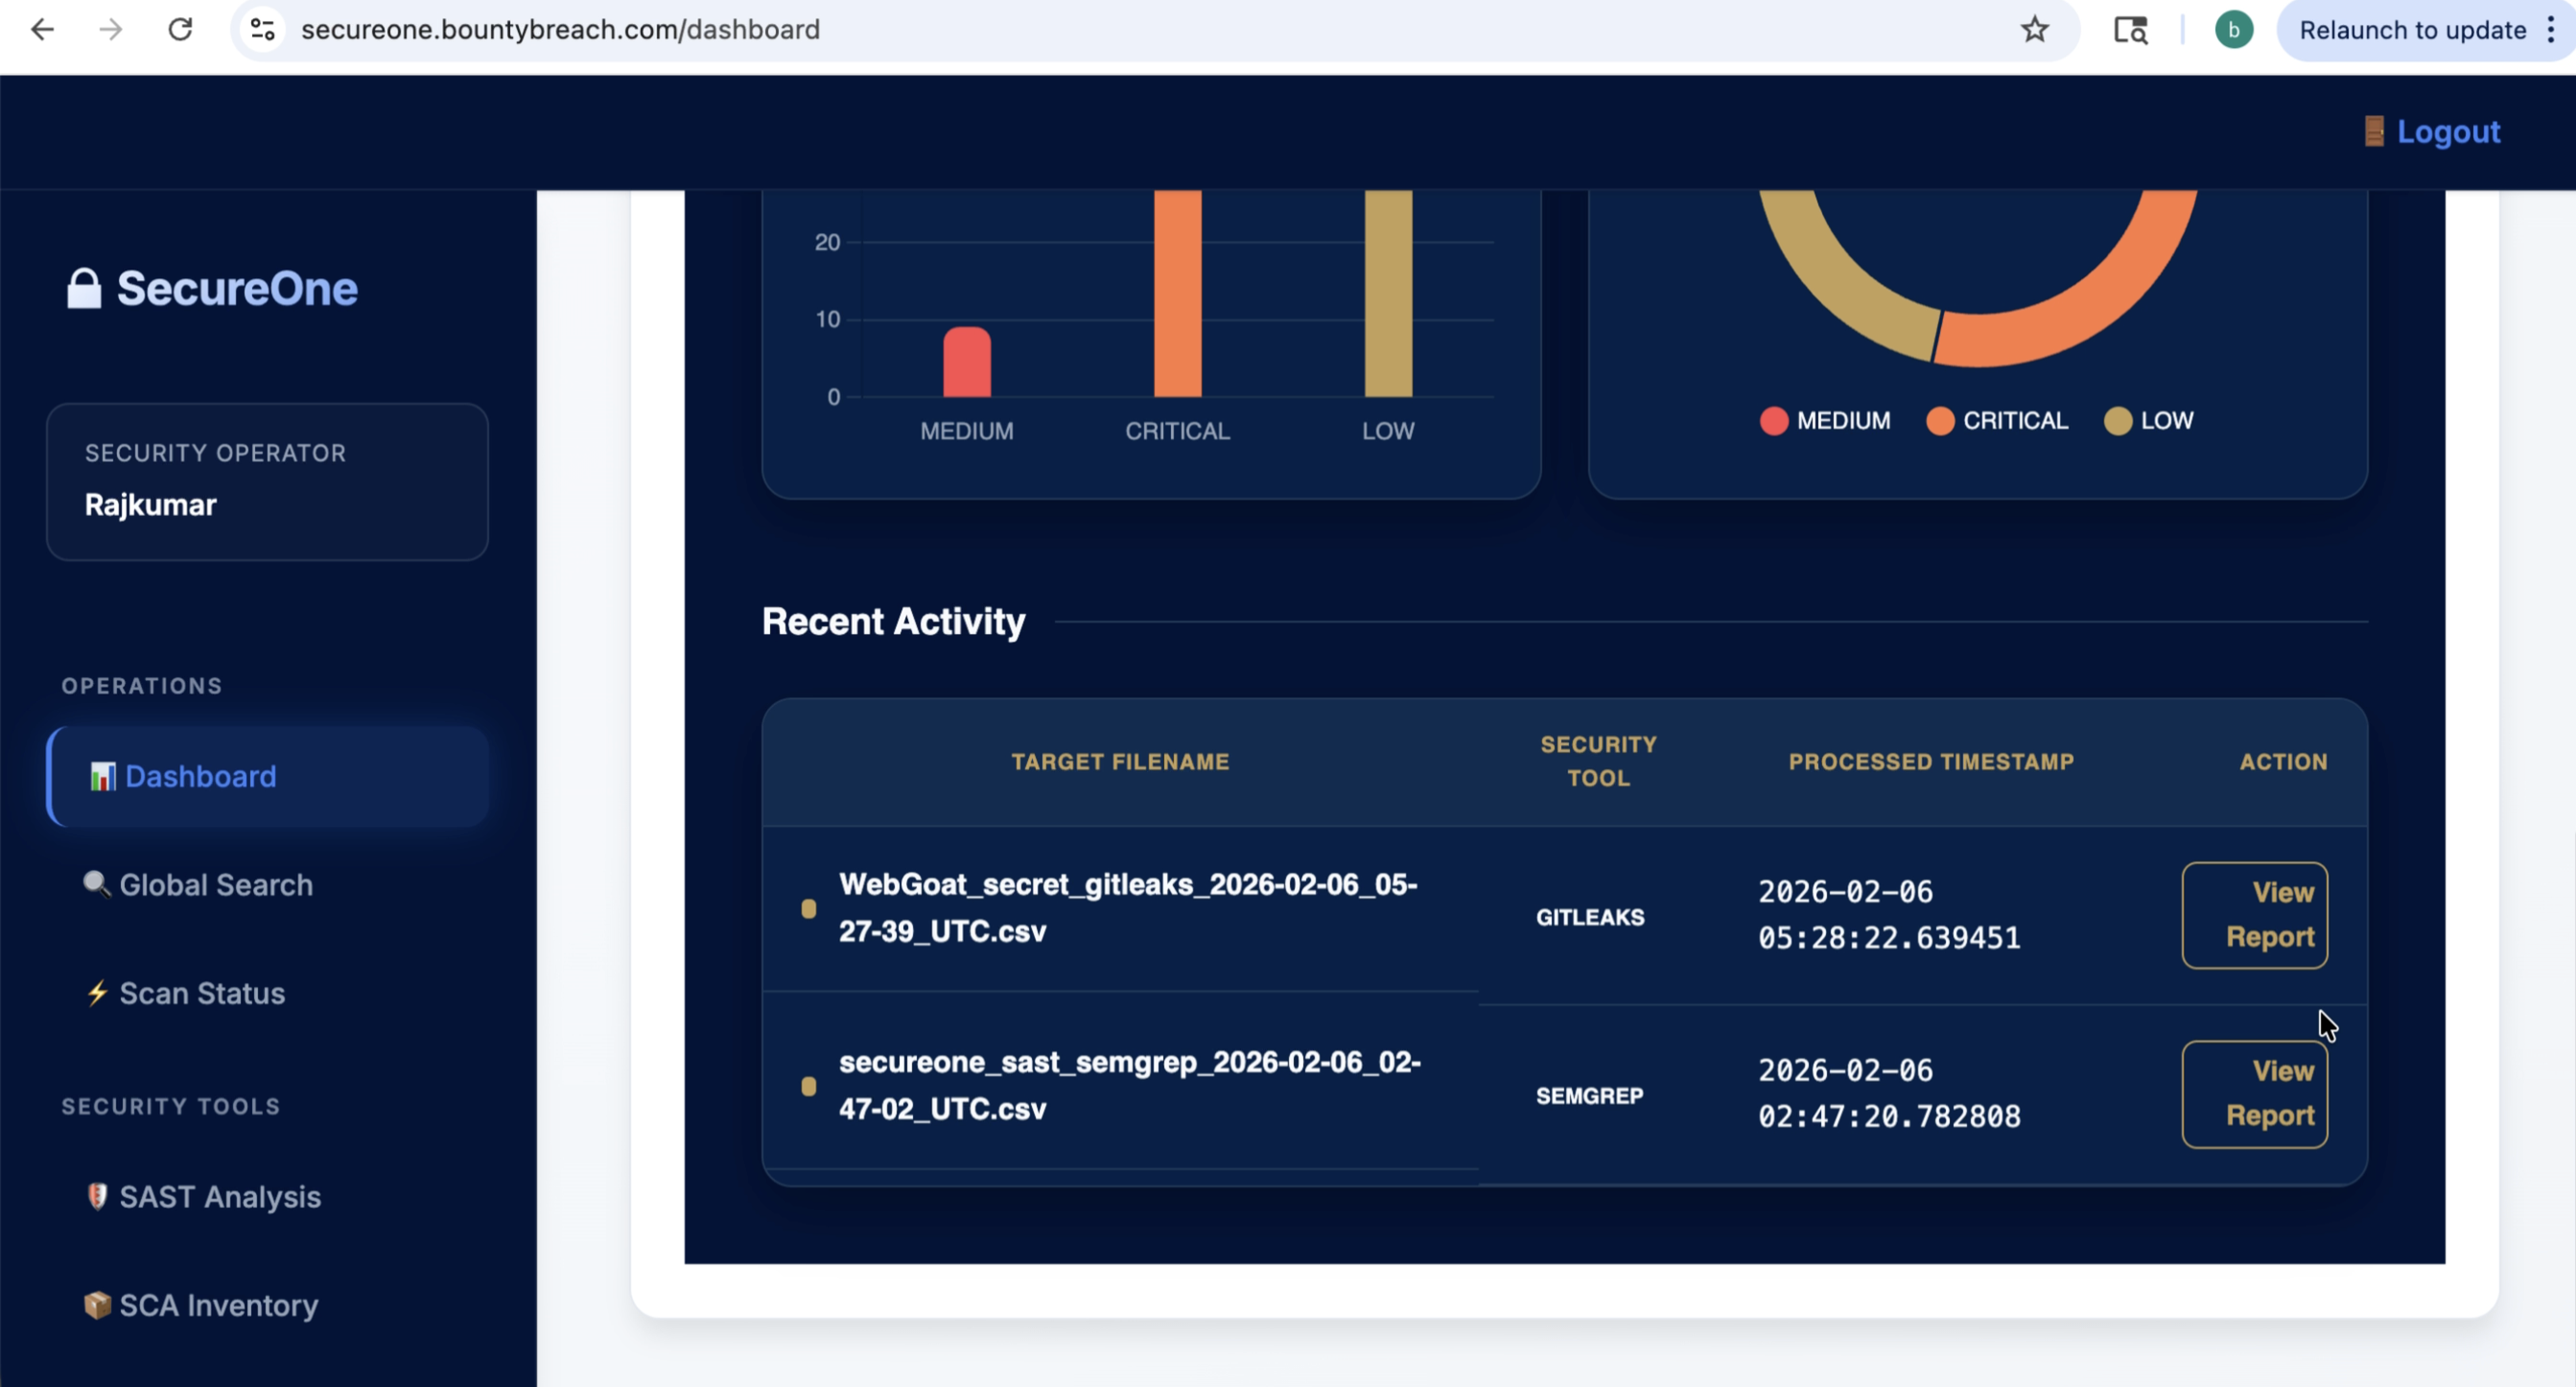
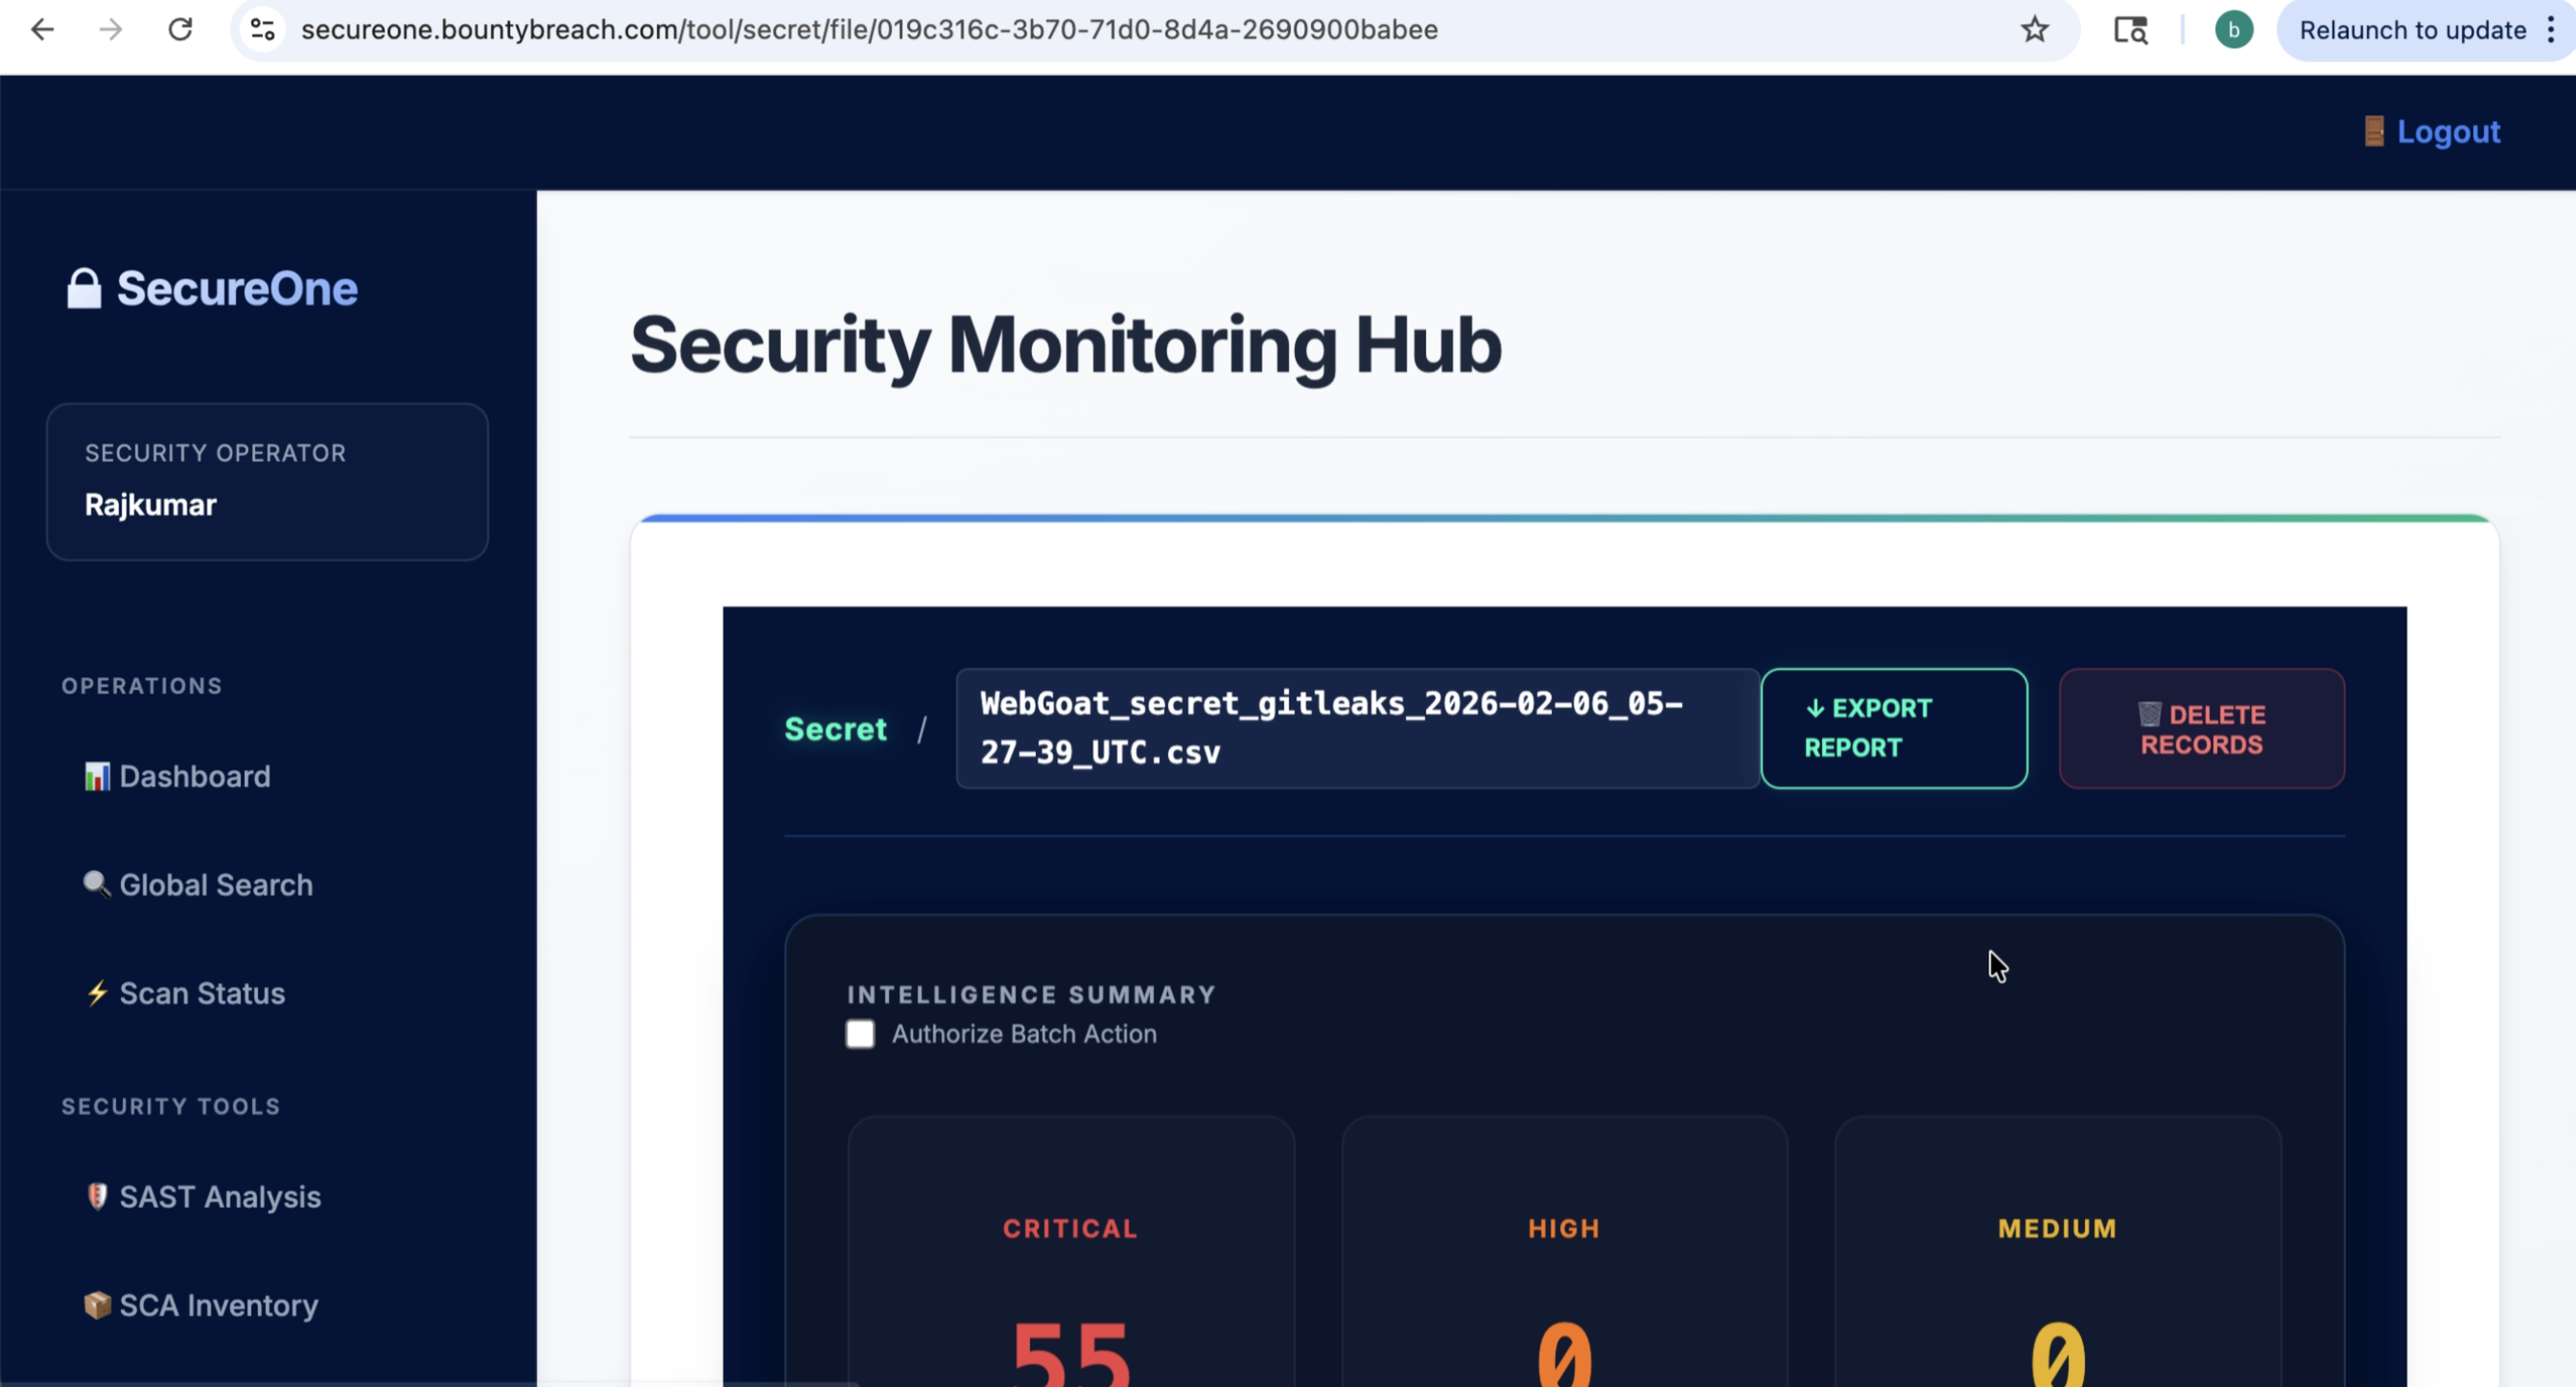
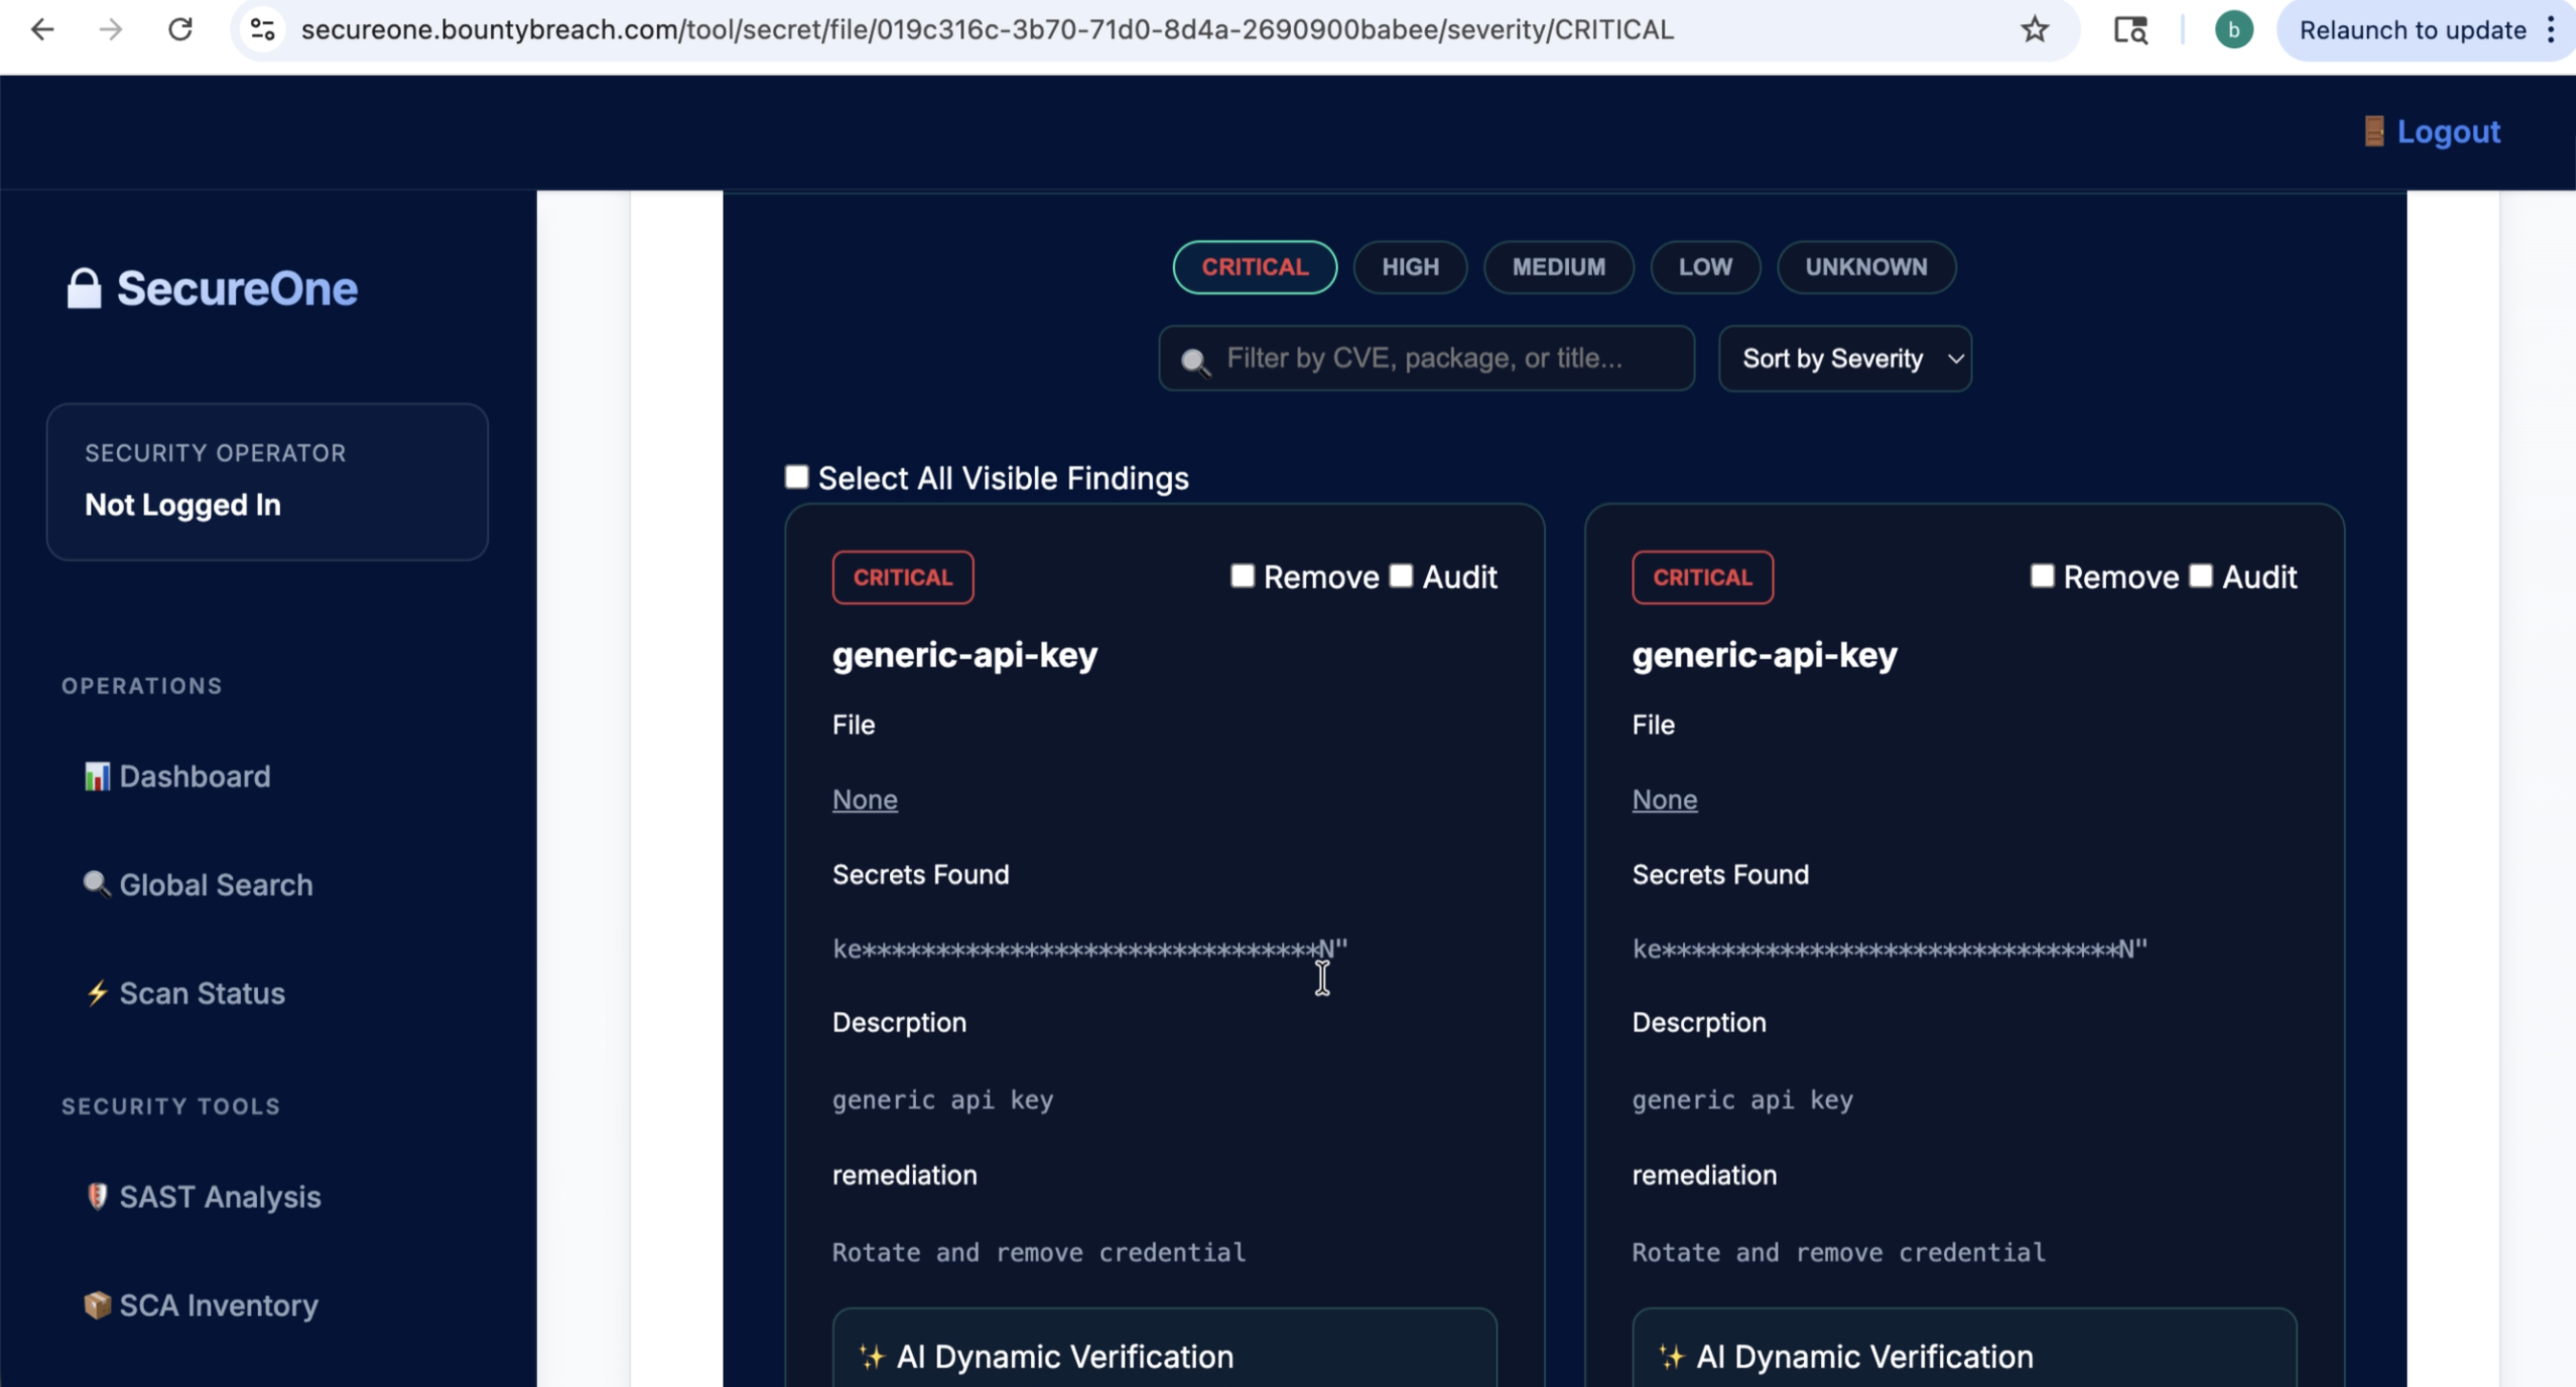
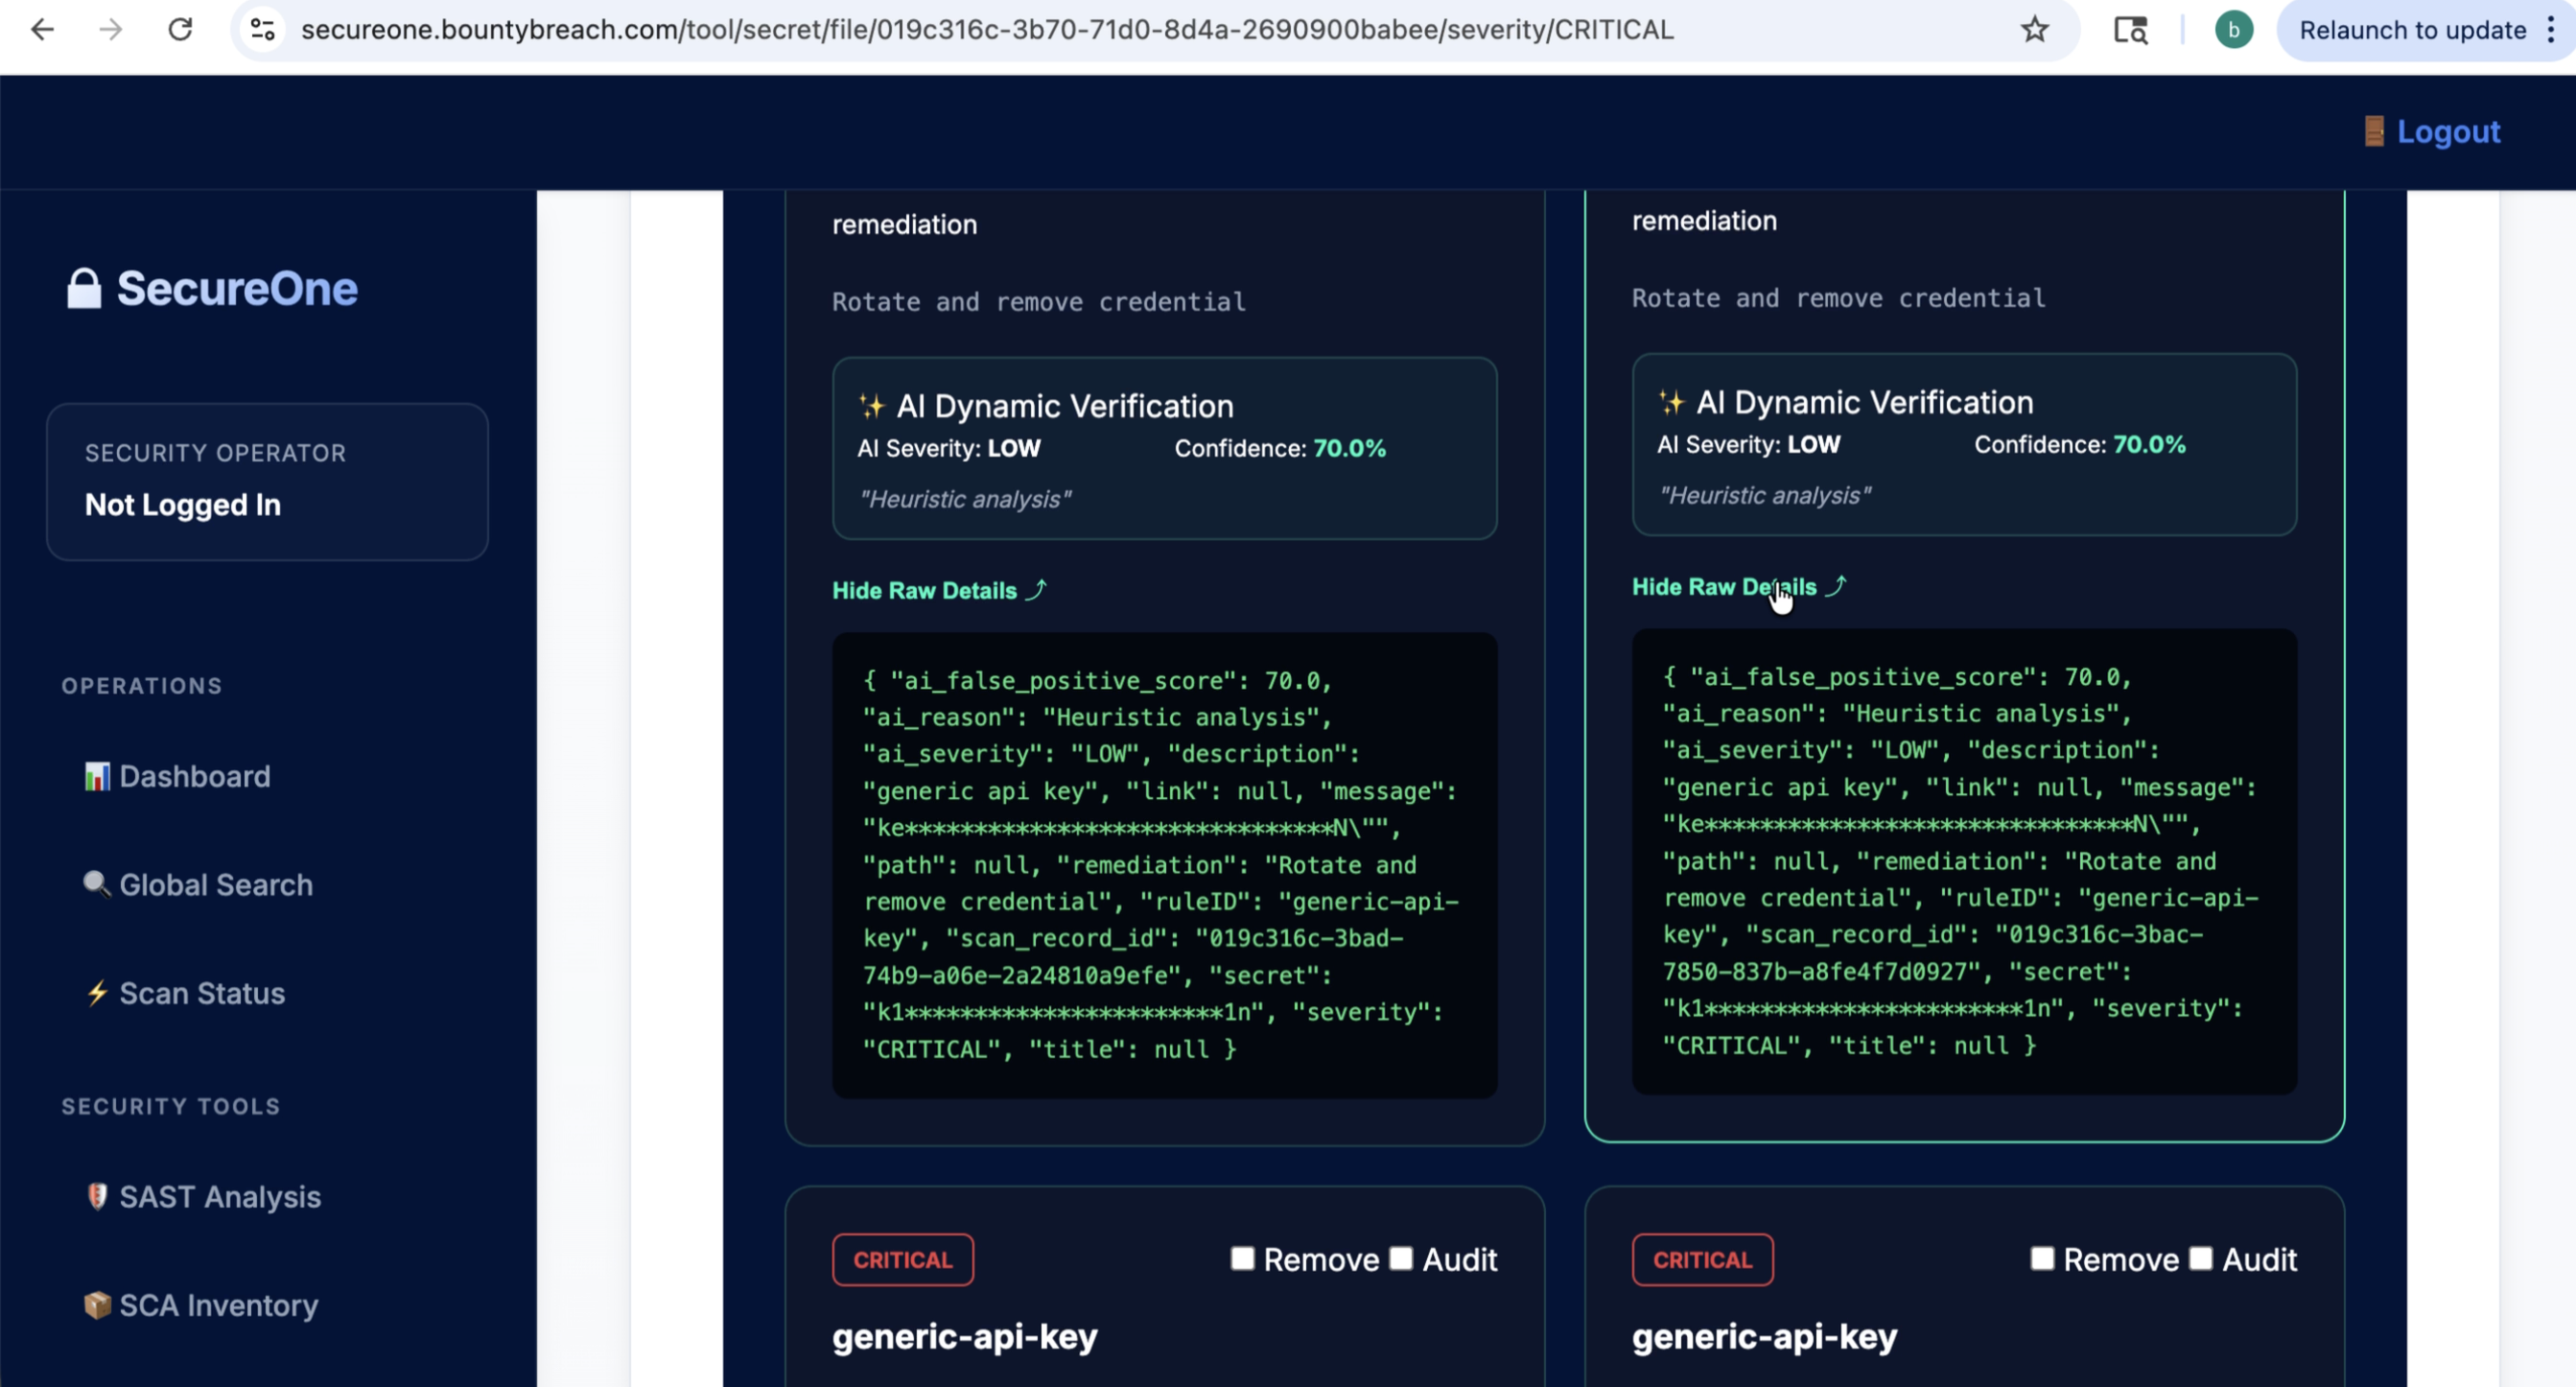
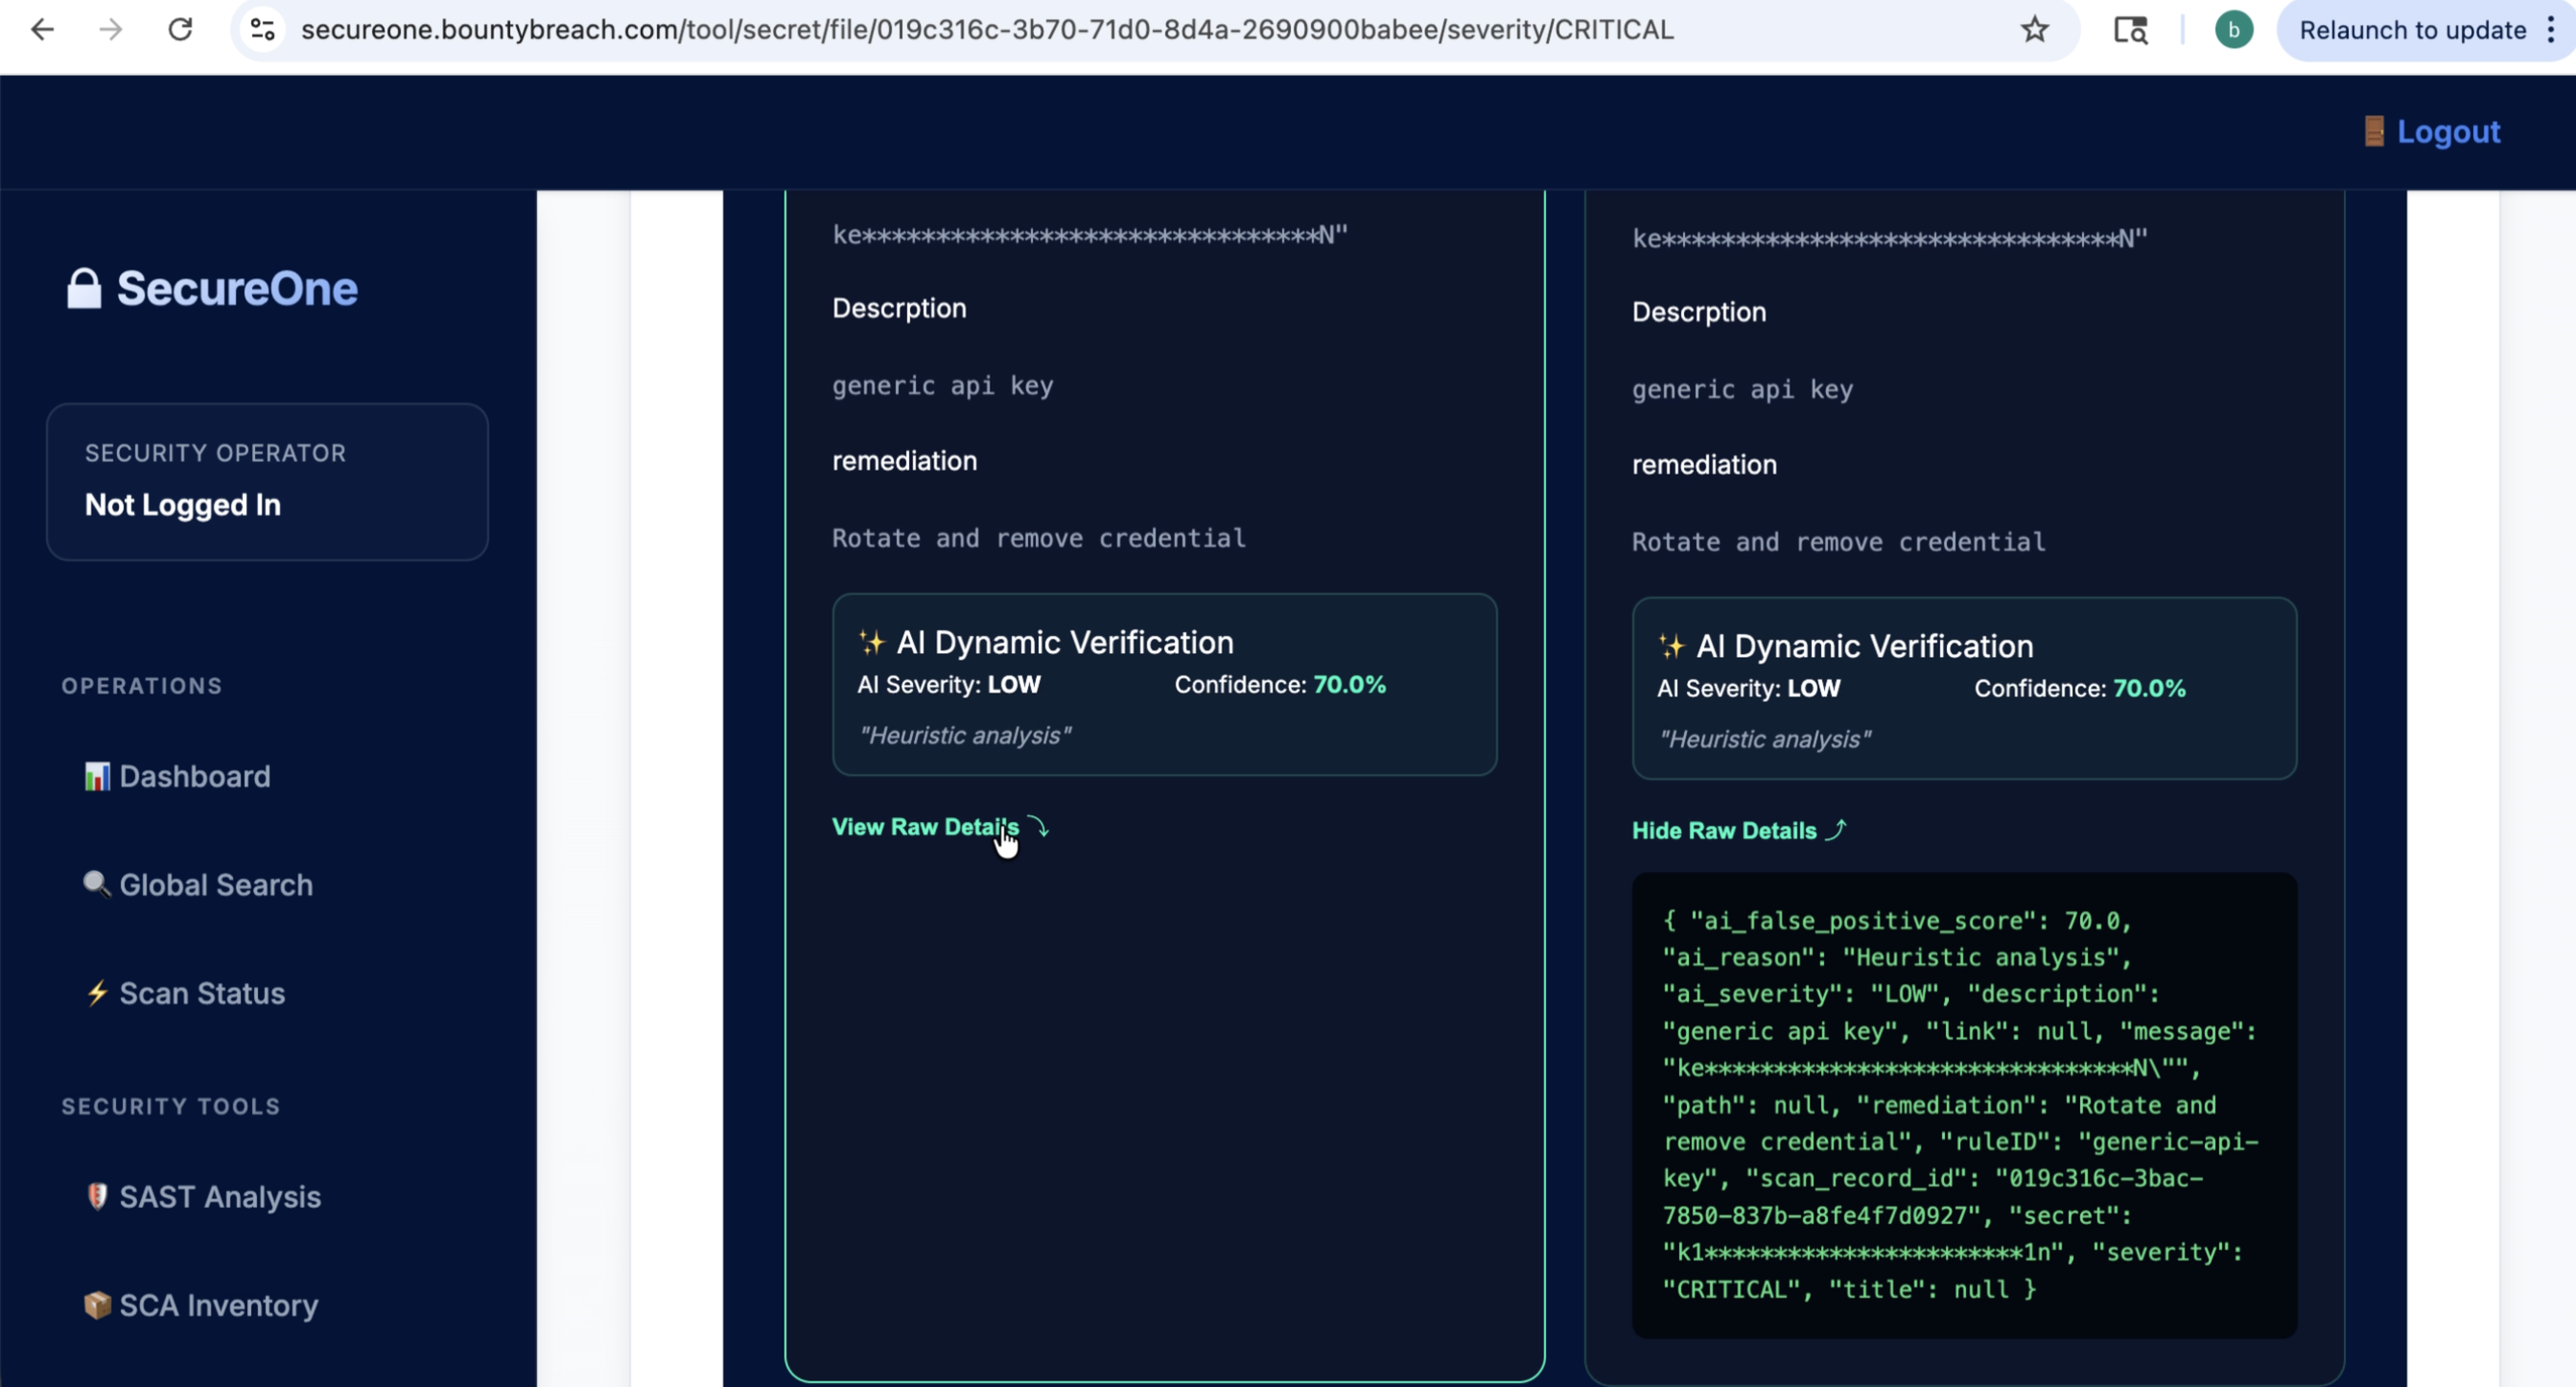
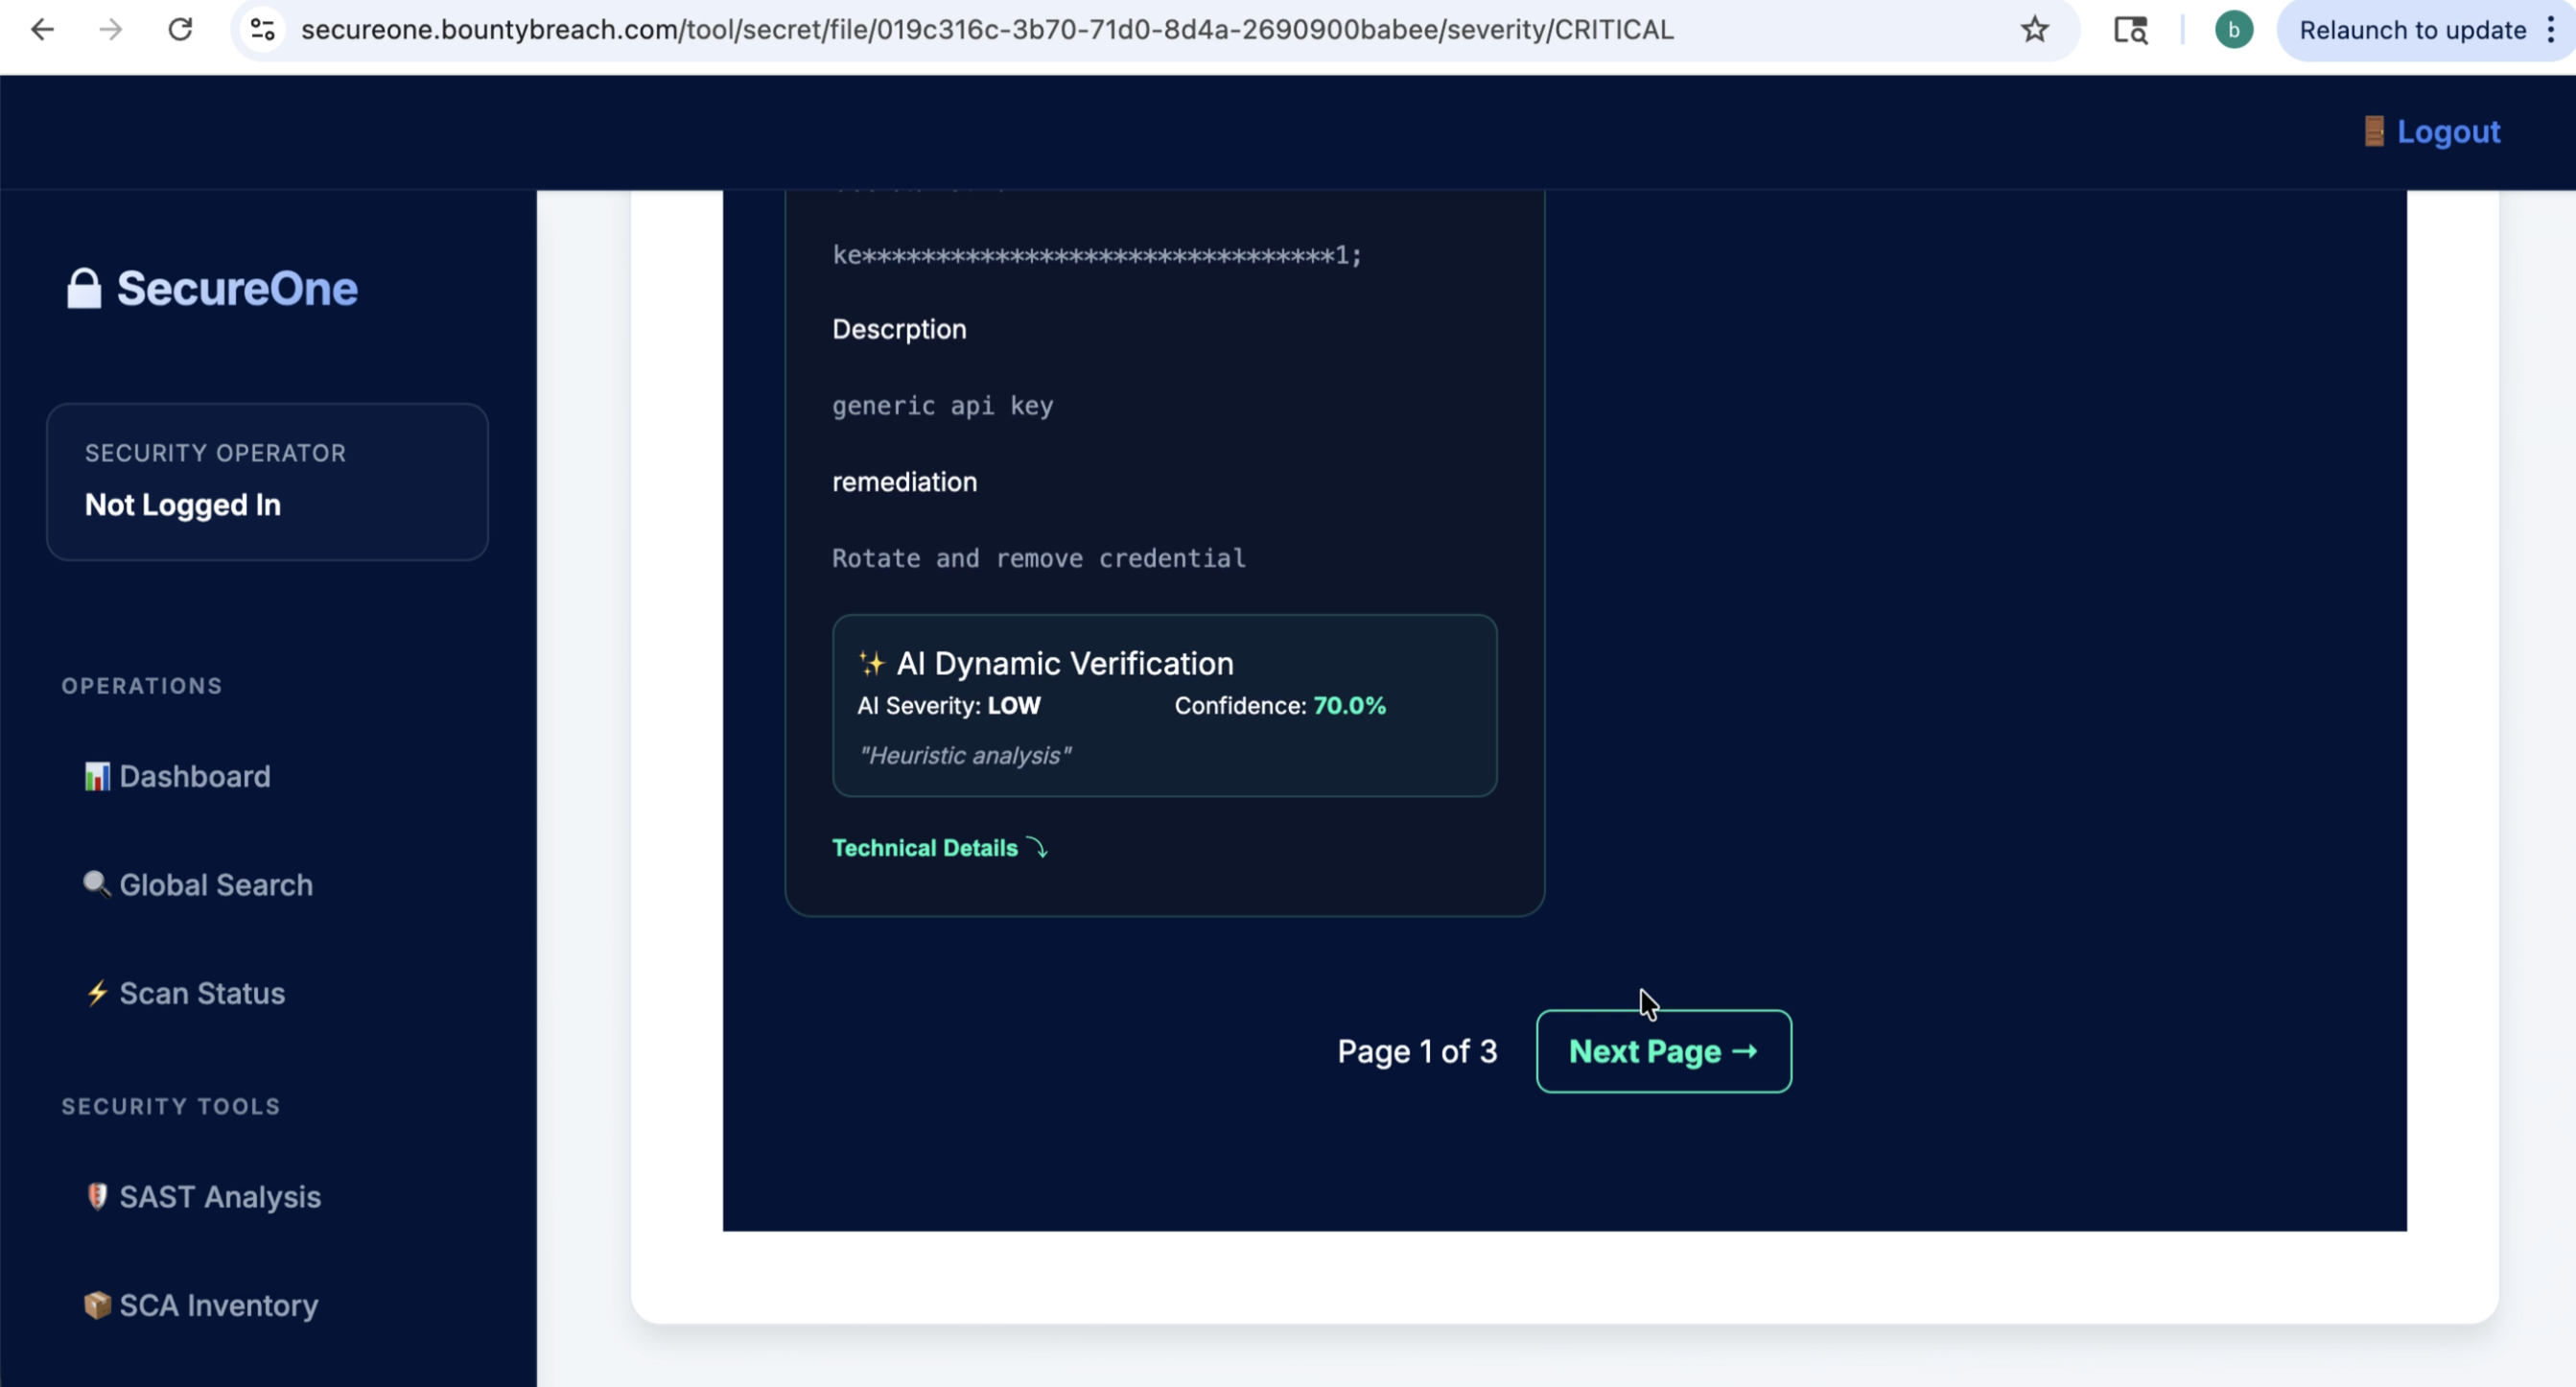
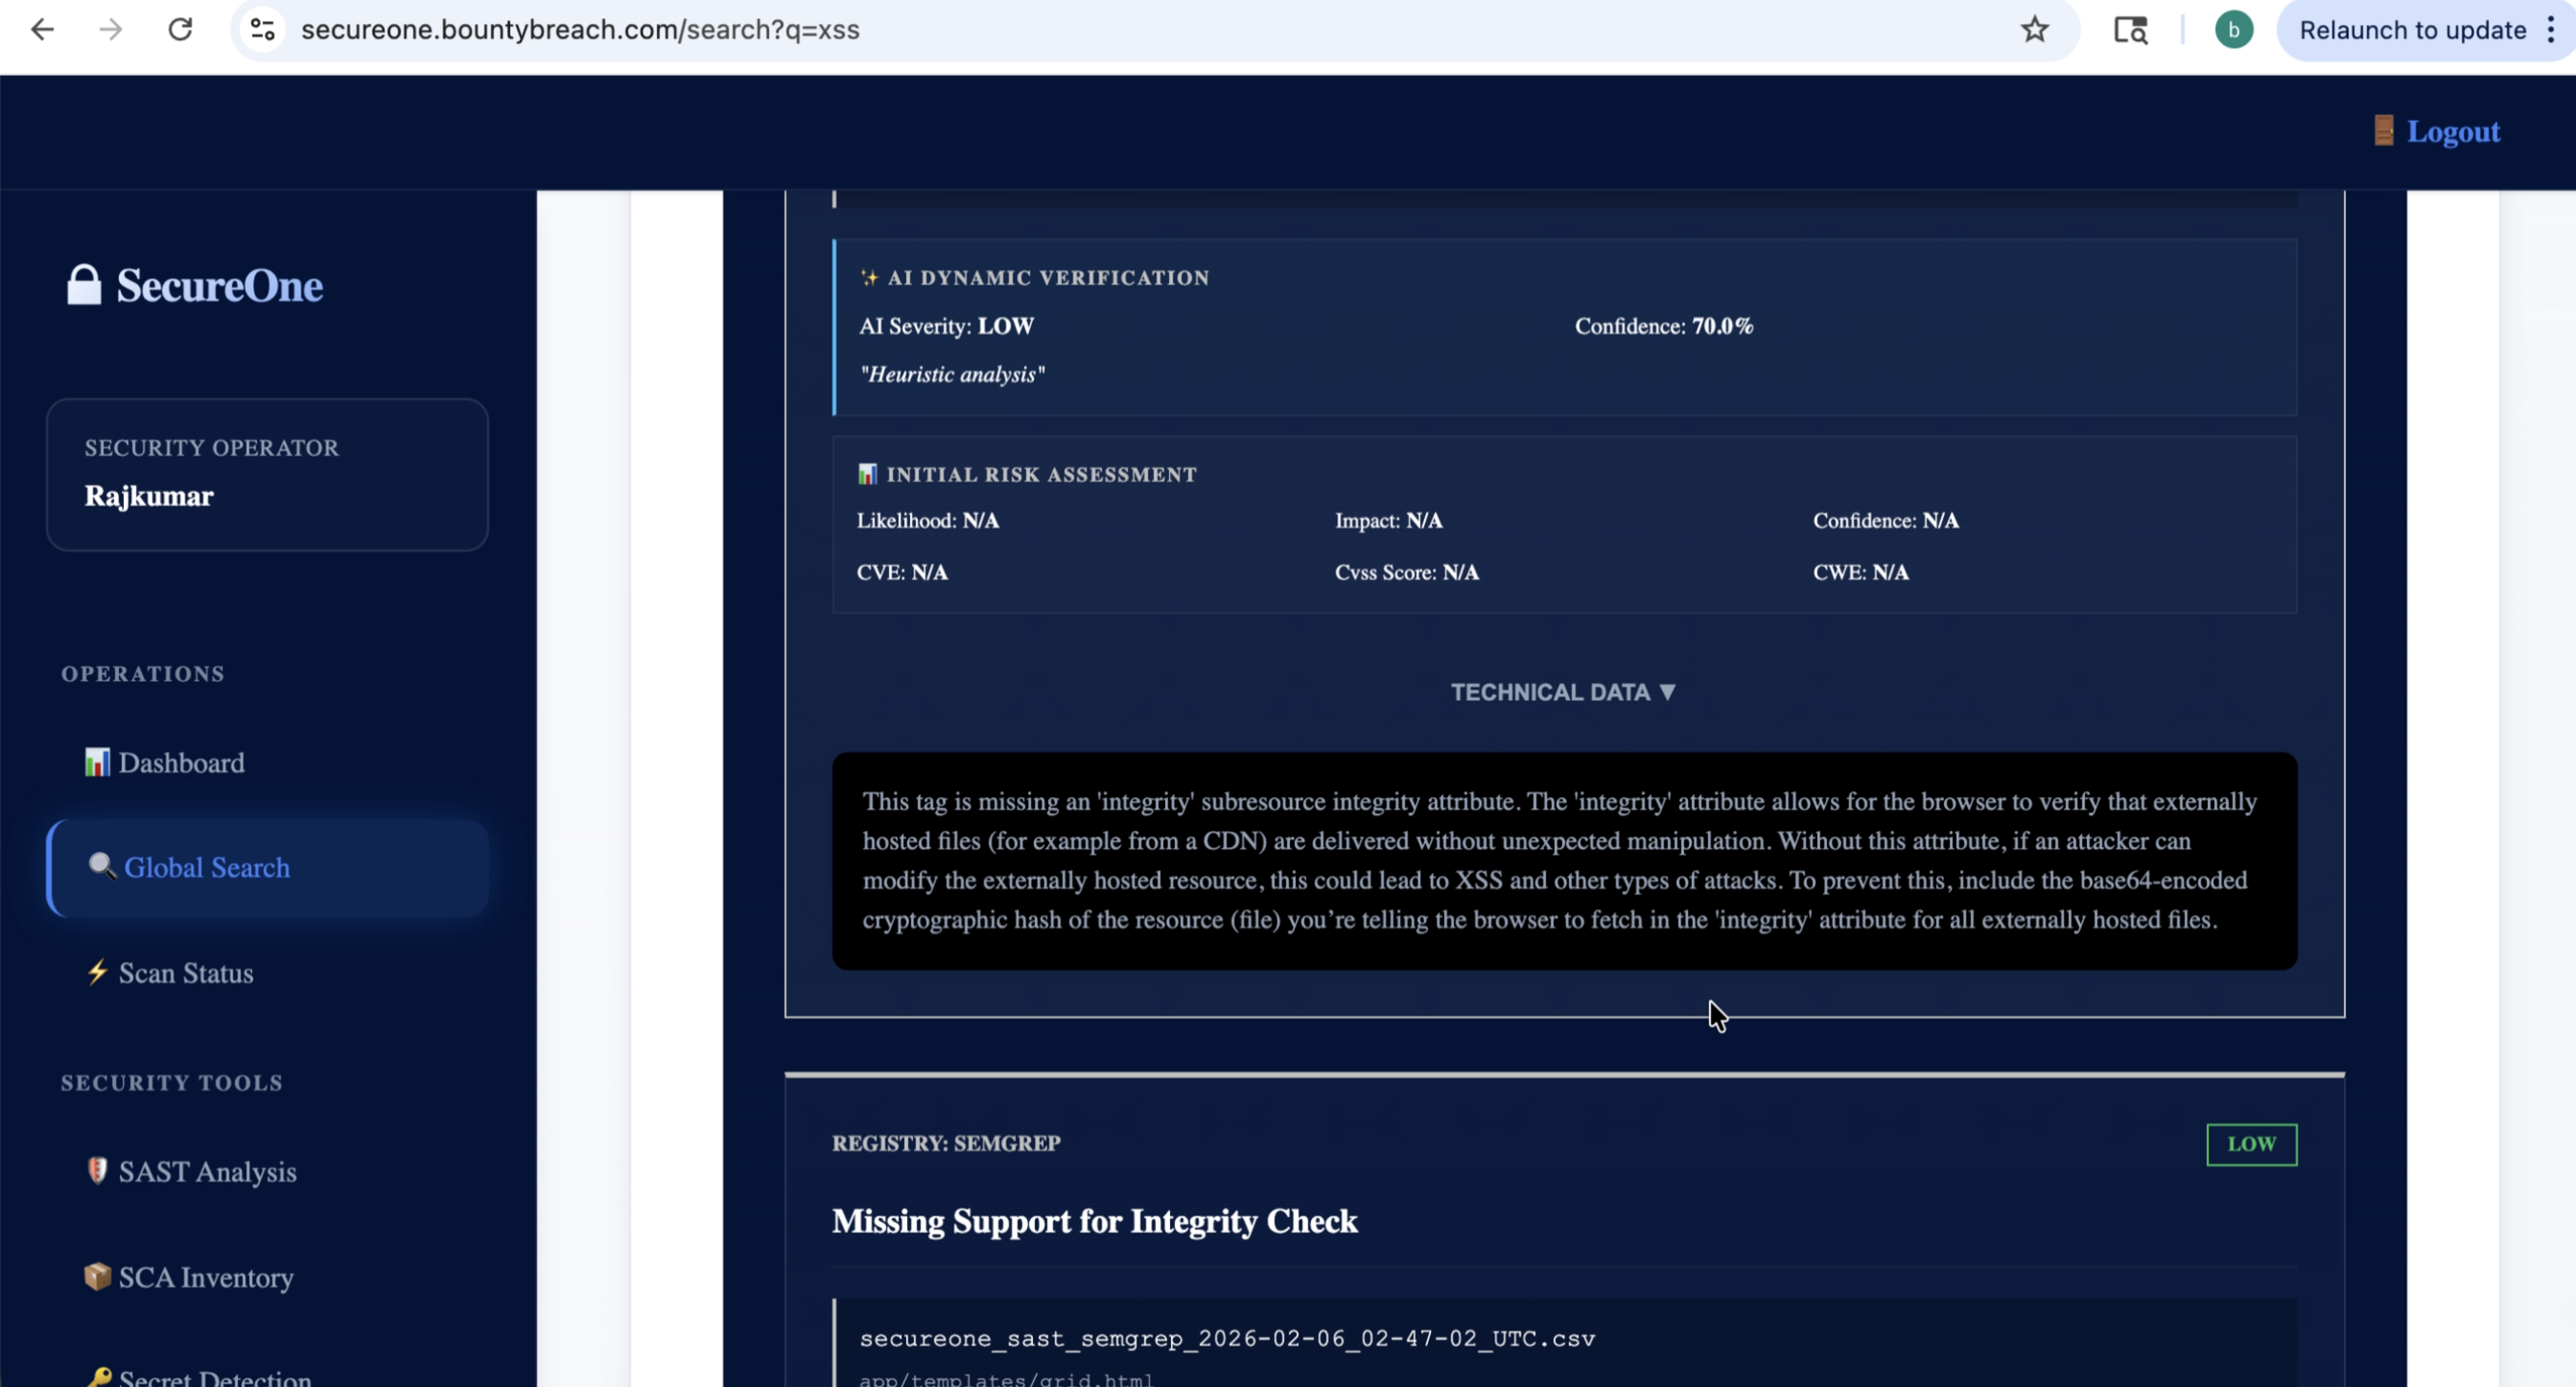
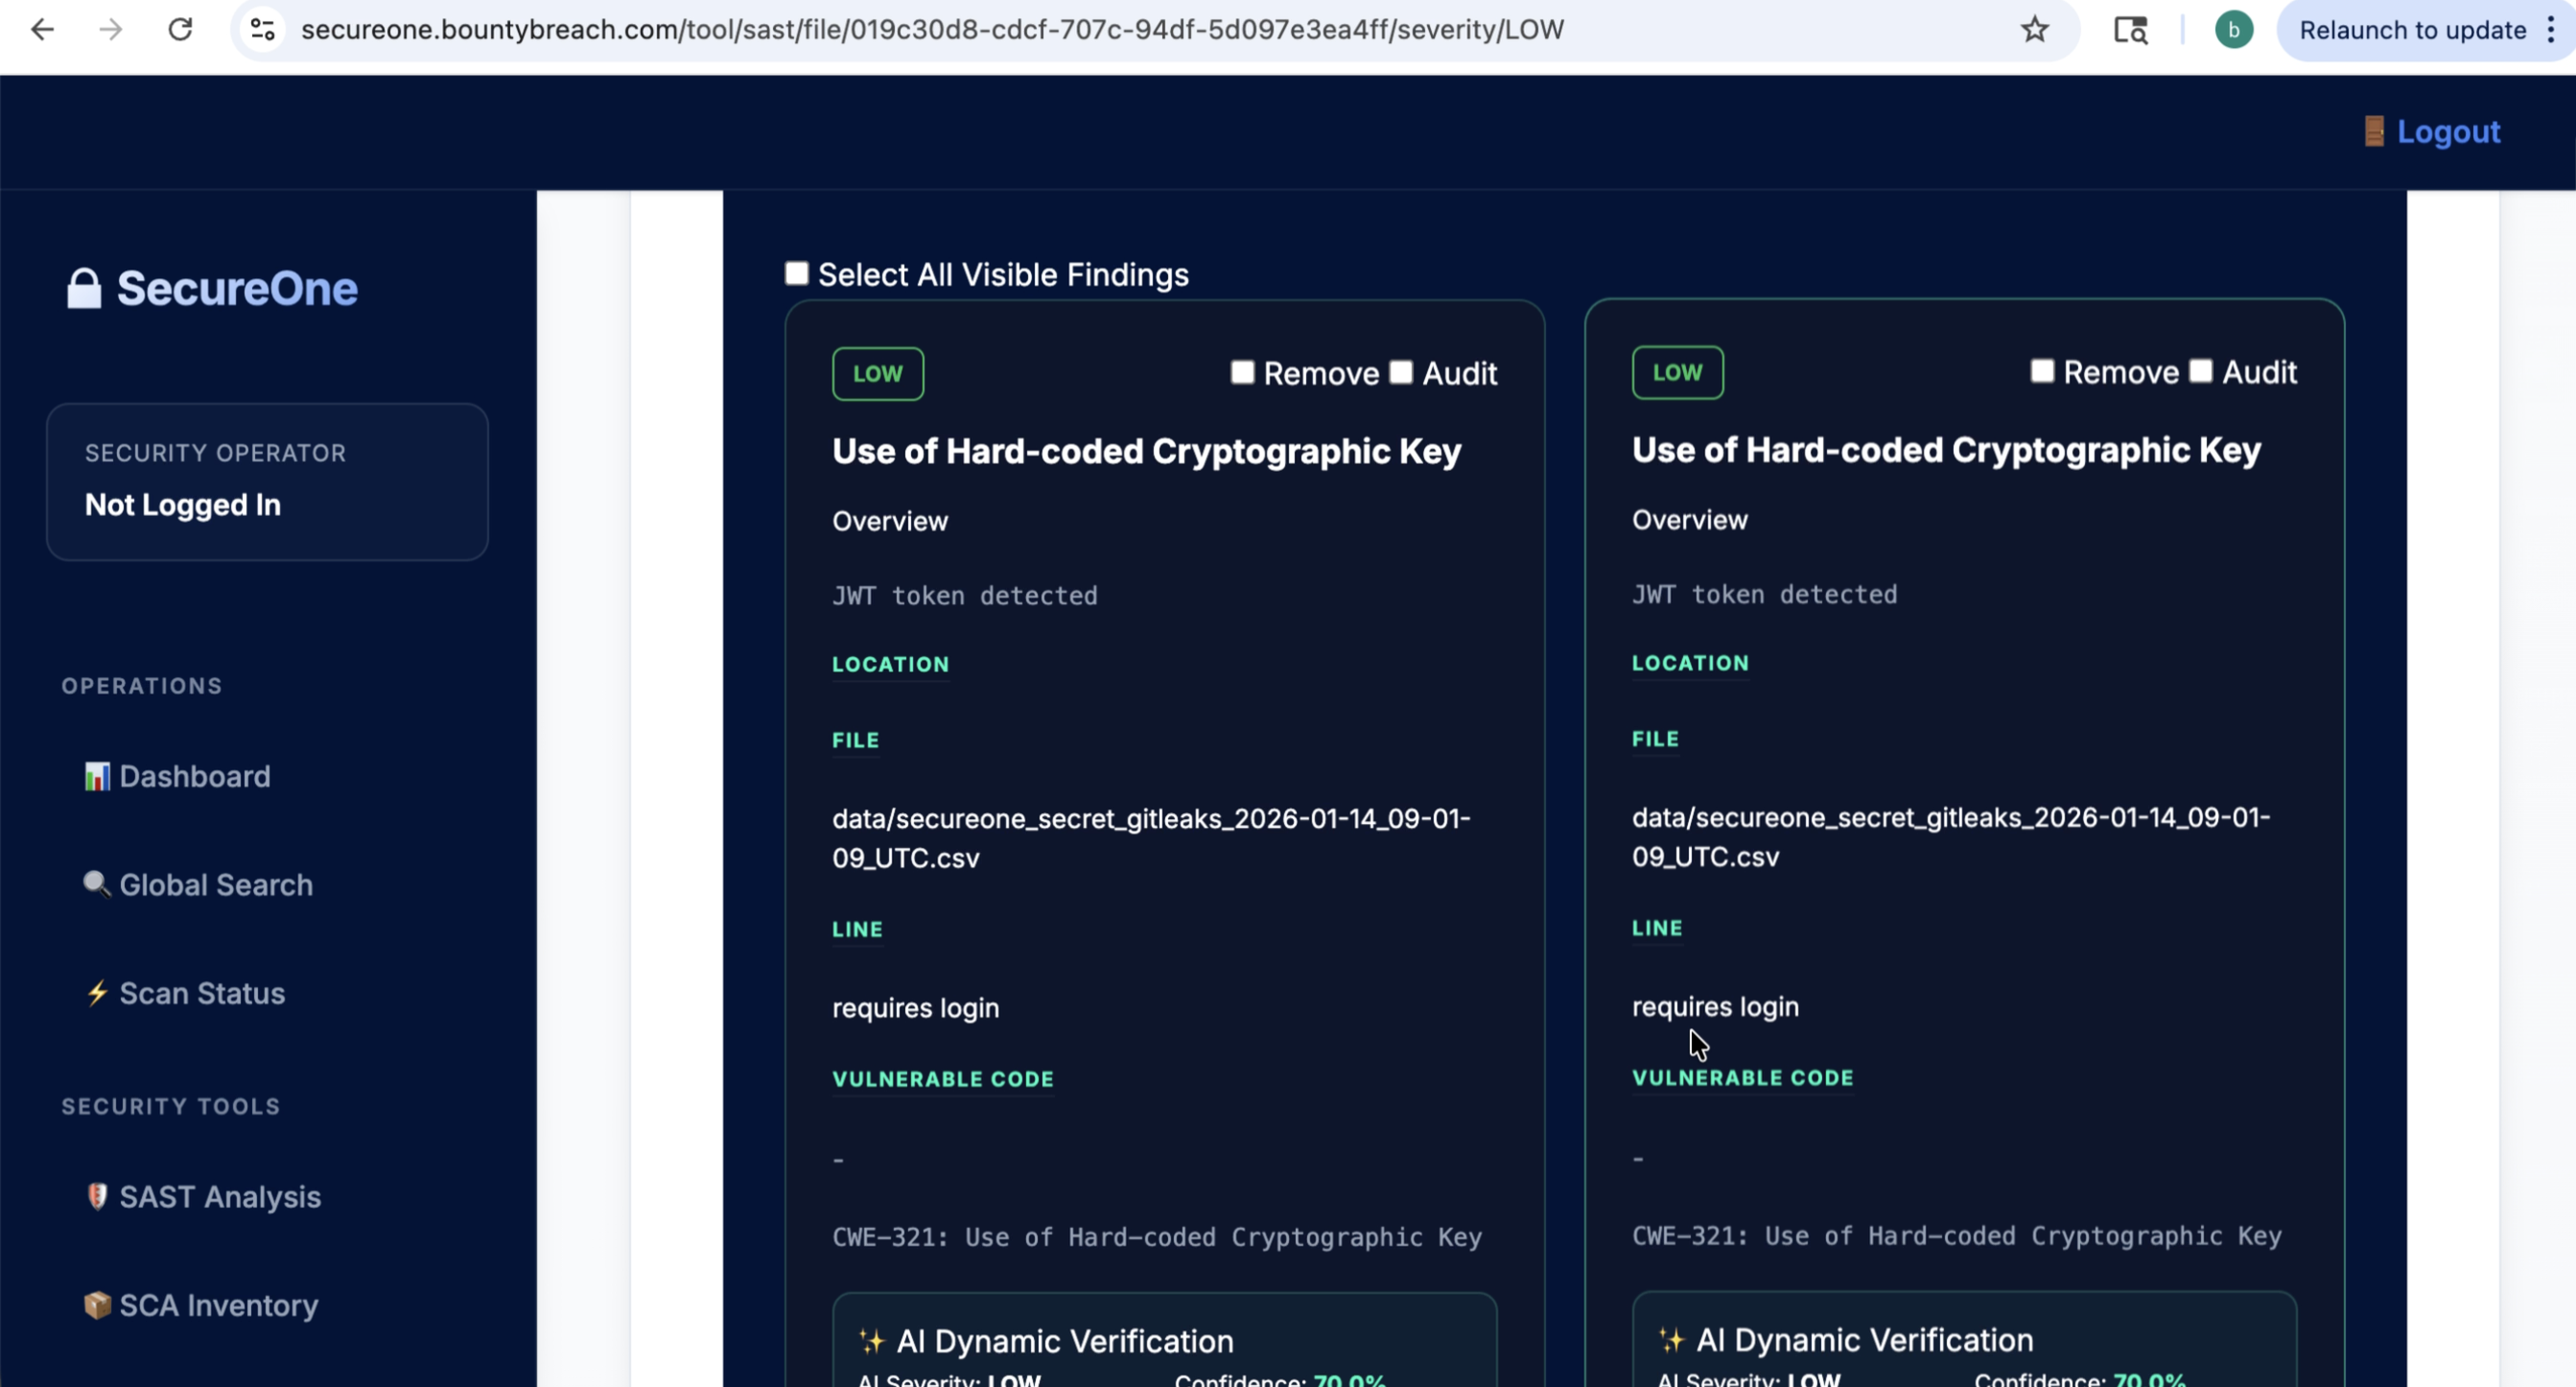
8) Review Findings
- Open scan results summary (critical/high/medium/low counts).
- Filter by severity, tool, file, and category.
- Open individual findings to inspect evidence and remediation guidance.
 Step 28 screenshot
 Step 29 screenshot
 Step 30 screenshot
 Step 31 screenshot
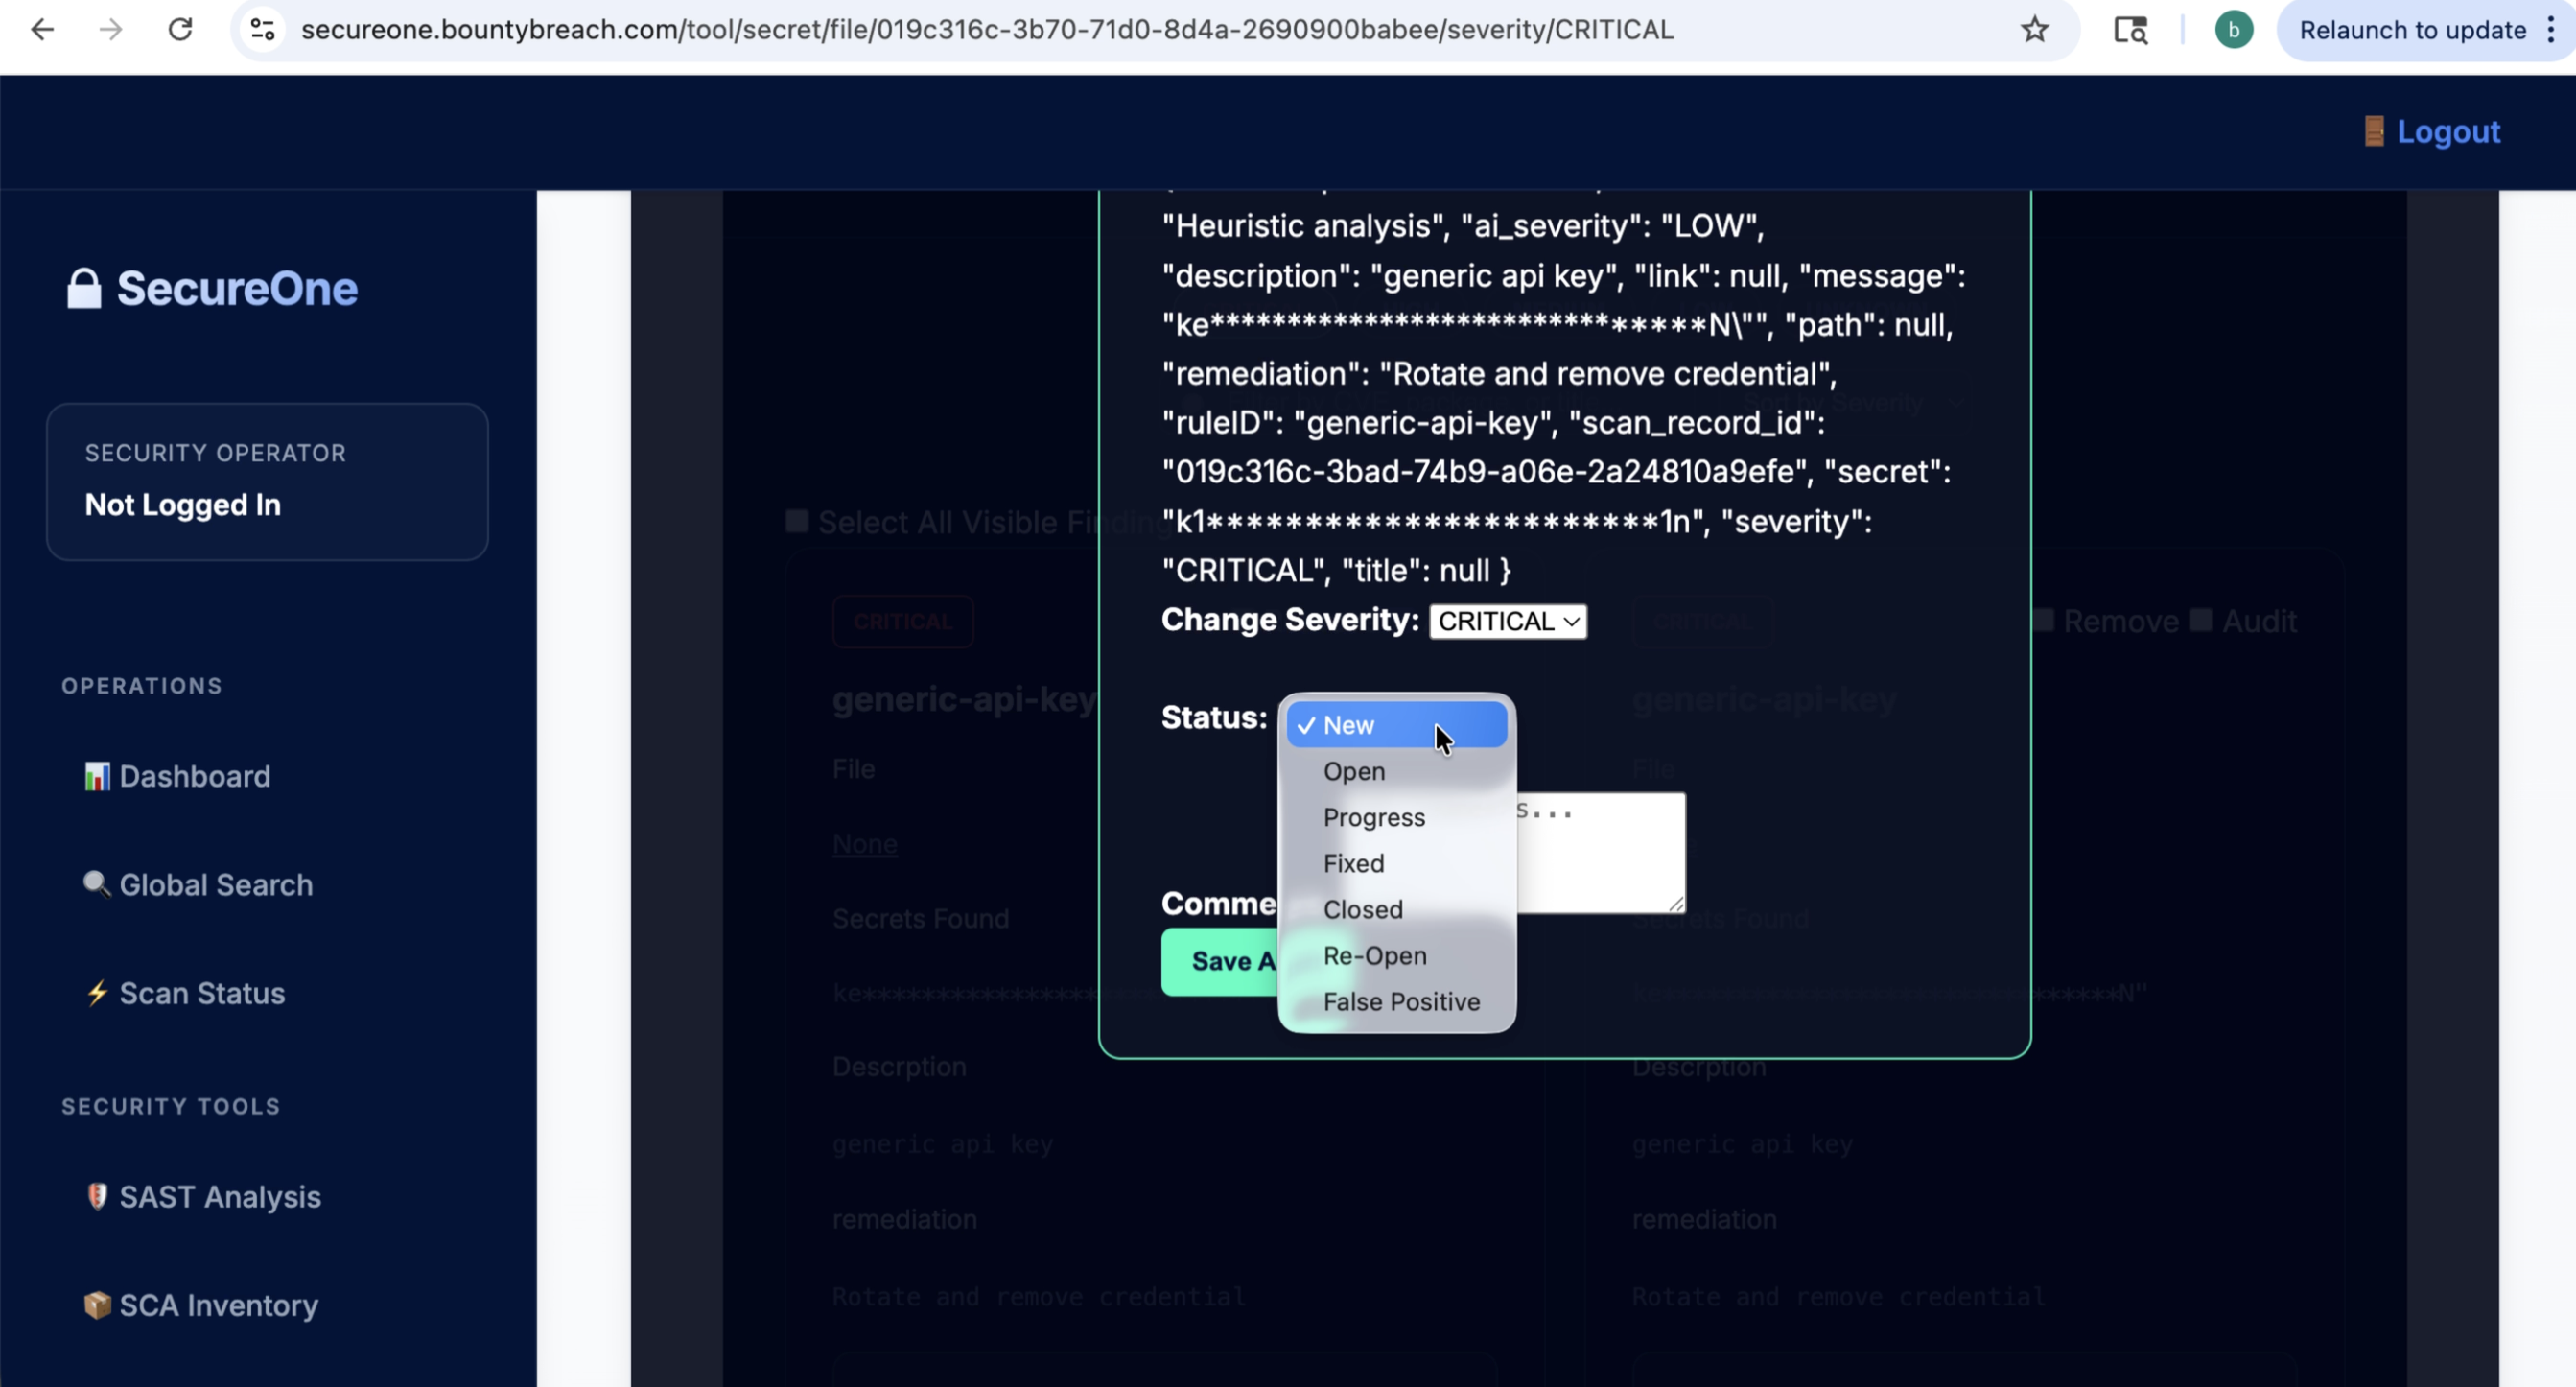
9) Triage & Actions
- Mark false positives where appropriate.
- Create tickets/tasks for true positives.
- Re-run scans after fixes and confirm issue closure.
- Enable policy gates in CI/CD to prevent regressions.
 Step 32 screenshot
 Step 33 screenshot
 Step 34 screenshot
10) Next Steps
- Add additional repositories and environments.
- Configure scheduled scans and notifications.
- Roll out role-based access for security and engineering teams.
- Track security posture trends in dashboard reports.
 Step 35 screenshot